

Evaluate an embroidery tools supplier by following the thread path rather than counting objects in a tray. A hoop, needle, threader, scissors and marker may look complete in a catalog, yet the maker experiences them as a sequence of pickups, grip changes, pauses and returns. Onehourcrafts uses that sequence to reveal whether the assortment, packaging and evidence support the work customers will actually perform.
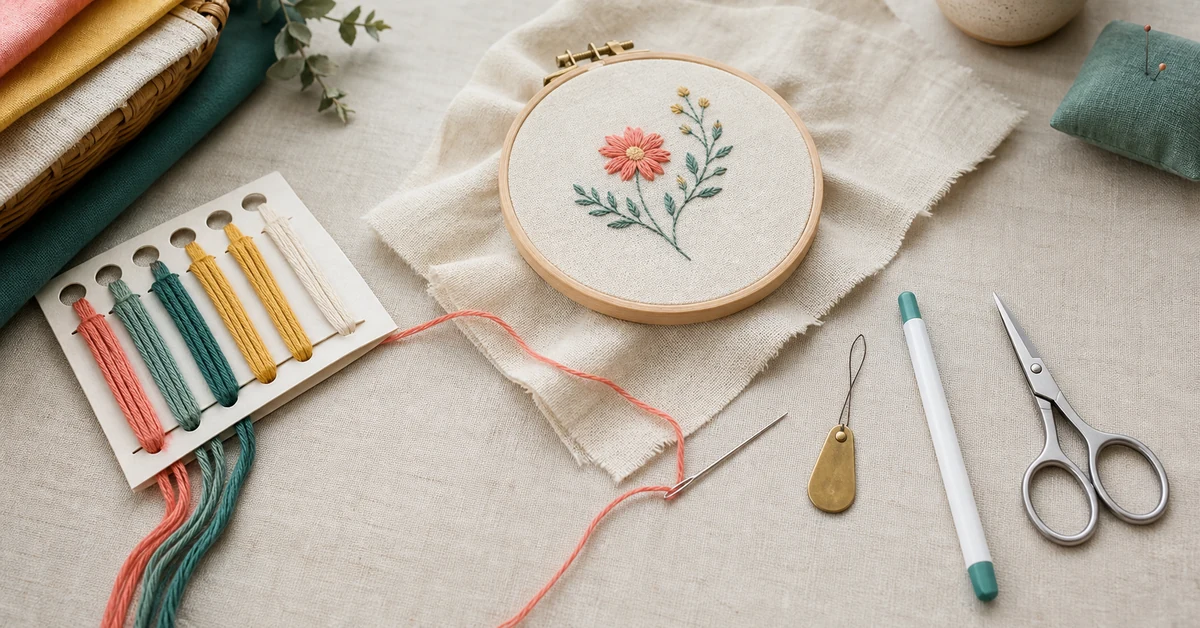
Start with a named project movement
Choose one compact embroidery project and write the physical movements it requires: open the hoop, mount fabric, separate thread, mark a point, stitch, trim and pause. Avoid beginning with a SKU list. The movement list becomes a neutral frame for comparing suppliers and makes missing transitions visible.
A sampler, repair patch and decorative hoop each stress different tools. State the intended audience and finished state so the sample does not quietly drift into an expert demonstration that a retail customer was never promised. A supplier comparison should also name the exact embroidery tools supplier configuration being reviewed.
- Open and mount
- Prepare and mark
- Stitch and pause
- Trim and return
Draw the path before reviewing the pack
Sketch the tool route on one sheet. Mark where each item enters the hand, where it rests, and where the next item must be found. Include thread cards, packaging folds and instruction pages because they can interrupt the path as surely as a missing needle.
The drawing is useful even when the supplier changes materials later. It preserves the job the assortment must do, while allowing handle shape, finish, color and pack format to be negotiated without losing the working sequence.
Separate tool role from tool count
Five needles do not automatically create five useful choices. Name the role of each size, point, eye, hoop or cutting edge and identify the step at which the maker should switch. If two tools perform the same role, decide whether that redundancy helps recovery or only adds cost and clutter.
| Role | Observed handoff | Evidence to request |
|---|---|---|
| Mounting | Hoop opens and closes without fabric drift | Opened sample and tension note |
| Thread control | Thread separates without losing identity | Thread card and instruction view |
| Stitching | Needle enters the stated fabric cleanly | Working sample with tool identity |
| Finishing | Trim is reachable and controlled | Final-state photo and tool return |
Watch the first pickup, not the hero shot
Ask a tester to open the production-intent pack and pick up the first tool without rearranging the contents. Record what is hidden, what slides, and whether the tool can be named from the pack alone. A polished flat lay cannot show this initial friction.
Repeat the pickup after the insert has been opened and partly used. Small changes in thread position or a folded instruction sheet can make a neat assortment feel confusing. Those changes belong in the approval conversation, not only in merchandising photography.
Let grip changes reveal the real workload
Embroidery moves between pinch, pencil, pull and snip grips. Have the tester complete a short sequence and describe when the hand changes position, when a handle catches, and when a tool must be put down. Note fatigue or hesitation without turning a short trial into a universal ergonomic claim.
A useful embroidery tool assortment balances the hand work with the visual promise. A beautiful handle that blocks a thread path may be a poor choice for a beginner, while a plain tool that stays identifiable may reduce support questions.
Make the hoop a working boundary
Test the actual hoop with the actual fabric and thread system. Check opening, tension adjustment, edge clearance, storage and the point at which the hoop is removed. The hoop should not become a decorative frame in the sample if customers are expected to stitch inside it.
For a hoop and needle set wholesale brief, record the hoop identity beside fabric size, stitch area and finishing boundary. A supplier can then quote comparable configurations instead of substituting a visually similar ring that changes the usable surface.
Keep needle identity visible after use
Use a shallow needle card, tube or holder through pickup, threading, stitching and pause. Confirm that the tester can return the needle to the right position and distinguish sizes after several threads have been cut. This is a small operational detail with a large effect on beginner confidence.
The holder should be evaluated with production-intent inserts and instructions. If a substitute container is used during sampling, mark it as a temporary fixture so it does not become an accidental promise about the released pack.
Follow thread from card to fabric
Start with the sealed thread presentation and end at the stitched surface. Record color identity, strand separation, waste, loose tails and the place where cut thread is parked. The path should survive a short interruption without forcing the maker to rebuild the color decision from memory.
Do not imply a fixed leftover amount for every maker. Tension, stitch density and repair choices change consumption. Instead, agree a project-specific reference and state the expected decision boundary in the instruction and quotation.
Put marking tools through a quiet test
Mark a point, erase or cover it as intended, and then store the marker while the hoop remains loaded. Observe whether the cap, tip and instruction language stay synchronized. A marker that works on one fabric but not the approved fabric is a configuration issue, not a generic stationery detail.
Keep the test modest and evidence-led. The aim is to compare the released materials and to expose a hidden customer-supplied item, not to make a broad performance or washability promise without destination-specific review.
Pause with an unfinished stitch
Stop midway through the project, leave the thread attached and clear the work surface. Reopen the pack later and ask the tester to identify the next action, the active thread and the correct needle. Photograph the paused state before and after storage.
This pause reveals whether the assortment supports real homes, classrooms and shop-floor demonstrations. If storage is not included, say so. A declared household boundary is more useful than a vague suggestion that everything returns to the original tray.
Compare retail evidence with working evidence
An opened sample should show the same hoop, tools, thread and instructions described on the unit. The GS1 barcode standards overview can frame identity questions while leaving implementation to the buyer and market.
For retail embroidery tools, place a small tool-role panel beside the sealed pack. Customers need to see what changes in the hand, what remains their choice and which items are included, without relying on an unverified superlative. Add the 30-second shelf-clock guide when the same assortment must work online and in store.
Use a failure shelf, not a failure story
Keep a small evidence tray with a tangled thread, a bent needle, a loose hoop screw and a mislaid marker. Ask the supplier how the released assortment and instructions address each ordinary interruption. This is not a request for every possible error; it is a way to see whether recovery has been considered.
A failure tray also helps customer support. The team can distinguish a missing component from a use question and route the response to the right owner. Retain the approved examples so the same language survives staff changes and future revisions.
Write the RFQ around the sequence
State project, fabric, hoop, needle roles, thread identity, marking, trimming, pause, packaging, quantity scenarios and evidence. The ISO quality management principles can support process questions without certifying the assortment.
Use the retail embroidery shelf-clock guide and the buying-guide library to connect tool decisions to the wider sampling file. Ask for a working sequence, not only a component photograph.
- Freeze the project movement
- Map each tool handoff
- Test the opened and paused states
- Record identity and recovery evidence
- Approve the released path
Make the tool path survive a second user
Give the opened sample to a reviewer who did not watch the first test. Ask that person to locate the needle, thread, hoop adjustment and finishing tool, then resume the project from the paused state. This handoff tests whether the evidence is understandable after the sourcing meeting ends.
If the second user depends on the original tester’s memory, revise the insert, role labels or storage boundary. The point is not to eliminate every question. It is to make the predictable questions visible and answerable from the released configuration.
How Onehourcrafts closes the thread path
Onehourcrafts can align project movement, tool roles, hand comfort observations, thread identity, pause evidence and retail presentation in one release record. The assortment becomes a working route that buyers can compare across samples and variants.
Before approving an embroidery tools supplier, ask for one production-intent path from sealed pack to unfinished pause and final trim. Keep the path, the evidence tray and the role map with the quotation so a future revision can show exactly what changed.
- Working movement map
- Tool-role evidence
- Paused-project photo
- Released pack reference
Frequently asked questions
What should an embroidery tool assortment prove?
It should prove that the named tools support the intended project movement, remain identifiable, and have a clear boundary for any customer-supplied items.
Why follow a thread path?
A sequence exposes hidden handoffs, storage friction and role duplication that a static component list or hero image can hide.
How should hoop choices be compared?
Compare opening, tension, fabric size, stitch area, hand access, storage and finishing context in the actual project configuration.
Do more needles always create more value?
No. Each needle should have a named role or recovery purpose. Unexplained duplicates add clutter without improving the making path.
What belongs in a paused-state sample?
Show the attached thread, active needle, loaded hoop, instruction position, loose components and the storage method used during interruption.
Should markers be tested on every fabric?
Test the marker with the approved fabric and instructions. Avoid broad claims about removal or washability without configuration-specific evidence.
How can a pack reduce tool confusion?
Use clear role cues, stable storage, matching identity and an opened reference that shows where each tool returns after use.
What is a failure tray?
It is a small set of ordinary interruption examples used to discuss recovery, support routing and evidence without pretending to cover every possible error.
When should a supplier provide an opened sample?
Before approval, when the buyer needs to compare the sealed promise with the real tool path, materials and instruction revision.
What belongs in an embroidery tool RFQ?
Include project, fabric, tool roles, pack boundary, quantities, variants, evidence, inspection points, support expectations and destination assumptions.





