

Review a latch hook rug kit manufacturer by walking the pile into the room where the finished piece is meant to live. A close crop can make any yarn look rich, while the maker must manage canvas tension, cut lengths, row direction, edge treatment and a final surface that reads from standing distance. Onehourcrafts connects those stages so buyers can compare the kit promise with the finished object.
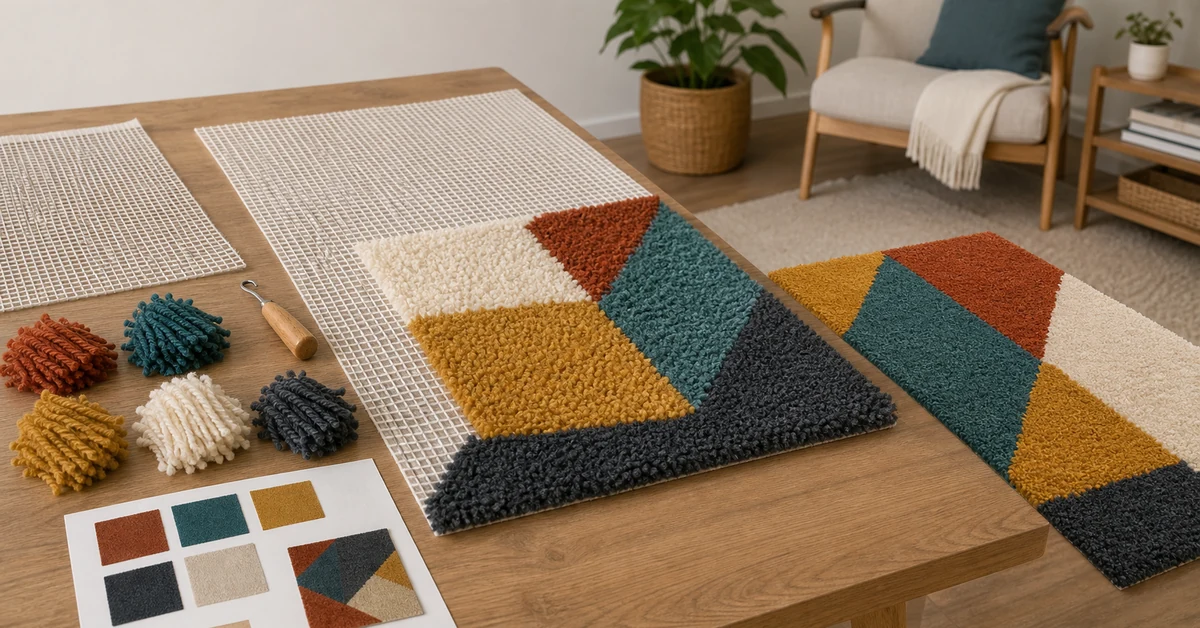
Name the room and the viewing distance
Choose the intended placement before sampling: wall, chair, floor-adjacent accent or tabletop. Record the viewing distance, lighting and whether the customer sees the front, edge or reverse during normal use. This keeps the sample tied to a commercial use rather than an abstract craft image. Name the exact latch hook rug kit manufacturer configuration beside the room note.
Different placements change which evidence matters. A floor-adjacent piece may need a declared backing and edge route; a wall piece may prioritize hanging and reverse appearance. Do not let one styled photograph imply every use.
- Name the room
- Set the viewing distance
- Mark the visible edge
- Freeze the display boundary
Mark the canvas as a working map
Use the production-intent canvas and chart to mark rows, color blocks and the direction in which the hook enters. Check that the printed grid remains legible after handling, folding and partial completion. A grid is both an instruction surface and a navigation aid.
For a latch hook rug kit wholesale brief, retain an untouched canvas, a half-worked canvas and a final reference. Those states show where distortion begins and whether the chart still answers the maker’s next question.
Measure cut lengths at the actual tool
Cut a small reference set using the supplied or specified tool. Compare length, fray, storage and color identity. The goal is not to promise one universal fringe length; it is to establish the range and process that the approved design needs. Keep the latch hook pile consistency note beside the sample so the visual conversation has a named reference.
| Stage | What can drift | Buyer record |
|---|---|---|
| Cutting | Length or fray | Reference bundle and tool |
| Looping | Tension or pull-through | Half-row image |
| Pile | Direction or density | Front and side view |
| Finishing | Edge or backing | Complete object reference |
Let a beginner find the next square
Ask a tester to complete a short block without verbal coaching. Watch whether the chart, color bundles and partially covered canvas point to the next square. Capture questions rather than correcting them immediately; the question shows where the system asks for invisible expertise.
A clear beginner route does not mean every customer works at the same pace. It means the supplier and buyer can describe the cues that support a restart after interruption, color change or a small counting error.
Use rotation to reveal pile direction
Turn the partly worked canvas ninety degrees and inspect the pile under the same light. Some yarns hide direction changes when viewed head-on. Record whether the finished surface has a clear nap, a patchy sheen or a visible transition between blocks.
Pile orientation is a product-specific visual characteristic, not a universal quality grade. Agree the acceptable appearance with a physical reference and keep the reference attached to the released artwork and instruction revision.
Check density without flattening the story
Compare open, medium and concentrated sections of the design. Note canvas show-through, pull tension, loop height and whether the color balance changes when the piece is viewed from across the room. A dense area can be intentional; the buyer needs to know where it is intentional.
Use a simple observation grid instead of a single score. This makes it easier to discuss a design change, yarn substitution or chart revision without turning a visual preference into an unsupported performance promise.
Give the hook a safe resting place
Pause after several rows and ask the tester to set down the hook, loose yarn and cut bundles. Check whether the tool is visible, whether yarn can be separated again and whether the canvas edge remains protected. A rug project occupies more table area than a small kit.
If the pack does not include storage, state the household assumption. A larger project can be complete as a craft experience while still requiring a declared basket, tray or work surface supplied by the maker.
Walk the edge before the center is done
Inspect the canvas margin early, halfway through and after the final loop. Record whether the approved design leaves enough workable allowance for the chosen edge or backing route. An attractive center cannot rescue a margin that disappears during finishing.
The edge route should be named in the quotation, instructions and product photography. If the buyer expects a bound edge, hanging sleeve or another treatment, sample it with the same materials rather than adding a studio-only solution later.
Compare backing options as customer work
Lay out the possible reverse treatments and describe what the maker actually does after the last loop. Review materials, order, appearance and added tools. A backing can clean the profile, but it should not hide unresolved canvas movement or loose yarn.
Use the rug kit backing options list to define a decision boundary, not to imply that every option suits every destination. Keep the chosen route tied to the released size, edge and display method.
Bring the unfinished sample to the shelf
Place an unfinished and finished reference beside the sealed pack. The replenishment-clock guide offers a useful reminder that visible progress must survive repeated store handling without masking the work remaining.
A shelf sample should make the project boundary honest. Show grid, yarn bundle, tool, expected surface and finishing statement without implying that framing, backing or installation is included unless it is in the released pack.
Use a room path for returns
Ask a reviewer to move the completed sample from table to its declared display position, then return it to storage. Record snag points, loose pile, edge handling and the instructions or packaging needed to protect the surface. This small route often reveals assumptions that a workbench never exposes.
Returns evidence is not a universal durability test. It is a way to learn which handling moments the buyer should explain, inspect or prevent through packaging and display guidance.
Tie color bundles to the released identity
The GS1 barcode standards overview can frame questions about color, chart and unit identity. Keep implementation product- and market-specific, and make mixed revisions visible during changeover.
When yarn, chart or backing changes, update the sample, insert, color card and support language together. A correct code cannot repair a shelf sample that belongs to an older pile recipe.
Write the RFQ as a finished-room brief
Share room, viewing distance, canvas, grid, cut length, pile direction, density, edge, backing, packaging, quantity scenarios and evidence. The ISO quality management principles can frame process questions without approving the rug.
Connect the brief to the buying-guide library and request a production-intent unfinished and finished pair. Make the room path part of acceptance, not a post-launch styling exercise.
- Freeze the intended placement
- Map the canvas route
- Reference pile and edge states
- Review backing as customer work
- Release the matched pack
How Onehourcrafts closes the room path
Onehourcrafts can align canvas map, cut reference, pile direction, edge route, backing decision, shelf evidence and handling notes in one approval file. The finished rug is treated as a sequence of states that a buyer can inspect and explain.
Before approving a latch hook rug kit manufacturer, ask the supplier to walk one released sample from chart to room and back to storage. Keep the unfinished pair and the final placement reference with the RFQ so design ambition stays connected to practical work. The last-row pull-test guide adds a related production checkpoint.
- Canvas and chart pair
- Cut-length reference
- Edge and backing sample
- Declared room placement
Frequently asked questions
Why choose the room before the rug sample?
Placement determines viewing distance, edge handling, backing, display and the evidence needed for a truthful product promise.
What should a canvas map include?
Record grid, rows, color blocks, margins, entry direction and the states that help a maker restart after a pause.
How should cut length be approved?
Use a physical reference made with the intended tool and yarn, then define acceptable process variation for the specific design.
Is pile direction always a problem?
No. Direction can be part of the visual design. Buyers should define the intended appearance and inspect transitions with a physical sample.
What belongs in a density review?
Compare canvas show-through, loop height, tension and visual balance across open and concentrated design areas.
Does every rug kit need backing?
The need depends on placement, materials, edge route and customer promise. State the chosen boundary and any added work clearly.
How can unfinished samples help sales?
They show the work remaining, tool system and progress path so shoppers do not confuse a finished studio piece with the unit contents.
What should a return-path review observe?
Look at movement from table to display and back, including snags, loose pile, edge contact, storage and packaging protection.
When should color identity be checked?
Check it at sealed pack, opened bundle, chart, active work and shelf sample stages, especially during any revision changeover.
What belongs in a rug-kit inquiry?
Include room use, size, canvas, chart, yarn, cut reference, pile, edge, backing, pack, quantities, samples and inspection evidence.





