

Packaging problems often begin before artwork. The kit contents are still changing, the instruction has no confirmed page count, small tools have no fixed position and the buyer has not decided whether the pack must hang, stack, ship alone or fit a subscription box.
To compare OEM crochet kit packaging options, build the package from the product outward. Solve containment first, then learning support, protection, brand communication, required information and logistics. The visible format should be the result of those decisions, not the starting point.
This approach is useful for beginner crochet kits, character kits, tool sets, gift projects, workshop packs and private-label ranges sold through stores or eCommerce.
Layer 1: Contain every component
List the contents and identify what can tangle, puncture, leak, scratch, shift or disappear. Yarn, hooks, needles, stitch markers, eyes, filling, clips and printed instructions behave differently inside a package.
Choose an internal organization method:
- Paper bands or yarn wraps that keep colors identifiable.
- Small labeled bags for accessories and safety eyes.
- Blister, tray or paper insert positions for tools.
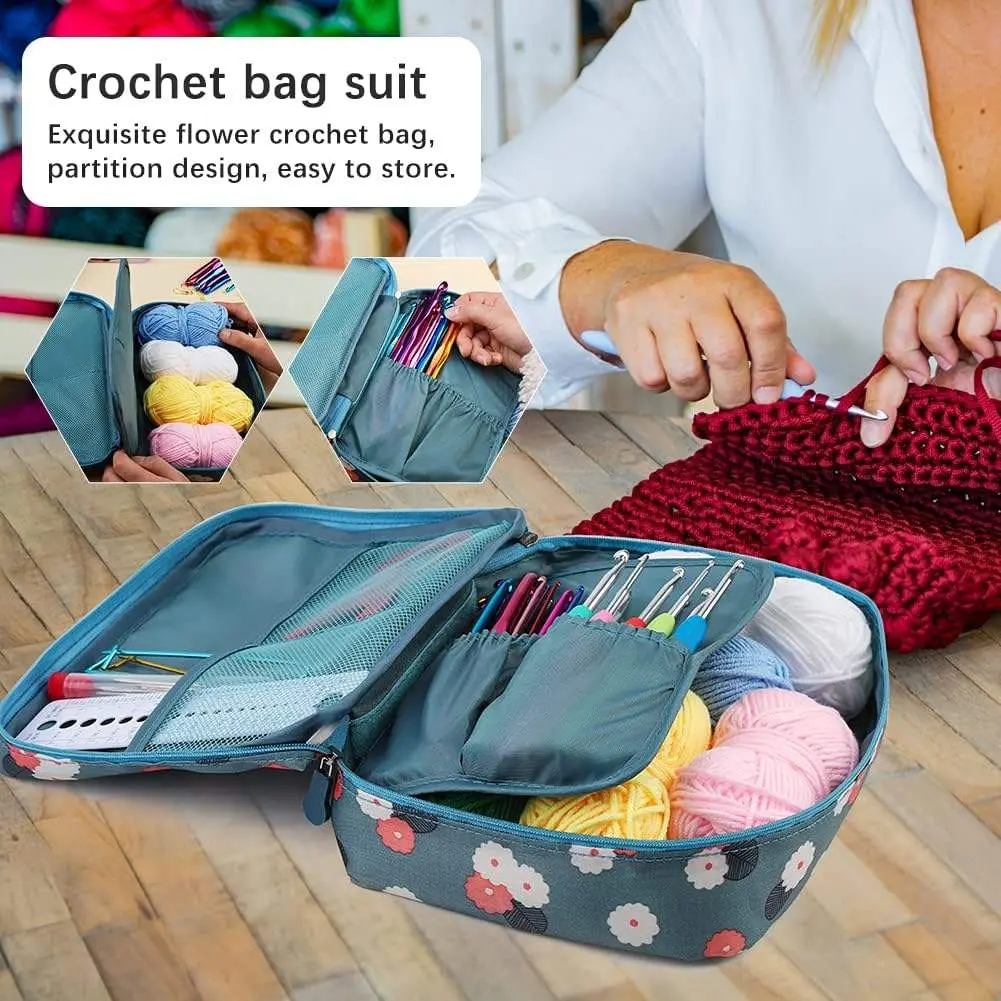
- Compartments in a reusable organizer.
- Folded instruction pockets that keep paper away from sharp tools.
Test the complete pack after shaking, turning and opening it. The customer should understand where to begin without sorting a mixed pile of materials.
Layer 2: Support the project experience
The package and instruction should work together. The exterior explains the result, skill level and major contents. The instruction teaches the project. Avoid forcing the front panel to carry the entire tutorial.
Define the instruction format before setting the package dimensions. A folded card, booklet, pattern sheet and multilingual insert need different space. If video support is used, keep essential identity, safety, care and contact information available without relying only on a QR code.
Consider how the customer uses the package during the project. A resealable pouch or organizer can hold parts between sessions. A tightly glued carton may be discarded immediately. Reuse is valuable when it improves the activity, not when it is only a marketing claim.
Layer 3: Protect the contents and finished impression
Protection depends on the route to the customer. A shelf pack may need scuff resistance and clean stacking. An eCommerce pack may face parcel compression and repeated handling. A gift kit may need the contents to remain presented after transport.
Review:
- Package compression and corner damage.
- Yarn snagging, moisture exposure and color transfer.
- Tool movement and sharp-point control.
- Window scratching or separation.
- Seal strength and tamper evidence where appropriate.
- How the pack looks after removal from the master carton.
A larger box is not automatically safer. Empty space lets components move and increases freight volume. Use the smallest structure that protects and explains the actual kit.
Layer 4: Communicate the brand and project
Customers should understand the offer from normal viewing distance. Prioritize the finished result, project type, skill level, approximate size and the reason the kit is different.
Build a message hierarchy:
- What the customer makes.
- Who the project is for.
- What is included.
- How difficult or time-intensive it is.
- Why this version is useful, giftable or distinctive.
Do not cover the pack with equal-size claims. Strong hierarchy improves scanning and creates space for required information. Photography should show a result that the supplied materials and instructions can reproduce.
Layer 5: Reserve information and label zones
Before final artwork, create zones for barcode, SKU, batch or traceability information, importer or responsible-party details where applicable, origin marking, material statements, age positioning, warnings, care and translations.
The exact requirements depend on product classification and market. The craft product compliance requirements guide explains why intended use, user, contents, claims and market should be defined before testing and labeling.
Also reserve practical eCommerce labels. A marketplace label placed over instructions or required text creates rework. Use a physical label simulation on the packed sample rather than relying only on a dieline.
Layer 6: Design for production and logistics
Packaging cost includes more than the printed unit. Consider tooling, print setup, MOQ, inserts, assembly time, labels, master cartons, freight volume and damage risk.
Ask the supplier for:
- Finished dimensions and tolerance.
- Material and thickness.
- Print method and color reference.
- Surface finish and window material.
- Insert, tray, bag or compartment details.
- Closure and seal method.
- Packing sequence and labor assumptions.
- Units per inner and master carton.
- Carton dimensions, gross weight and pallet assumptions if used.
Confirm whether several SKUs can share one structure. Common dimensions and inserts may reduce complexity while printed sleeves, labels or cards create differentiation.
Match the visible format to the channel
| Channel or use | Packaging priority | Useful direction |
|---|---|---|
| Retail shelf | Fast project recognition and stacking | Printed carton, window carton or structured pouch |
| Peg display | Low weight and clear front communication | Header pouch or compact hanging carton |
| eCommerce | Parcel protection and efficient dimensions | Compact carton, protected pouch or organizer in a shipper |
| Gift range | Presentation and opening sequence | Rigid or folding gift box with controlled insert |
| Workshop | Fast distribution and participant identification | Labeled project packs inside a master workshop carton |
| Reusable starter set | Ongoing tool and material organization | Zipper case, divided box or portable organizer |
The retail packaging ideas article provides more customer-facing format examples. The engineering layers here help the buyer specify how a selected format should work.
Build a print-ready packaging specification
A useful comparison of OEM crochet kit packaging options needs one specification for suppliers and designers. Include:
- Approved product and bill of materials.
- Internal layout with component positions.
- Package dimensions, material and structure.
- Dieline version and artwork files.
- Print colors, finish, window and inserts.
- Instruction format and placement.
- Label and required-information zones.
- Packing sequence and acceptance checks.
- Master-carton configuration and shipping tests.
Give every file a version number. Packaging often changes after the product, so the purchase order should reference the final approved versions rather than "latest artwork."
Approve in four physical stages
Stage 1: White sample
Check dimensions, opening, internal layout and component fit before color printing.
Stage 2: Printed package sample
Review color, legibility, finish, image quality, barcode and required information.
Stage 3: Fully packed sample
Confirm the actual contents, organization, weight, opening experience and customer understanding.
Stage 4: Production reference and carton test
Seal the approved package and confirm master-carton packing, handling and inspection criteria.
Do not skip from a screen proof to mass printing when structure, color or packed presentation is important.
Common specification mistakes
Choosing the box before freezing contents
Late component changes can create empty space, pressure or a new insert requirement.
Approving artwork without a packed sample
The graphic may work while the yarn tangles, tools move or instructions do not fit.
Ignoring print and component minimums
Printed packaging can create a higher MOQ than the finished kit. Separate the minimums and leftover-material risk.
Using sustainability language without evidence
Define the material, claim, market and evidence. Avoid broad claims that the specification cannot support.
Forgetting the master carton
Retail pack quality can be lost through poor carton fit, excessive weight or uncontrolled movement during transit.
Match print risk to the sales test
Printed packaging commits the buyer to artwork, language, claims and SKU information. For an early test, compare the risk of a fully printed box with a common structure using a sleeve, label or insert. The flexible route may cost more per unit but reduce obsolete packaging when the product, market or message changes.
Ask which elements can remain common across the range and which must be SKU-specific. A shared carton with controlled labels may support a pilot, while a mature high-volume line may justify fully custom printing and inserts.
Include packaging inventory in the reorder plan. Product components can sometimes be reused across designs, but printed packs may become unusable after a barcode, claim, translation or image change. Approve print quantities against the expected sell-through period, not only the printer's lowest unit price.
Where Onehourcrafts fits
Onehourcrafts provides OEM/ODM support for crochet DIY kits, including contents, color combinations, instructions, branding inserts, barcode and labeling support, retail packaging and packed samples.
For range economics, use the crochet kit MOQ guide to compare packaging, component and finished-kit minimums before locking the format.
Frequently asked questions
Should every yarn color have a separate compartment?
Not always. The organization should keep colors identifiable and prevent tangling without adding unnecessary material or assembly.
Can a pouch look premium?
Yes. Material, print, closure, insert design and content organization affect perceived value more than format alone.
When should the barcode be tested?
Test it on the printed package and again after any finish, label or placement change. Confirm channel-specific requirements.
Is a window necessary?
No. A window can improve visibility but may add cost, scratching or recycling complexity. Use it when seeing the actual contents improves the decision.
Can the supplier create the dieline?
Usually, but the buyer and designer should verify the structure, dimensions, print areas, labels and final version before production.
Specify the system, not only the surface
The best way to compare OEM crochet kit packaging options is to evaluate how each pack contains the contents, supports the project, protects the product, communicates the offer, carries information and moves through logistics. A print-ready specification turns those requirements into a repeatable packed product.
Contact Onehourcrafts with your kit contents, channel, quantity, package direction, market and target date to discuss a packed sample and OEM packaging specification.





