

A crochet hook size guide for kits should match the hook to the actual yarn, stitch pattern, finished project and target user. The diameter printed on a tool is only one input. Shaft shape, throat, tip, handle, surface finish and instruction gauge all affect whether a beginner can complete the project comfortably and obtain the intended result.
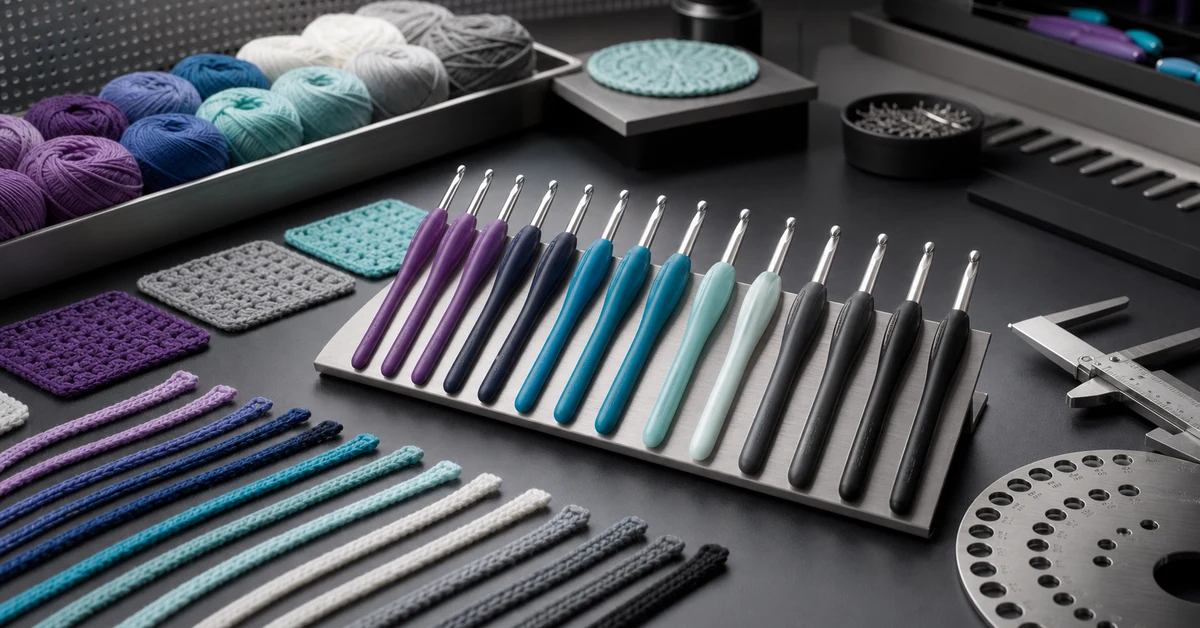
Begin with the finished fabric target
Define what the crocheted fabric must do. An amigurumi body typically needs firm coverage so stuffing does not show. A scarf may need a looser drape. A basket needs structure, while a decorative flower needs clear edges and manageable shaping. Write down the intended stitch, dimensions, surface and firmness before selecting a hook.
Then identify fixed parts that could constrain the fabric. Stuffing volume, safety-eye posts, frames, bases, accessories and package dimensions may all depend on the project's final size. A hook change that seems minor can alter gauge enough to affect these components. The specification therefore needs an acceptable finished range, not only a nominal tool size.
- Project type and main stitch construction.
- Target dimensions and acceptable variation.
- Required firmness, drape or stitch definition.
- Fixed-size accessories that must still fit.
Create a diameter ladder
Make the same test swatch with three adjacent hook sizes using the proposed production yarn. Keep the stitch count, row count and operator consistent. Let the samples rest, then measure width, height, mass, visible gaps and handling time. Photograph all swatches under the same conditions.
The middle diameter is not automatically correct. A smaller hook may improve coverage but increase hand effort and make insertions difficult. A larger hook may feel faster but create gaps or change the finished shape. The ladder reveals the usable window and shows whether the design is tolerant enough for beginners with different tension.
| Observation | Hook may be too small | Hook may be too large |
|---|---|---|
| Insertion | Requires force or catches fibers | Easy but lacks control in tight areas |
| Fabric | Very stiff or compressed | Loose, open or weakly shaped |
| Gauge | Project trends smaller | Project trends larger |
| User effort | Hand fatigue and slow rhythm | Extra motion and uneven loop size |
Check the hook profile, not only diameter
The working shaft sets loop size, but the head and throat influence how the hook enters stitches and retains yarn. Compare tip sharpness, groove depth, transition smoothness and shaft length. A very sharp tip may split some yarns; a blunt tip may struggle in firm fabric. Rough joins or plating can create friction even when the stated diameter is correct.
Use the exact production candidates, including handle and finish. Catalog samples from another line do not prove that the selected tool will behave the same. Inspect several pieces for straightness, burrs, coating consistency and secure handle attachment. If sizes are identified by color, verify that the color system matches the instructions and retained standards.
Evaluate handle comfort with real sessions
An ergonomic-looking handle does not guarantee comfort. Ask target-level users to work long enough to establish a rhythm. Observe grip position, rotation, pressure points, tool slippage and how often they stop. Include different hand sizes where practical. Do not tell testers which option is expected to win.
Score comfort separately from project performance. A soft handle may feel pleasant but allow the hook to rotate inside it. A thick handle may reduce pinching for one user and feel cumbersome to another. For compact kits, also consider packing length and how the hook is retained without bending, scratching or damaging yarn.
- Give each tester coded hook samples and identical yarn.
- Run a short swatch followed by a representative shaped section.
- Record errors, time, stops and user comments.
- Inspect the fabric without knowing which hook made it.
- Compare comfort and outcome before selecting the tool.
Align hook, yarn and instruction gauge
The instructions should be written from the approved system. State the hook clearly and provide a useful gauge or size checkpoint where the project allows it. If the user must change hook size to match a sample, decide whether the kit will include alternatives or whether the design tolerance makes that unnecessary.
Beginner kits should avoid unexplained size conventions. Metric diameter is a practical common reference even when another regional system is also shown. Confirm every printed value against the actual tool; handle markings, packaging, component lists and instruction pages must agree. A mislabeled hook can look like a user technique problem.
Decide whether one hook or a set belongs in the kit
A single-project kit often needs one validated hook. Adding multiple sizes can increase perceived value, but it may also confuse the first step and create more count-control points. A broader learning set may justify several diameters when the projects and instructions deliberately demonstrate their differences.
Use a role test for every included size. If a hook is not required by the project, future learning path or stated product purpose, it may be better sold in a separate tool set. This keeps the kit focused and makes missing-part inspection easier.
- One-hook project kit: fastest setup and simplest instructions.
- Two-hook technique kit: useful when sections need documented changes.
- Multi-size learning set: appropriate when comparison is part of the product.
- Accessory set: separates tool variety from a single project promise.
Freeze a hook specification
The final record should include measured diameter, usable shaft length, head and throat reference, handle material and dimensions, color, marking method and surface standard. Attach the winning swatch, full project sample and approved yarn lot or standard. Define how production pieces will be sampled and what defects cause rejection.
This is where the crochet hook size guide for kits becomes a purchasing control. If a supplier proposes a replacement tool, compare it with the complete specification and repeat the working test. A matching printed size does not make a substitution equivalent.
- Approved tool sample and measured dimensions.
- Yarn, stitch, gauge and finished-size references.
- User-trial results and accepted limitations.
- Marking, color, packaging and incoming-check rules.
Challenge the selection with edge cases
Before sign-off, repeat short trials in the sections most likely to expose a mismatch. Test the tightest insertion point, the smallest ring, a decrease cluster, a color join and any area worked around a fixed accessory. Use a dark yarn if one belongs in the range, because reduced stitch visibility can change how the same hook feels to a beginner.
Also test the tool after realistic packing and handling. Confirm that the hook does not bend, loosen inside the handle or acquire surface damage from nearby accessories. Open the kit in the order a customer will encounter it and verify that the size marking is visible before the instructions ask for it.
A robust crochet hook size guide for kits documents the edge conditions that passed, not only the attractive center swatch. If one difficult section repeatedly fails, the team can change the hook, yarn, stitch construction or instructions with evidence about the actual constraint.
- Tightest stitch entry and most complex shaping.
- Darkest yarn and least visible working section.
- Smallest fixed accessory or dimensional interface.
- Packed-tool condition after normal transport handling.
Where Onehourcrafts fits
The Onehourcrafts crochet DIY kit page describes ergonomic crochet hooks in multiple sizes and colors, assorted yarn, measuring tools and hook-set customization. Buyers can use the diameter ladder and tool specification to discuss a complete hook-and-yarn system rather than selecting from photographs alone.
Review the crochet kit yarn selection guide, the guide to crochet accessory set ideas and the crochet sampling process. Send the project, yarn, candidate diameter, handle needs, target user and volume assumptions through the contact page. Final tool safety, labeling and market requirements still need written confirmation.
Frequently asked questions
Should a crochet kit use the hook size printed on the yarn label?
Use it as a starting reference, not an automatic answer. Make the actual project with the proposed yarn and adjacent hook sizes, then approve the diameter that delivers the required fabric and user experience.
Why can two hooks with the same diameter feel different?
Head shape, throat depth, tip, shaft length, surface finish and handle all affect yarn capture and hand movement. Compare production samples in use rather than relying only on the marked diameter.
How many hook sizes should a beginner kit include?
Include only sizes with a defined role. One validated hook is often clearest for a single project, while several sizes make sense when the kit intentionally teaches comparison or requires technique changes.
What is the best way to test handle comfort?
Ask several target users to work representative sections for a realistic period. Record grip changes, pressure, slippage, errors and stops, then compare comfort with the quality of the finished fabric.
What should trigger hook reapproval?
Changes to diameter, profile, shaft length, finish, handle, factory source or yarn system should trigger relevant measurement and working tests. Keep the approved physical tool and swatch as references.





