

A cross stitch kit quality checklist should follow the product from artwork to completed pack. The chart, printed fabric, thread set, needle, instructions and packaging form one connected system; a defect in any link can stop the maker. Retail buyers need staged approval gates that reveal those failures before bulk production.
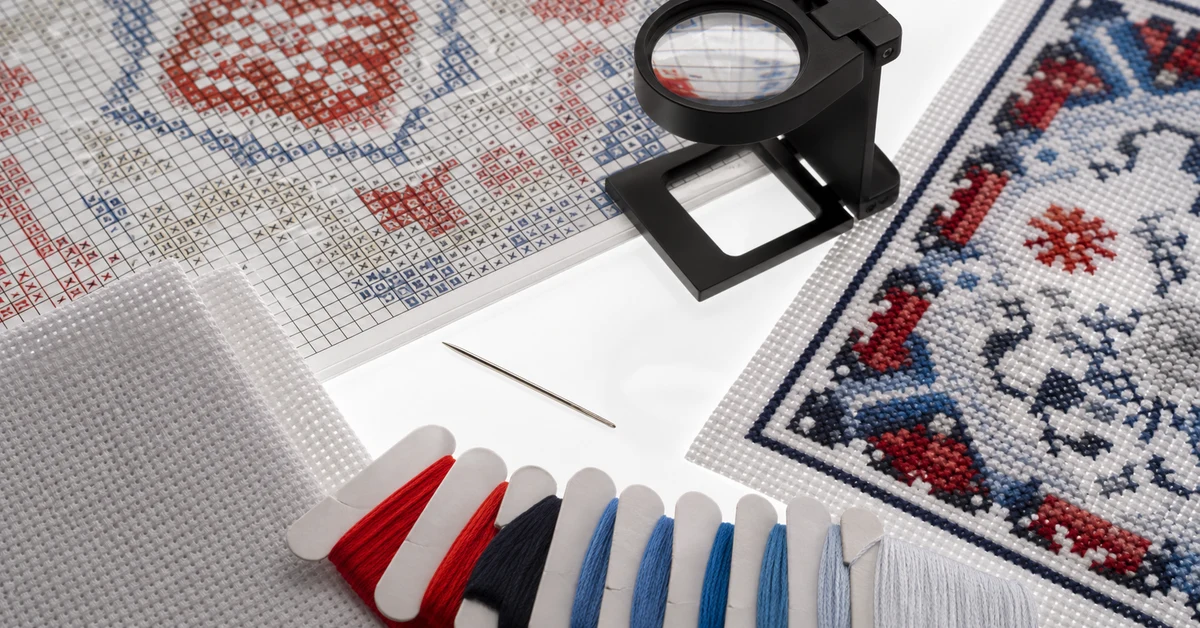
Gate one: prove the design can be stitched
Begin with the source artwork and converted stitch chart. Confirm finished dimensions at the specified fabric count, total stitch area, number of colors, backstitch or specialty-stitch requirements and expected completion level. A visually appealing image may convert into scattered single stitches, ambiguous edges or an excessive number of close shades.
Complete a working sample from the proposed chart. Mark any region where symbols are hard to distinguish, thread changes are unnecessarily frequent or the stitched result loses an important feature. The sample maker should log corrections rather than silently improving the design, because undocumented judgment cannot be reproduced by the customer.
- Check chart orientation, center marks and page joins.
- Verify every symbol against the thread key.
- Confirm that the stated finished size matches the chosen fabric.
- Record all deviations between chart and stitched sample.
- Approve a controlled final artwork file before printing begins.
Inspect pre-printed fabric as a registration problem
For printed kits, inspect whether the pattern aligns consistently with the fabric grid. Look across the full design, not only at the center. Distortion, double printing, weak marks or ink crossing stitch boundaries can make an otherwise correct chart difficult to follow. Compare several pieces from different positions in the production batch.
Check the fabric cut size, edge condition, count and squareness. The cut must provide enough working margin for the intended hoop or frame and for finishing. If the printed marks are designed to wash away, obtain the supplier's documented care method and test it on production-representative material. Do not promise removability or safety without evidence relevant to the destination market.
Audit the thread map, not just the thread bundle
Count every supplied color and compare it with the approved key. Then assess the amount of each color against measured sample consumption plus a justified allowance. Long carries, mistakes, thread tails and beginner technique can increase use. A kit that contains the correct number of colors can still fail if one high-consumption shade runs short.
Evaluate thread for shade consistency, unwanted knots, fraying and transfer to light fabric. Similar shades need clear separation and labeling. If threads are loaded on a card, verify hole order and labels against the instructions. If they are bundled, confirm the system prevents tangling during packing and first use.
| Defect | Likely source | Control |
|---|---|---|
| Wrong shade in position | Loading or key mismatch | Approved thread map and count check |
| Thread runs short | Underestimated consumption | Full sample record plus allowance |
| Close colors confused | Weak identification system | Separated positions, symbols and labels |
| Color transfers to fabric | Material or finishing issue | Representative rub and care testing |
Examine needle and accessory fitness
The needle must suit the fabric openings and thread count. Inspect point style, eye finish, straightness and surface condition. A rough eye can damage thread; an unsuitable point can frustrate the user or affect safety expectations. Confirm quantity and how the needle is retained so it cannot migrate loose inside the package.
If the kit includes a hoop, threader, scissors or other tools, use the production candidates to complete the sample. Check hoop grip, closure operation and whether the working area fits the design. Accessories should earn their place through function. Extra items that are inconsistent or difficult to pack can add failure points without improving the project.
Run an instruction-to-component trace
Place every instruction step beside the referenced component. Names, colors, symbols and quantities must match. Verify the order in which the maker encounters materials after opening the pack. A correct instruction booklet can still feel confusing if the physical organization uses different terms or hides the first required item.
Give the kit to target-level users without verbal coaching. Record where they pause, choose the wrong thread, misread the chart or cannot recover from an error. Separate content problems from skill limitations. The article on writing craft kit instructions provides a deeper usability process for this stage.
Gate two: approve a sealed pre-production kit
Do not approve components only in separate sample bags. Request a complete kit made with intended materials, organization and packaging. Open it as a customer would, then complete or partially complete the project from that exact pack. This reveals crushed thread cards, folded charts, loose needles, fabric creases, unreadable inserts and pack-order mistakes.
- Photograph the sealed pack and all contents in opening order.
- Reconcile components to the approved bill of materials.
- Measure critical dimensions and count thread colors.
- Run the instruction trace and representative stitching test.
- Sign and retain one approved sealed reference kit.
The approved kit should carry version identifiers for artwork, chart, thread map, fabric print and packaging. Without version control, a later correction can be applied to one file while an older component remains in production.
Gate three: verify production and packing
Production inspection should sample across the run and focus on defined critical, major and minor defects. Critical issues may include unsafe loose sharps or prohibited materials. Major issues include missing thread, incorrect chart, unreadable print, severe registration error or a component that prevents completion. Cosmetic packaging marks may be minor if product protection and saleability remain acceptable.
Use line clearance between versions and count controls during kitting. The process in preventing missing parts in craft kits can be adapted to thread cards, needles and inserts. Inspect finished cartons for product identity, quantity and mix, then retain representative samples with lot information.
Turn complaints into an evidence loop
Complaint categories should map back to the design chain: chart, print, thread, fabric, needle, instruction, packing or transport. Ask for photos and lot information where practical. A single report may be user error; repeated reports at the same step signal a product-system problem. Define who reviews trends and when stock containment or a specification change is triggered.
Used this way, a cross stitch kit quality checklist is not a one-time inspection sheet. It is a record linking approved design files, physical standards, production controls and real-world feedback. The limitation is that no checklist replaces market-specific compliance review or a risk assessment for the intended age group.
Assemble the master quality file
The final file should allow a different inspector to reach the same decision. Include the signed chart, printed-fabric standard, thread map, consumption record, needle and accessory specifications, instructions, packaging artwork and defect classifications. Add photographs of accepted and rejected examples where a written tolerance could be misunderstood.
Link every file to a revision code and the retained sealed kit. When artwork or a component changes, identify which approvals are affected and repeat those checks. A working cross stitch kit quality checklist should produce at least these records:
- Approved stitched sample and corrected chart.
- Printed-fabric registration, size and care-test evidence.
- Thread positions, shade standards and per-color allowances.
- Needle retention, instruction usability and pack-count results.
- Production sampling log, defect decisions and complaint actions.
Where Onehourcrafts fits
The Onehourcrafts cross stitch DIY kit page describes pre-printed fabric, thread, needle and fabric components, with custom patterns, artwork, packaging and instruction cards. It also states attention to pattern printing and color matching, which gives buyers concrete checkpoints to include in the approval brief.
Review the existing cross stitch factory guide, the broader craft product compliance overview and the OEM sampling timeline guide. Then send artwork version, fabric specification, thread map, instruction language, pack concept and target quantity through the contact page. Confirm the final test plan and destination requirements in writing.
Frequently asked questions
What is the first sample a buyer should approve?
Approve a stitched design sample and corrected chart before treating packaging as final. This proves the artwork can be executed with the proposed fabric, thread colors and stitch logic.
How can buyers check whether enough thread is included?
Measure consumption from complete samples, account for tails, mistakes and user variation, and document the allowance for each color. Checking total bundle weight alone may hide a shortage in one critical shade.
Why inspect more than one printed fabric piece?
Registration, print strength and cutting can vary across a run. Samples from different production positions provide better evidence than one carefully selected piece from the center.
Should the sealed kit be tested before bulk production?
Yes. A sealed pre-production kit reveals problems caused by organization, folding, retention and packaging that separate component approvals cannot show. Keep one signed kit as the physical reference.
Which cross stitch defects deserve the fastest response?
Prioritize safety issues and defects that prevent completion, including loose sharps, missing key components, wrong charts, severe print misalignment and insufficient critical thread colors.





