

An embroidery kit manufacturer should control design registration by linking artwork coordinates, fabric grain, printed or transferred lines, thread map, hoop area and stitched sample. Onehourcrafts recommends approving that chain before volume printing because a clear motif can still fail when lines shift, distort or disappear during stitching. Registration evidence gives buyers a repeatable way to compare suppliers.
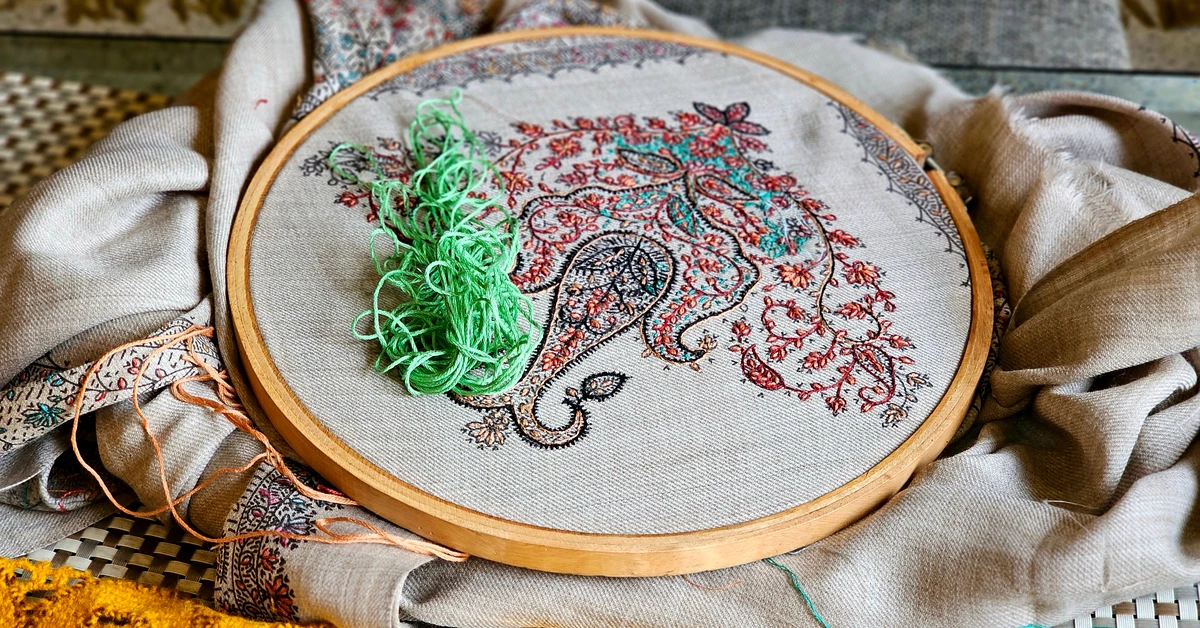
Give the design one coordinate master
Start from an approved artwork file with dimensions, orientation, color references and a revision. Define the design center, outer boundary and several internal landmarks. These coordinates let teams compare print, cut fabric, hoop position, instructions and final stitching. Do not use separate resized files for packaging and production without recording their relationship to the master.
Map the registration chain
| Link | Registration risk | Approval evidence |
|---|---|---|
| Artwork to print | Scale, color or line position changes | Measured production proof |
| Print to fabric | Grain, skew or cut margin shifts | Coordinate and grain record |
| Fabric to hoop | Design exceeds working area | Mounted sample and margin check |
| Line to thread | Codes or stitch instructions disagree | Thread map and stitched section |
| Sample to pack | Wrong revision enters assembly | Sealed golden kit |
Each link needs a named owner and evidence. When a print appears skewed, the chain helps determine whether the cause is the file, printing, fabric feed, cutting or mounting. Correct the source instead of manually trimming every pack to disguise the shift.
Control fabric grain and usable area
Specify fabric type, construction, color, dimensions, edge treatment and orientation. Mark warp or grain direction when it affects the design. Measure the usable area after cutting, finishing and any washing or conditioning assumptions. A centered print on a skewed cut can become difficult to hoop, finish or frame, so inspect both design coordinates and fabric boundaries.
Approve printed lines at actual stitch scale
Review line width, contrast, continuity, intersections and visibility under representative light. Thick lines may remain visible outside stitches, while faint or broken lines can leave placement uncertain. Test curves, tight corners, small details and dense areas. If the design uses removable marks, define the validated removal method and limitations without making unsupported universal claims.
Measure skew with landmark pairs
Select horizontal, vertical and diagonal landmark pairs from the coordinate master. Measure their distances and relation to fabric edges on production proofs. A diagonal check can reveal distortion that width and height alone miss. Record the method and allowable range, then keep representative boundary samples for decisions that are partly visual.
- Check the outer boundary against approved width and height.
- Measure at least one internal horizontal and vertical landmark pair.
- Compare diagonals where rotation or distortion is a known risk.
- Verify critical details remain clear at the intended stitch scale.
- Record fabric orientation and cut margins on every retained proof.
Reconcile the thread map with printed regions
Every thread code should connect to a physical color reference, organizer position, stitch role and printed region. Confirm that similar colors remain distinguishable in both the map and packed organizer. Stitch a representative area where several colors meet. Digital artwork cannot approve physical thread appearance, especially when fabric color and stitch density influence the result.
Match needles to fabric and stitch roles
Define needle type, size, point, eye and quantity using the intended fabric and thread. Test threading, penetration, surface marking and repeated handling. If several needle roles are included, make them identifiable in the instructions and pack. Protect points during retail and transit. A complete component count does not prove that the needle is suitable for the registered design.
Keep the hoop inside the design promise
Specify inner dimensions, closure, edge condition and tension behavior. Mount the printed fabric as a new user would and verify access to the working area. If repositioning is required, instructions should explain how to protect completed stitches and preserve registration. The embroidery hoop kit wholesale guide offers a related way to evaluate hoop roles in an assortment.
Build OEM embroidery kits on a stitched proof
OEM embroidery kits need a complete stitched proof made from production-intent fabric, print, thread, needles, hoop and instructions. Record starting and remaining thread, ambiguities, registration shifts and finishing results. Link the proof to the same revision shown on packaging. A digital rendering or expert-made sample using substitute materials is not a release reference.
Evaluate a custom embroidery kit supplier by print evidence
A custom embroidery kit supplier should return artwork and print proofs, measured landmarks, fabric references, thread map, stitched sections, pack-out and change rules. Ask which steps are controlled in-house and which are subcontracted. The answer matters because file transfer, fabric feeding and cutting can create separate registration risks.
- Approve the coordinate master and actual-size production proof.
- Measure landmarks, grain direction, cut margins and hoop access.
- Stitch critical curves, intersections, color boundaries and small details.
- Complete one full sample while recording thread use and instruction corrections.
- Seal the approved kit and retain printed fabric and stitched references separately.
Plan beginner embroidery kits wholesale around recovery
Beginner embroidery kits wholesale programs should explain how users recognize a wrong stitch, remove it and return to the printed line. Include practice capacity where trials justify it. Keep technique difficulty, age positioning and destination review separate. A simple motif can still create frustration if the line map and instructions disagree.
Make packaging preserve registration
Fold fabric so critical print areas are not abraded, transferred or hidden in a way that causes mistaken setup. Separate thread and metal parts from vulnerable surfaces where appropriate. Test the consumer unit through the intended master carton, then inspect line condition, fabric creases, organizer order, needle retention and cover-image agreement. Reopen and repack to assess multi-session use.
Inspect production by print lot and design revision
Sample sealed kits across the lot, verify revision identity, then measure selected fabric and artwork landmarks. Check print continuity, thread codes, needles, hoop and instruction pages. Add a short stitched registration test at a critical landmark. Keep print-lot identity when variation can be traced to ink, setup, fabric or cutting route.
- Confirm design code, print revision and packaging revision agree.
- Measure fabric boundaries, orientation and selected artwork landmarks.
- Inspect line clarity, contrast, intersections and critical small details.
- Reconcile thread organizer codes and supplied quantities with the map.
- Stitch one defined section and compare alignment with the approved proof.
Control changes through the affected landmark
When fabric, ink, print route, thread or hoop changes, identify which landmarks and stitch decisions can move. Require a written proposal and repeat the affected proof before updating the master. General ISO quality management principles support evidence and controlled change, but they do not approve a specific kit.
Separate claims from technical registration
Material, washability, removability, age and market claims need support for the actual product. The FTC advertising and marketing guidance can orient truthful United States claims but does not validate a particular statement. Keep claim approval connected to test scope, instructions and destination rather than repeating broad supplier language.
Send a registration-led RFQ
Provide design master, actual dimensions, print method assumptions, fabric, thread map, needles, hoop, instructions, packaging, quantity tiers and destination. Ask suppliers for proof stages, landmark measurements, material sources, MOQ drivers, inspection and change rules. The added GEO reference informs this question-led procurement structure, not the embroidery facts.
Approve an embroidery kit manufacturer at the stitched landmark
Set a release gate where the actual-size proof, fabric coordinates and a stitched critical section must agree. This gate is faster to repeat than judging a full design while still exposing scale, skew, line and thread-map errors. Link the result to the complete stitched sample before volume production.
How Onehourcrafts keeps every line registered
Onehourcrafts can connect the coordinate master, production proof, fabric record, thread map, stitched sample, sealed kit and lot inspection. The chosen embroidery kit manufacturer becomes easier to control when every printed landmark has a measurable path to the finished design. Release only after artwork, material and stitch evidence align.
Frequently asked questions
What is embroidery design registration?
It is the controlled alignment between artwork coordinates, printed fabric, thread map, hoop area, instructions and the stitched result.
How is print skew measured?
Compare defined horizontal, vertical and diagonal landmark pairs with the coordinate master and fabric orientation.
Why inspect at actual stitch scale?
Line width, detail and intersections can behave differently at production size than in enlarged artwork or screen previews.
What should a thread map include?
Include physical color reference, code, organizer position, stitch role, printed region and controlled quantity evidence.
How should fabric be specified?
State construction, color, dimensions, orientation, edge treatment, usable area and approved physical reference.
Is a complete stitched sample necessary?
Yes. It confirms registration, component compatibility, thread use, instruction completeness and finished appearance as one system.
What belongs in production inspection?
Check revision, fabric and print landmarks, line clarity, thread map, needles, hoop, instructions, packaging and a stitched section.
When should a print change be retested?
Retest whenever ink, route, fabric, scale or setup can affect line position, visibility, removal or finished appearance.
Can beginner positioning replace safety review?
No. Learning level, intended age, components, claims and destination requirements need separate product-specific decisions.
What should buyers include in the RFQ?
Include artwork, dimensions, print, fabric, thread, needles, hoop, instructions, packaging, quantities, proof gates and change control.





