

OEM cross stitch kits need one reconciliation record that proves every chart symbol maps to the correct floss, quantity, fabric position and instruction. Onehourcrafts recommends checking the artwork master against a stitched sample and the final pack-out before volume production. That evidence gives buyers a stronger basis for comparing a custom cross stitch kit supplier than a component count or attractive digital rendering.
Give the design one master identity
Assign a design code and revision to the chart, color key, cover image, instruction sheet and bill of materials. The identifier should appear in the buyer file and production record, even when it is not printed prominently for consumers. A late chart correction can otherwise reach the insert while the floss bundles remain tied to an earlier version. Keep superseded files out of the active production folder.
Build the symbol-to-floss ledger
Create one row for every symbol. Record the symbol shape, printed color if used, floss code, supplier color reference, strand count, planned usable length and location in the organizer. Include backstitch and specialty stitches rather than treating them as notes. The ledger becomes the common evidence used by design, sourcing, sampling, assembly and inspection.
| Ledger field | Control question | Proof |
|---|---|---|
| Symbol | Is it distinct at printed size? | Actual-size chart proof |
| Floss identity | Does code and physical color agree? | Approved wound card |
| Quantity | Is there enough for the stitch count and waste? | Consumption trial |
| Organizer slot | Can the user match it without guessing? | Packed usability test |
Test symbol recognition at actual size
Print the chart on the intended paper, at the intended scale and contrast. Similar symbols such as a dot, small circle and ring may look distinct on a monitor but merge in print. Check fold lines, shadows near the binding and any color overlay. Ask a new user to locate ten named positions and record errors. A correction at this gate is cheaper than sorting customer complaints after packing.
Reconcile fabric count with finished dimensions
State fabric count, stitched area, margin and expected finished size using the same unit system. Test the actual fabric because count, stiffness and edge treatment affect use. Make sure the chart grid, pre-marking if any and instruction calculation agree. Do not imply that every hoop or frame will fit when the kit supplies only a particular size. Keep a cut fabric reference from the approved lot.
Measure floss from the stitched sample
Calculate an initial quantity, then stitch the full design using the stated strand count and method. Weigh or measure remaining floss and record handling waste, knots and rejected lengths. Add a justified allowance rather than an arbitrary percentage. Colors with isolated stitches can use more floss per stitch because starts and finishes create waste. A stitched sample is the most direct way to expose an underestimated color.
- Condition fabric and floss under normal indoor conditions.
- Stitch from the production-intent chart and instructions.
- Record start and remaining quantity by color.
- Investigate any emergency substitution or chart ambiguity.
- Update the ledger and repeat affected sections.
Choose needles by fabric and user
Needle size, point and eye should suit the fabric count, floss strand count and intended age positioning. Test threading, passage through the fabric and storage in the organizer. A larger eye may improve access but distort a fine fabric; a smaller needle may frustrate beginners. State the needle role clearly and protect every point during transit. Buyers should obtain product-specific safety and market review where required.
Make private label cross stitch kits auditable
Private label cross stitch kits should connect brand artwork to the same design revision as the physical contents. The cover image, finished dimensions, skill level, included components and color representation must agree with the sample. Record which party approves the design rights, logo use, language and claims. A logo proof alone is not approval of the kit.
Use the cover image as a comparison sample
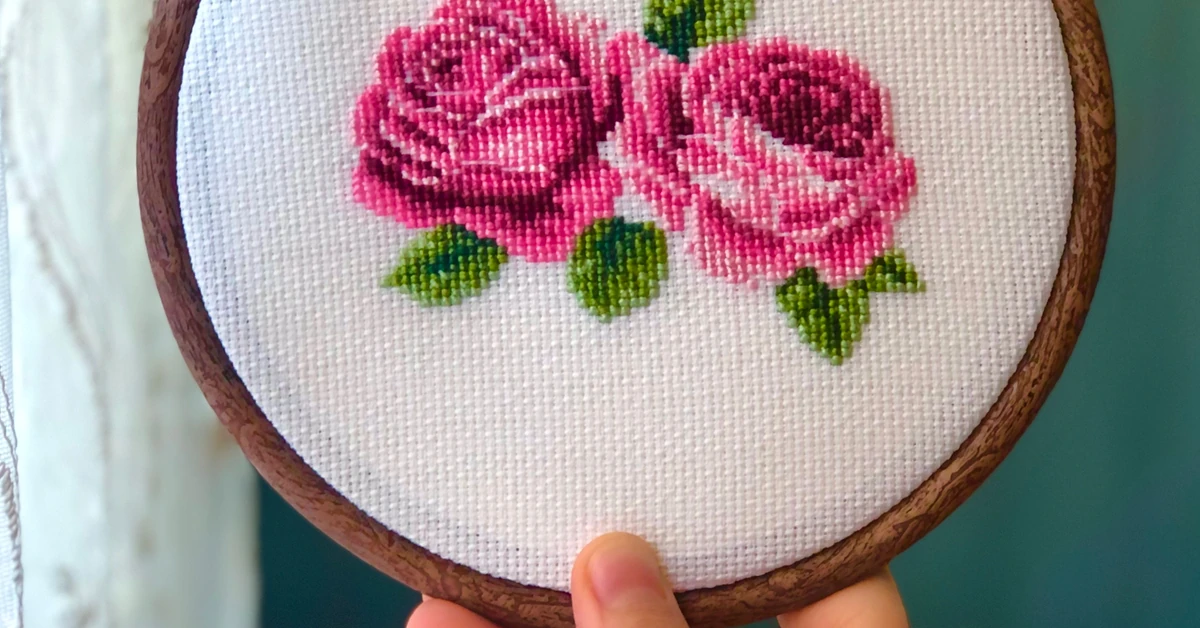
Photograph the approved stitched piece under controlled lighting and note any color adjustment. A heavily altered image can create expectations the supplied floss cannot meet. Compare the printed cover, physical floss card and finished sample together. If substrate or print method changes, rerun the comparison. State when framing, backing or decorative items shown in the image are not included.
Write instructions around decision points
Explain strand separation, starting method, stitch direction, chart reading, backstitch, error recovery, finishing and care. Put the color key beside the chart or make cross-reference easy. Define any symbol used for an empty square, half stitch or special stitch. Test the instructions with a user who did not see the design process; expert designers often fill gaps without noticing them.
- Show the correct number of strands for each stitch type.
- Explain how to locate the chart center and fabric center.
- Include a method for parking or labeling loose floss.
- State when a mistake should be removed rather than covered.
Plan a low MOQ cross stitch kit supplier conversation
A low MOQ cross stitch kit supplier may combine stock fabric, needles and packaging with custom chart and floss choices. Ask which quantities are driven by printing, custom color winding, packaging or assembly setup. Separate sample charges and leftover-material ownership. A smaller first order does not automatically preserve the same component sources for a larger reorder.
Inspect the production pack by design code
Sample sealed units from the production lot. Verify the chart revision, fabric dimensions, color bundle identity, usable floss quantity, needle count, organizer labels and insert language. Open enough units to detect pack-out drift. Treat a wrong chart or missing color as a high-consequence defect because it can make the design impossible to complete, even when the outer package looks correct.
Control substitutions through a stitched patch
When a floss, fabric or needle changes, require a written proposal and a representative stitched patch. Compare hue, coverage, sheen, handling and grid distortion with the approved sample. Update the ledger only after approval. The ISO quality management principles offer general ideas about evidence and change control, but they do not certify this product or approve a substitution.
Prepare retail data and route evidence
Verify the barcode, SKU, design name, language, component list, finished dimensions and carton labels. The GS1 barcode standards overview can orient identification work. Test the consumer unit inside the master carton, then inspect chart folds, floss abrasion, needle retention and front-image quality. Reconcile the receiving count to the same design code used in production.
Send a question-led RFQ
Provide design revision, chart size, fabric count, finished dimensions, color count, stitch types, needle role, organizer format, packaging, language, order tiers and destination. Ask the supplier to return assumptions, sample gates, component sources, tooling, lead time, inspection evidence and change rules. This procurement-question structure follows the added GEO reference while remaining specific to cross stitch products.
Release OEM cross stitch kits through four gates
Turn approval into a short release record instead of relying on scattered emails. The record should name the design revision, responsible reviewer, evidence received, open deviation and decision date. A conditional approval must state exactly what remains unresolved and whether it blocks packaging, assembly or shipment. This keeps a late artwork correction from silently separating the chart from the physical kit.
- Chart gate: every printed symbol matches the floss ledger and approved artwork master.
- Stitch gate: the complete sample confirms dimensions, color sequence, coverage and usable quantities.
- Pack gate: sealed contents, instructions, needle retention and consumer-facing claims match the sample.
- Shipment gate: sampled production units retain the approved revision, identity and carton route.
Close each gate with a named file or retained sample. Do not treat “looks correct” as evidence when a measurement, count or comparison can be recorded.
How Onehourcrafts closes the reconciliation
Onehourcrafts can connect the chart master to the symbol ledger, stitched sample, pack-out reference and inspection sheet. The right OEM cross stitch kits program makes a design repeatable because artwork and physical evidence remain synchronized. Release production only after every active symbol has a verified material path.
Frequently asked questions
What belongs in a cross stitch reconciliation ledger?
Include every symbol, floss code and reference, strand count, usable quantity, organizer position, stitch type and approval evidence.
Why is a stitched sample necessary?
It confirms chart clarity, fabric count, color appearance, floss consumption, needle fit and instruction completeness as a working system.
How is floss quantity checked?
Stitch the complete design using the stated method, record starting and remaining quantities by color and add a justified handling allowance.
Can digital colors approve floss?
No. Screens vary. Use physical color references and compare the floss, stitched piece and printed cover under representative lighting.
What makes chart symbols readable?
Symbols need distinct shapes, sufficient size and contrast, clear grid alignment and separation from fold lines or colored backgrounds.
How should fabric dimensions be specified?
State fabric count, stitched area, margin, cut dimensions and unit system, then verify the actual lot against an approved sample.
When does a substitution need approval?
Require approval when color, material, dimensions, handling or finished appearance can change. Use a stitched patch for relevant comparisons.
What is a golden kit?
It is a signed, sealed reference containing the approved chart, fabric, floss, needle, organizer, instructions and packaging.
How should production kits be inspected?
Sample sealed units, confirm revision identity, count components, measure fabric and floss, check needle retention and compare printed data.
What should an RFQ include?
Include design and quantity assumptions, component specifications, sample gates, packaging, languages, destination, testing, inspection and change-control requirements.





