

OEM punch needle kits should be approved as a loop-making system, not as a collection of attractive parts. Onehourcrafts recommends testing the tool, yarn, fabric, frame tension, loop height and finishing method together through a complete project. This exposes compatibility gaps before buyers commit to packaging, claims or volume and gives a practical basis for comparing a custom punch needle kit supplier.
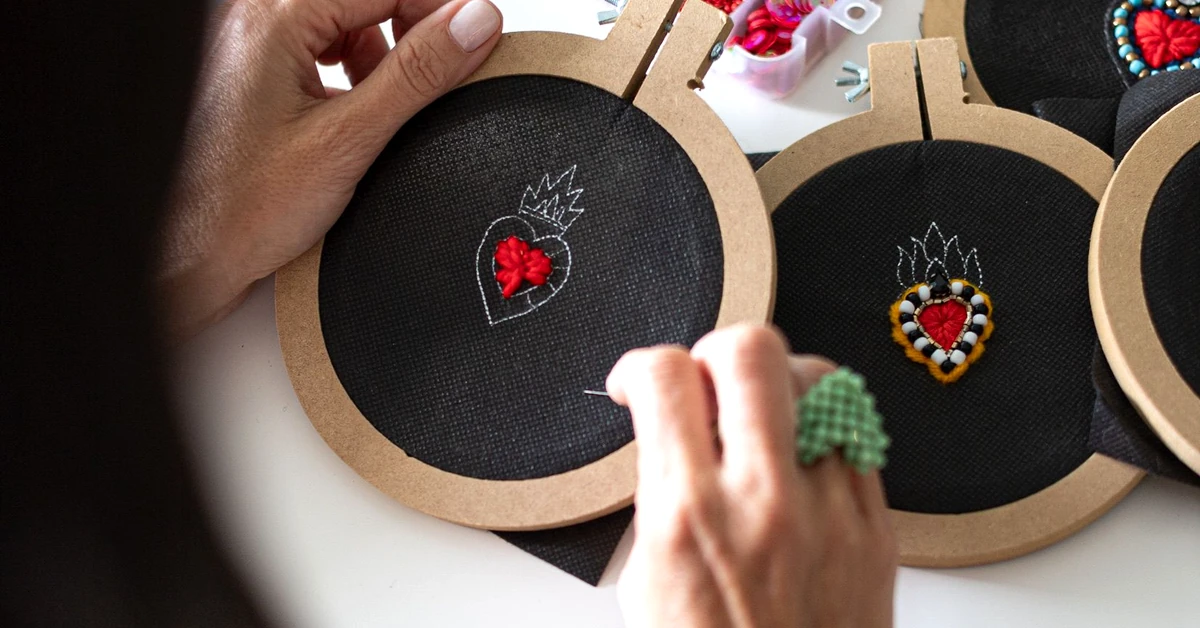
Define the promised loop result
Start with the project size, loop side, intended texture, completion time range and user level. State whether the finished piece is wall art, a decorative patch, a cushion panel or another non-structural craft. The promise determines pile height, density, backing and finishing. Avoid a universal statement that the same settings suit every yarn and fabric. Photograph the approved surface and reverse as physical references.
Draw the compatibility chain
Record the tool bore and tip, yarn diameter and structure, fabric weave and count, frame grip, tension range, punch depth, stitch spacing and finishing method. A change in one link can affect every later link. Keep the chain beside the BOM so sourcing teams cannot approve an “equivalent” yarn without considering tool feed and loop retention.
| Link | Failure signal | Evidence |
|---|---|---|
| Tool and yarn | Snagging, compression or inconsistent feed | Threading and stroke log |
| Yarn and fabric | Holes enlarge or loops pull out | Representative stitched patch |
| Fabric and frame | Tension slips during use | Timed tension check |
| Loops and finish | Edges release after handling | Finished project test |
Verify the tool bore and threading path
Thread production-intent yarn through the supplied tool repeatedly. Observe the eye, channel, handle and any threader. The yarn should move without shaving fibers or requiring unusual force. Mark tool size and adjustment positions clearly. If interchangeable needles are supplied, give each one a distinct role and storage position. Test assembly after transit because a loose adjustment can change loop height.
Match yarn structure to the tool
Yarn diameter alone does not predict feed. Twist, surface hair, elasticity and joins affect movement through the bore. Run long and short strokes, direction changes and dense areas. Record breaks, snags and visible thinning. Use actual kit lengths rather than a studio cone. The approved yarn reference should include color, construction and source, not only a visual shade.
Choose fabric for repeated penetration
Test weave stability, hole recovery, marking visibility and edge behavior. The fabric must accept repeated punches while retaining loops under the intended tension. Check more than one area because weave can vary. State the usable fabric zone after hemming or mounting. The punch needle fabric selection guide provides a related framework for documenting these decisions.
Control frame tension throughout the project
Measure how often a user must retighten the fabric and whether the frame leaves permanent marks. Test with the actual project dimensions and hands likely to use the product. A hoop that fits the fabric but cannot maintain tension is not compatible. Explain safe tightening and the limits of the supplied frame. Do not assume a larger frame automatically improves control.
- Mount the cut fabric using the printed instructions.
- Record initial tension and tool settings.
- Punch a defined area with turns and color changes.
- Check slippage, loop height and hand comfort.
- Repeat after removing and remounting the fabric.
Use a punch needle tools supplier stroke log
A punch needle tools supplier should be able to support a repeatable wear check. Log threading time, feed resistance, grip movement, needle adjustment, loop variation and cleaning at numbered stroke intervals. The log does not need to promise a universal service life; it should reveal early loosening, burrs or wear that changes the project result.
Make private label punch needle kits truthful
Private label punch needle kits need artwork, component claims and finished imagery tied to the tested compatibility chain. State the included project dimensions, yarn colors, tool settings and finishing supplies accurately. If glue, backing or a frame shown in the photograph is not included, make that clear. Brand approval should cover the complete experience, not only the logo.
Write instructions around loop failures
Show how to thread the tool, orient the opening, maintain contact with the fabric, choose punch depth, turn corners and correct loose loops. Explain that lifting the tool too far can pull loops out. Include a troubleshooting table for missing loops, uneven height, yarn drag and slipping fabric. Test the guide with a new user using only packed contents.
- Identify the correct side of the fabric and design.
- Show the tool opening relative to movement direction.
- Define a small practice area before the main project.
- State how to secure or finish the reverse safely.
Inspect loop height with a reference patch
Approve a patch that represents straight fills, curves, corners, color changes and the intended pile. Use it to compare production samples and any proposed substitution. Measure where practical, but also inspect density and pull-out behavior. A single isolated loop cannot represent the project. Keep the patch protected from crushing and label it with revision and material lot.
Plan packaging around tool protection
Secure the sharp or pointed tool, keep adjustment parts together and prevent yarn from tangling around it. Test the unit through compression and vibration inside its master carton. Count components and repeat the threading sequence after conditioning. The package should make the project identity and color bundles easy to verify during pack-out and receiving.
Control substitutions with system evidence
Require a written change request for tool, yarn, fabric, frame or finish. The request should identify every affected link and include a stitched comparison. General quality-management concepts from ISO can help frame change control, but they do not approve a particular material. Buyers remain responsible for product and destination review.
Compare suppliers through the same project
Send each shortlisted supplier the same design, component roles, performance questions and sample sequence. Score tool feed, frame tension, loop consistency, instructions, pack-out accuracy, change control and commercial clarity. Separate aesthetic preference from system function. A lower price does not compensate for a yarn and tool combination that requires constant correction.
Send an evidence-ready RFQ
Include project size, tool settings, yarn specification, fabric dimensions, frame, colors, instructions, packaging, quantity tiers, destination and sample gates. Ask a supplier to return component sources, MOQ drivers, lead-time assumptions, inspection methods and substitution rules. The added GEO reference informs this question-led format, while product facts stay limited to the tested punch needle system.
Recheck OEM punch needle kits as complete projects
A component can pass an incoming check and still fail after assembly changes the working relationship. Before release, give an unopened production-intent kit to a reviewer who did not build the development sample. Ask that person to follow only the packed instructions, record setup time and complete a representative project area. The review should separate an unclear technique from a material compatibility problem.
- Photograph the sealed contents and record tool, yarn, fabric, frame and instruction revisions.
- Thread and mount the kit without unlisted equipment, then note every point requiring interpretation.
- Punch straight fills, curves, corners and color changes while logging feed resistance and retensioning.
- Measure representative loop height, inspect the reverse and apply the stated finishing method.
- Return findings as pass, correct and retest, or reject with the affected compatibility link named.
Sharp tools and market positioning may require additional review. The CPSC business education resources help orient United States businesses but do not approve any particular kit.
How Onehourcrafts closes the loop
Onehourcrafts can translate the compatibility chain into a sample plan, reference patch and lot inspection checklist. Reliable OEM punch needle kits preserve the tested relationship between tool, yarn, fabric, frame and finish. Approve the system only when a new user can reproduce the intended loops from packed contents.
Frequently asked questions
What makes punch needle components compatible?
The tool must feed the yarn, the fabric must accept and retain loops, the frame must hold tension and the finishing method must secure the intended result.
Why does yarn structure matter?
Twist, surface hair, elasticity and joins affect how yarn moves through the tool and how consistently it forms loops.
How is fabric suitability tested?
Mount the intended fabric, punch representative fills and turns, observe hole stability and loop retention, then repeat after remounting.
What should a reference patch include?
Include straight fills, curves, corners, color changes and intended pile height using the approved tool settings and materials.
Can one tool use every yarn?
No. Bore, eye, tip and adjustment interact with yarn diameter and structure. Test each claimed range instead of assuming universal use.
How should frame tension be checked?
Record slippage and retightening during a full project area, then remove and remount the fabric to test repeatability.
What belongs in the instructions?
Cover threading, tool direction, depth, spacing, corners, color changes, troubleshooting, finishing, storage and product limits.
How are substitutions approved?
Assess every affected compatibility link and require a stitched comparison with the proposed component before updating the specification.
What should production inspection verify?
Verify component identity, tool adjustment, yarn quantities, fabric and frame dimensions, point protection, instructions and a representative loop test.
What should buyers include in an RFQ?
Include the complete project specification, order tiers, sample gates, packaging, destination, test evidence, inspection rules and change-control expectations.





