

A punch needle pattern design guide should convert visual artwork into shapes that the selected tool, yarn and fabric can reproduce. Beginner-friendly patterns need clear areas, practical curves, controlled color changes and enough spacing for the loop surface. The best source illustration is not automatically the best punchable design.
Write the pattern promise
Define what the customer should recognize, how the finished piece will be used and the experience level required. A decorative flower may depend on a bold silhouette and three color areas. A character face may depend on feature placement. An abstract project may prioritize color rhythm and texture rather than precise representation.
Add the intended hoop size, displayed side, loop height, completion time range and packaging image needs. These constraints create the design boundary. If the promise is a fast first project, intricate outlines and many isolated details work against it even if they look impressive in digital artwork.
- Essential subject or visual idea.
- Target user and expected technique knowledge.
- Working area, loop side and display method.
- Color limit and intended completion effort.
Run the artwork reduction funnel
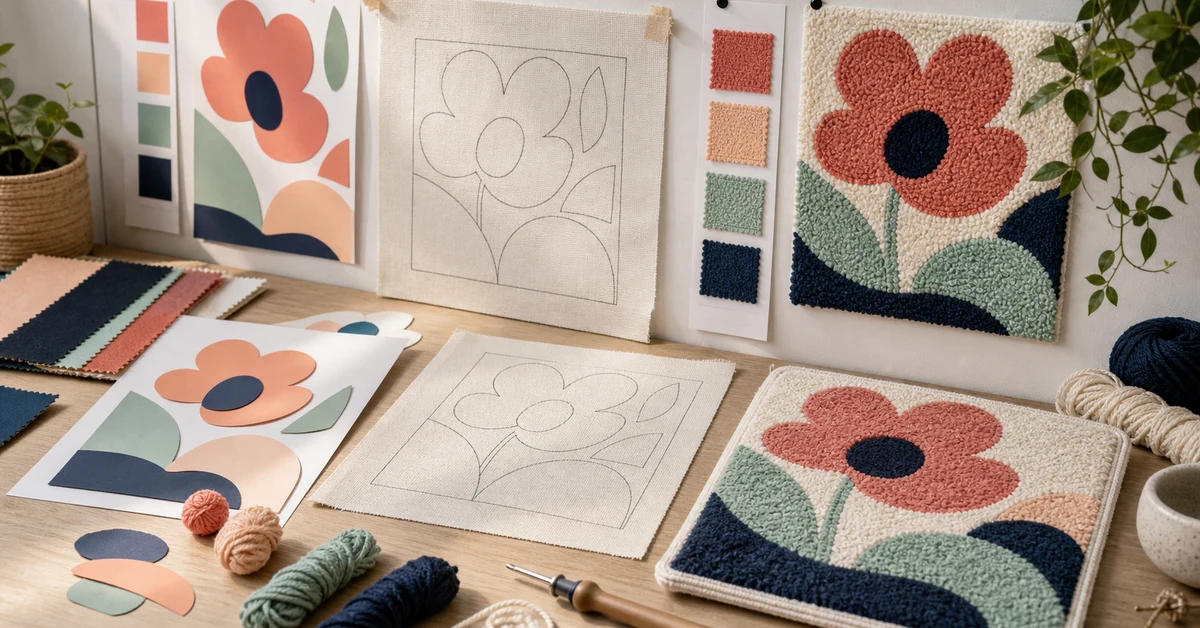
Begin with the source idea, then make three progressively simpler versions. Version one removes texture and shading. Version two combines small neighboring shapes and reduces colors. Version three keeps only the forms required for recognition. Print each at the actual working size rather than judging it on a large screen.
Ask people unfamiliar with the project what they see. If the simplest version remains recognizable, it may be strongest for a beginner kit. If an important feature disappears, restore that feature without bringing back every original detail. Reduction is controlled prioritization, not careless simplification.
- Identify the three features that carry recognition.
- Remove gradients, texture and decorative micro-details.
- Merge color areas that do not need separate punching.
- Print at hoop scale and review from normal viewing distance.
- Prototype the simplest viable version first.
Set a minimum shape vocabulary
Build the pattern from broad fills, practical curves, controlled points and clear boundaries. Very narrow channels may close when punched. Tiny islands can demand disproportionate setup and correction. Sharp digital corners often become rounded in yarn, so approve the textured interpretation rather than forcing the material to imitate vector art.
Create a stress tile containing the smallest circle, line, gap and corner that the system should reproduce. Punch it with the intended tool, yarn, cloth and spacing. The tile becomes the pattern designer's physical limit library.
| Artwork feature | Common punch risk | Design response |
|---|---|---|
| Thin line | Disappears into neighboring loops | Widen or convert to a boundary change |
| Tiny island | Difficult start, stop and correction | Merge with a larger color area |
| Sharp corner | Becomes rounded or overcrowded | Open the angle and test stitch direction |
| Narrow gap | Closes during filling | Increase separation or simplify silhouette |
Design color areas around workflow
Every color area creates a threading, starting, stopping and yarn-management decision. Count these actions, not just the number of colors. A design with four colors but many scattered islands may be harder than one with six large connected regions.
Plan an order that reduces handling over completed loops and gives the user visible progress. Large background areas can feel repetitive, while tiny details create frequent setup. Balance the rhythm. If close shades are used, confirm that they remain distinguishable in yarn and instructions under ordinary light.
- Count separate regions for each color.
- Mark recommended starting and stopping points.
- Keep early areas large enough to build confidence.
- Place difficult features after the user learns the motion.
- Avoid unsupported color changes that add no visible value.
Choose line treatment for the displayed side
The loop side and flat stitch side present boundaries differently. Decide which side is customer-facing before artwork is finalized. A narrow outline that reads on the flat side may not create the same effect on the loop side. Direction and density can also change perceived edges.
Punch the same small motif using two or three line treatments: separate outline, adjacent color boundary and negative gap. Compare recognition, effort and correction. Use the simplest treatment that supports the visual promise.
Print guidance that survives stretching
Patterns printed on fabric must remain aligned and readable when the cloth is mounted. Review the full working area for distortion, weak sections and marks that disappear beneath the first neighboring loops. Boundaries should tell the user where to work without demanding impossible precision.
If printed marks are intended to be removed, validate the documented process on production materials. Keep cleaning or care claims separate from the visual design approval. For reusable charts or transfers, ensure orientation and scale cannot be confused.
Prototype with a beginner observation script
Give the complete sample kit to target-level users and observe without adding instructions that the customer will not receive. Record where they start, whether they follow the intended color order, which boundaries create uncertainty and where loops fail. Measure completion of key stages rather than demanding that every test session finish the project.
Ask users to identify the image before starting and after several stages. This shows whether the design provides satisfying progress. Record correction events, remaining yarn and actual time. A technically punchable pattern may still be unsuitable if its effort conflicts with the product promise.
- First setup and threading without coaching.
- One broad fill area and one curved boundary.
- A color change and a small detail.
- Error recognition and recovery attempt.
- Final recognition, confidence and repacking feedback.
Approve the pattern system
The final punch needle pattern design guide should leave more than an artwork file. Retain the printed cloth, stress tile, completed sample, color sequence, yarn allowances, tool settings, user-test observations and approved pack image. Link each artifact to a revision.
When artwork, yarn thickness, needle, fabric or hoop size changes, repeat the affected stress tile and project sections. The limitation is important: aesthetic approval cannot prove material compatibility, and material compatibility cannot prove that the design is easy to understand.
- Reduced artwork and actual-size print.
- Minimum feature and spacing reference tile.
- Color-region map and recommended work order.
- Completed physical sample and time record.
- Beginner findings, revisions and known difficulty points.
Measure pattern workload before range approval
Visual simplicity and working effort are related but not identical. Estimate workload through punched area, number of separate regions, thread changes, difficult boundaries and setup steps. Then compare the estimate with observed prototype time. This makes it easier to build several designs that genuinely belong to the same stated level.
For a collection, place every completed prototype and workload record on one board. A small design with many islands may take longer than a larger design with broad fills. If two products carry the same beginner label and price position, unexplained effort differences can lead to inconsistent reviews and completion rates.
Use the punch needle pattern design guide to assign a workload band and record the reasons:
- Total punched area and largest uninterrupted fill.
- Number of color regions, starts and stops.
- Count of minimum-size details or tight corners.
- Observed setup, active work and correction time.
- Points where target users needed help or paused.
Workload is not a promise of exact completion time, but it is a useful internal comparison when supported by consistent tests.
Where Onehourcrafts fits
The Onehourcrafts punch needle DIY kit page describes pre-printed fabric, hoop, yarn, accessories and custom patterns across floral, animal, abstract and seasonal themes. A buyer can use the reduction funnel and stress tile when briefing custom artwork.
Review the component compatibility guide, the punch needle factory guide and the guide to writing craft kit instructions. Send the intended motif, hoop size, displayed side, colors, skill level, package and quantity through the contact page for prototype discussion.
Frequently asked questions
Why should punch needle artwork be simplified?
Yarn loops have physical width and rounded texture. Tiny details, narrow gaps and sharp corners may disappear or become difficult to execute. Simplification protects recognition and usability.
How many colors are suitable for a beginner pattern?
There is no fixed number. Count separate color regions and setup actions as well as colors. A few scattered colors can be harder than several large connected areas.
What is a pattern stress tile?
It is a small physical test containing the minimum lines, circles, gaps, corners and fills the design system intends to use. It defines practical artwork limits for the selected materials.
Should the loop side or flat side be chosen first?
Yes. Decide the displayed side before approving outlines, boundaries and photography because the two surfaces present shape and line treatment differently.
When does a pattern need to be re-prototyped?
Re-test after meaningful changes to scale, artwork, yarn, tool, fabric, hoop, print or work order. Repeat at least the affected stress features and representative project sections.





