

A shopper gives a craft kit only a few seconds. They look for the finished project, try to judge the difficulty, and wonder whether everything needed is inside. If the package answers none of those questions, the materials can be excellent and still remain on the shelf.
The best retail packaging ideas for craft kits do more than hold yarn, fabric, tools, and instructions. They explain the project, organize the first use, protect the components, and help the unfinished kit survive until the customer returns.
Different channels need different formats. A hanging craft-store kit, a gift box, a workshop pack, and an eCommerce product should not be forced into the same structure. These nine formats offer useful starting points for matching the package to the customer and the way the kit will be sold.
1. The window box makes the materials feel real
A clear window can show yarn texture, thread colors, a hoop, a tool, or a neatly arranged component set. It reduces uncertainty for customers who want to see what they are buying rather than relying only on an illustration.
The window should reveal something meaningful. A view of loose filling or the back of an instruction card adds little. Arrange the interior so the visible materials support the finished-project image printed beside them.
Check how the window behaves in transit and under store lighting. Thin film can scratch, reflect heavily, or separate from the carton. The insert must keep components in place without making the box difficult to pack or recycle.
2. A zipper pouch becomes part of the project
A reusable pouch gives the customer somewhere to keep unfinished work, loose tools, and leftover materials. It is especially useful for crochet, embroidery, travel projects, and kits likely to be opened over several sessions.
The pouch still needs retail communication. A paper band, hangtag, insert, or outer sleeve can show the finished result, contents, difficulty, brand, and barcode. Avoid covering the entire pouch with disposable material if reuse is the main value.
Test the zipper, seams, handle, internal space, and whether sharp tools have separate protection. A pouch that is attractive but too small to hold the work after opening fails its second purpose.
3. The resealable envelope suits compact starter projects
A strong paper or mixed-material envelope can work for small cross stitch, embroidery, felt, patch, and paper craft kits. It stores flat, ships efficiently, and can be easy to hang or display in a tray.
Use an opening that can be closed again. A tear-open pack may look neat before purchase but leaves the customer with loose thread and a needle after the first session. A zip seal, tuck flap, or reusable inner bag can improve the experience.
Protect rigid and sharp items so they do not puncture the envelope. Check whether the finished-project image remains clear when labels, contents, instructions, and required market information are added.
4. A book-style box turns instructions into the experience
A hinged or book-style package can present the project in sequence. The inside cover may hold a welcome message or first steps, while the materials sit in organized compartments. This format can suit giftable projects, premium starter kits, museum shops, and branded learning products.
The structure earns its cost when opening it feels useful, not merely theatrical. Keep the first instruction visible, make components easy to remove, and avoid deep wells that hide small tools.
Because this format uses more board, printing, and assembly, confirm the MOQ, shipping volume, and whether the package will be kept after completion.
5. A slim hanging carton works when shelf space is tight
Peg displays reward packages with a clear silhouette, strong top area, and readable front at a small size. A slim carton can protect the contents better than a simple bag while using less depth than a gift box.
Make sure the hanging point carries the product weight and survives repeated handling. Do not place the finished-project image where the hook or price label will cover it. Test several filled packs on the actual display spacing if possible.
The side panels can carry contents and difficulty information, but the main promise should stay on the front. Customers should not need to remove the product from the peg to understand what they will make.
6. The gift box sells the occasion as well as the craft
A rigid or well-finished folding box can position a kit as a birthday, holiday, new-home, friendship, or wellbeing gift. The visual language should make the recipient and occasion clear without hiding the craft itself.
Include a finished-project image and enough information for a non-crafter to choose confidently. Gift buyers may not know the difference between embroidery and cross stitch or understand why a particular hook size matters. Lead with the result and intended experience; place technical details where the maker can find them.
Consider a message area, gift sleeve, or removable card rather than printing one narrow occasion permanently on the main box. The same base package may then support several campaigns.
7. A workshop pack makes distribution fast
Workshop packaging should help an instructor place a complete project in front of every participant. Individual packs can use simple labels and shared outer packaging rather than full retail cartons.
Number thread colors, separate small components, protect needles, and make the first instruction immediately visible. Add a space for the participant's name when unfinished projects may be collected and returned.
The outer carton should make counting easy. An organizer needs to know that 24 participant kits, demonstration materials, and any shared tools are present without opening every pack.
8. A reusable starter case supports a product ecosystem
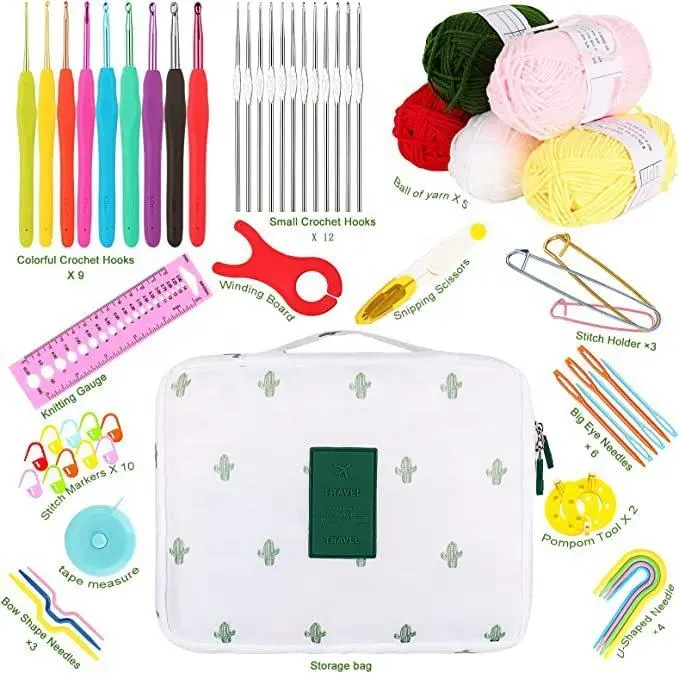
A durable case can launch a beginner into a category and create a home for future refill projects. The first kit might include core hooks, needles, markers, scissors, or storage, while later products focus on yarn, patterns, and themed materials.
This works only when the tools are genuinely useful and the case has room to grow. Fixed compartments that fit the launch kit perfectly may leave no space for the customer's next project.
Show how refills or companion products relate to the case. A starter system is easier to understand when the packaging, naming, and color coding remain consistent across the range.
9. An eCommerce mailer can become the retail package
For direct-to-consumer sales, a branded mailer may reduce the need for a second decorative box. The challenge is creating an opening experience that still organizes the components and protects the project during shipping.
Use inserts, pouches, bands, or compartments that prevent heavy tools from crushing soft materials. Put the first instruction near the top rather than beneath every component. Check whether the outside package needs to remain discreet or weather-resistant for the delivery route.
Photograph the actual unboxing sequence for the product page. Customers should see the scale, contents, and organization before ordering.
What every format still needs to explain
When comparing retail packaging ideas for craft kits, the structure changes but the customer questions remain similar:
- What will I make?
- What does the finished project look like and how large is it?
- Is this suitable for my skill level?
- What is included?
- What extra tools, if any, do I need?
- How will I keep the materials organized after opening?
- Who is the kit designed for?
Answer these in a clear order. The front can lead with the finished result, customer, and short value statement. The back or side can carry contents, difficulty, project information, instructions, brand, barcode, and required market details.
Choose the format with a simple channel test
Place a filled sample where it will really be sold. Hang it on a peg, stand it on a shelf, pack it in the shipping carton, or hand it across a workshop table. View the front from normal distance. Open it once, then try to store the unfinished materials again.
Ask:
- Can the customer identify the finished project quickly?
- Does the package protect and organize every component?
- Is the format suitable for the price position?
- Does it use shelf and shipping space sensibly?
- Can production pack it consistently?
- Does it remain useful or become waste immediately after opening?
Plan artwork after the contents are real
Begin visual direction early, but do not finalize dimensions and artwork before the contents, insert, and sample are stable. A slightly larger hoop, more yarn, or a protective needle card can change the fit.
Use a physical mockup to test type size, color, image reproduction, barcode position, closures, and internal movement. Review the package filled with production-equivalent materials, not an empty presentation model.
Where Onehourcrafts fits
Onehourcrafts supports custom product and private-label packaging across crochet, embroidery and other craft kits, and sewing products. Development can connect the project, contents, instructions, packaging, and retail presentation rather than treating the box as a separate final step.
A useful packaging enquiry includes the finished product, contents, channel, target customer, price position, package format, display method, quantity, destination market, and launch timing.
Packaging questions buyers ask
Which craft kit package is best for a first order?
Choose the simplest format that protects the contents, explains the project, fits the channel, and supports the intended price. A stock structure with custom printed elements may offer useful flexibility.
Should customers be able to see the materials?
Visibility can build confidence when texture, color, or organization matters. A window is helpful only when it reveals meaningful components and remains clear through handling and transit.
How can packaging support an unfinished project?
Use resealable envelopes, pouches, cases, compartments, thread cards, and protected tool storage. Test whether all materials fit after the customer has begun working.
Does premium packaging require a rigid box?
No. Premium presentation can come from useful structure, clear design, organized contents, good materials, and thoughtful opening. A complicated box without a customer benefit may add cost without value.
When should package artwork be approved?
Approve final dimensions and artwork after the product contents and important sample details are stable. Use a filled physical mockup to check fit and presentation.
Let the package finish the first explanation
The strongest retail packaging ideas for craft kits connect the promise on the outside with the experience inside. The customer sees what they can make, understands where to begin, and has a sensible place to keep the project until it is finished.
Contact Onehourcrafts with your craft format, contents, sales channel, packaging direction, quantity, and launch date to discuss a retail-ready kit and package structure.





