

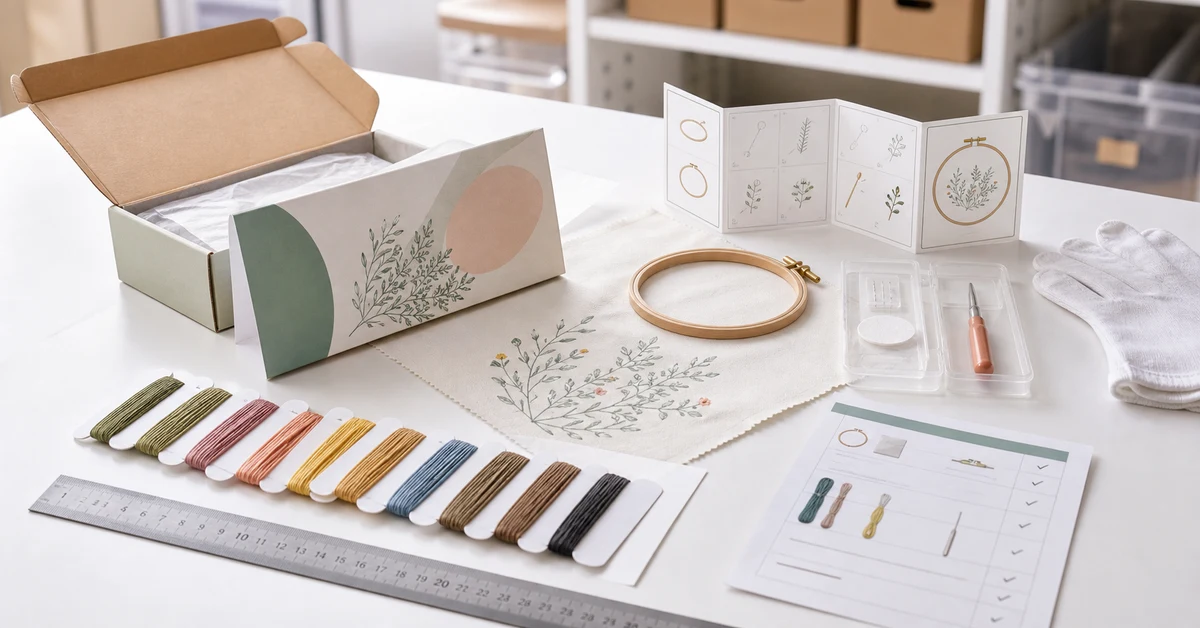
Embroidery kits for kids wholesale should be approved as complete learning systems, not as adult kits placed in smaller boxes. Buyers need to define the intended age, supervision model, project time, needle type, component security, instruction level and market-specific compliance route before comparing prices. A good program lets a child understand the project, handle the materials safely and finish something recognizably close to the pack image.
Define the child, the channel and the adult role
Start with a narrow user statement. “For children” is not a specification. A kit for an eight-year-old working with a parent differs from a classroom kit used by ten-year-olds and from a craft-store product intended for independent teenagers. Age grading affects design complexity, needle selection, warning language, packaging and how much adult setup is acceptable.
| Program | Use setting | Buyer priority | Likely support need |
|---|---|---|---|
| Family activity | Home with adult nearby | Clear shared steps and tidy storage | Parent setup and troubleshooting |
| Classroom or workshop | Supervised group | Fast distribution and count control | Teacher guide and spare components |
| Retail starter kit | Gift or self-directed purchase | Accurate age claim and visible outcome | Highly visual instructions |
| Promotional program | Event or branded campaign | Compact format and controlled messaging | Simple project with predictable timing |
Write the adult role into the brief: required, recommended or not normally needed after setup. That decision prevents the design team from hiding difficult threading, knotting or finishing behind a vague “adult supervision” statement.
A children's embroidery kit supplier should explain how those user assumptions changed the project, tool pack and instructions rather than presenting one generic age label.
Choose a project that can survive first-time handling
A child-friendly pattern needs generous visual landmarks, forgiving stitch placement and a finish that still looks good when tension varies. Large shapes, limited color changes and short stitch paths generally produce a better first result than dense shading or tiny outlines. The sample team should test the project with target-level users, not only skilled embroiderers.
- Limit the number of stitch types introduced in one project.
- Use clearly differentiated floss colors and symbols.
- Keep critical details away from the hoop edge.
- Provide a visible checkpoint after each major section.
- Design finishing so it does not require hidden specialist tools.
Record actual completion time, requests for help and common mistakes. These observations provide better age-grade evidence than a designer's estimate.
Build a controlled component specification
The bill of materials should identify every part by measurable attributes. “Embroidery floss,” “needle” and “fabric” are insufficient for repeat orders. Define fiber, color reference, strand count, length, needle point, eye size, hoop dimensions, printed or counted fabric, instruction revision and packaging quantity.
| Component | Specification points | Approval evidence | Typical failure |
|---|---|---|---|
| Fabric | Fiber, weave, dimensions, edge treatment, print alignment | Measured sample and wash/rub review if relevant | Fraying or distorted artwork |
| Floss | Fiber, color, length, organization, allowance | Color card and completed-project consumption | Color mix-up or shortage |
| Needle | Length, point profile, eye, finish, count | Tool drawing and protective-pack check | Wrong eye size or exposed point |
| Hoop | Diameter, material, closure, edge finish | Fit test with supplied fabric | Slipping fabric or rough edge |
| Instructions | Language, revision, diagrams, warnings, QR destination | Independent user trial | Ambiguous action or dead link |
Link component codes to the approved sample so a replacement material cannot enter bulk production without review.
Treat safety and compliance as a classification task
Requirements depend on the product's intended age, claims, components and destination market. The U.S. Consumer Product Safety Commission's Art and Craft Safety Guide explains labeling and material considerations for art supplies, while its small-parts guidance describes the U.S. ban and warning framework. For the EU, the European Commission summarizes the toy safety framework, including the current transition toward Regulation (EU) 2025/2509.
Do not copy a warning from another kit and assume it solves classification. Ask a qualified compliance specialist to determine whether the finished product is a toy, an art material, a general consumer product or another regulated category in each target market. The technical file should connect the decision to the actual components, age claim, instructions and packaging.
Design needle protection for the whole journey
Needle control begins before the consumer opens the pack. Specify how needles are counted, retained, inspected and protected from assembly through distribution. A loose needle in a retail box is both a safety concern and a serious quality failure.
- Receive needles in identified lots and verify finish and dimensions.
- Place each needle in a defined holder, tube or sealed card position.
- Use a count method that can detect an empty or incomplete holder.
- Inspect the closed retail pack for migration after vibration and drops.
- Define line clearance and rejected-needle disposal.
- Reconcile issued, packed, damaged and returned quantities by batch.
The protective solution must remain understandable to the user. If opening the holder requires unsafe force or releases several needles at once, the pack design has not solved the practical risk.
Test the instructions with target-level users
Independent trials should use the production-intent fabric, floss, hoop, needle and layout. Do not let the designer coach the first session. Record where the user pauses, misreads a symbol, loses a strand, cannot thread the needle or reaches a visual result that differs from the pack.
Borrow the revision discipline from the chart symbol design guide and the craft kit instruction workflow. Every diagram, color label and numbered step should point to the same approved project revision. Translate only after the technical source is stable.
Approve quality with measurable checkpoints
Incoming checks should cover fabric dimensions, artwork position, floss colors, hoop function and needle protection. In-process checks should verify component counts and instruction revision. Final inspection should confirm appearance, barcode, seals, warnings, assortment ratio and carton marks.
- Critical: exposed sharp point, prohibited component, wrong warning or missing safety document.
- Major: missing material, wrong color, unreadable instruction, failed hoop or incorrect barcode.
- Minor: small cosmetic variation that does not affect use, safety or saleability.
Define sampling and acceptance rules in the purchase specification. AQL language without defect examples leaves inspectors to make commercial decisions at the end of production.
Plan the range instead of buying isolated designs
A coherent children's embroidery range can share hoop sizes, needle holders, instruction architecture and packaging dimensions while varying artwork and difficulty. Shared platforms reduce unnecessary complexity, but only when color cards and instructions remain unmistakably linked to the correct SKU.
Use a range matrix with age band, theme, project time, stitch set, finished size, retail price target and seasonal role. This exposes duplicate offers and helps buyers decide which designs deserve samples first. For skill labeling, use the scoring method in the craft kit skill level guide.
Compare packaging by protection and teaching value
Packaging must protect the needle, keep floss organized and explain the project quickly. A window may improve shelf communication but can add material, assembly time and transit vulnerability. A compact box can look premium yet become frustrating if components return poorly after first use.
Retail ready embroidery kits also need approved barcode position, shelf orientation, legal text, assortment identification and a pack image that matches the supplied project.
| Format | Strength | Risk to review | Best fit |
|---|---|---|---|
| Paperboard box | Strong storytelling and stacking | Insert movement and excess volume | Gift and craft retail |
| Hanging pouch | Efficient peg display | Needle migration and crushed hoop | Value-led ranges |
| Reusable case | Storage after opening | Cost, closure durability and material mix | Premium starter kit |
| Classroom bulk pack | Fast group distribution | Individual identification and spare control | Education programs |
Set MOQ, sampling and lead time by change level
MOQ is driven by more than final assembly. Custom printed fabric, floss dye lots, boxes, inserts and translated instructions may each have different economic quantities. Ask suppliers to separate stock-component MOQ, printed-material MOQ and finished-SKU MOQ.
A useful sampling sequence is concept sample, technical sample, user-test sample, packaging sample and pre-production sample. Lead time should begin only after artwork, colors, safety route and bill of materials are approved. If a launch date cannot absorb a complete retest, reduce the number of custom elements rather than compressing every control.
Model total cost and avoid false savings
Compare quotations against the same specification and commercial terms. A lower unit price can be erased by high replacement rates, confusing instructions, mixed floss, weak packaging or compliance rework.
- Tooling, artwork, testing and sample charges.
- Component, labor and packaging cost.
- Inspection, rework and spare-material policy.
- Master-carton volume and freight assumptions.
- Returns, customer service and markdown exposure.
Use a landed-risk comparison rather than choosing from unit price alone. The best value is the configuration that meets the intended learning outcome with documented, repeatable controls.
Where Onehourcrafts fits
Onehourcrafts can support buyers developing embroidery kits for kids wholesale by connecting product design, material selection, sample iteration, private-label packaging and production controls. A productive inquiry should state destination markets, intended age, sales channel, annual forecast, target retail price, project theme, packaging format and required compliance documents. Buyers should request a written component specification, sample approval record and defect classification before placing bulk orders.
For custom kids embroidery kits, freeze artwork rights, color standards, translation ownership and permitted supplier use before files move into printing and bulk material purchasing.
The company profile states manufacturing experience since 1988, BSCI certification and OEM/ODM support. These are supplier-level signals; each children's SKU still needs product-specific classification, testing and approval for the intended market.
Frequently asked questions
What age should a children's embroidery kit target?
Choose the age after evaluating needle type, dexterity, stitch complexity, reading level and supervision. Do not assign an age from artwork style alone.
Can a blunt needle remove every safety concern?
No. Point profile matters, but eye size, length, retention, breakage, user behavior, small components and market classification also require review.
How many colors should a beginner kit include?
Use enough colors to create a satisfying result without making sorting and chart reading difficult. Target-user trials provide better evidence than a fixed universal number.
Should fabric be pre-printed or counted?
Pre-printed guides can reduce interpretation work. Counted designs may suit older or more experienced users. Test print visibility, alignment and removal claims where applicable.
What should a sample approval include?
Approve the complete kit: fabric, floss, hoop, needle holder, instructions, finished project, warnings, retail packaging and master-carton arrangement.
How is MOQ calculated?
MOQ depends on custom fabric, floss, packaging, print processes and assembly efficiency. Request separate minimums for materials and finished SKUs.
How long does development take?
Timing depends on artwork maturity, user testing, revisions, translation, testing and packaging. Plan multiple approval stages instead of one cosmetic sample.
Can the kit use private-label packaging?
Yes, subject to confirmed artwork, barcode, legal text, warnings, material choices, print minimums and final packaging approval.
How should intellectual property be handled?
Provide artwork ownership or licensing evidence, define permitted use in writing and control access to character files, patterns and packaging assets.
What information should an RFQ contain?
Include market, age, project concept, dimensions, materials, kit contents, packaging, forecast, target date, testing needs and a reference image or draft specification.
Release a kit children can actually complete
Successful embroidery kits for kids wholesale combine a realistic age promise with controlled components, secure needle packing, tested instructions and evidence appropriate to the destination market. Freeze the complete user experience before production, then inspect the same features that made the approved sample understandable and satisfying.





