

A punch needle hoop size guide should match the frame to the pattern's active working area, fabric tension, hand access and retail package. The finished artwork diameter alone does not determine the right tool. A hoop must hold enough fabric for secure tension while letting the user reach edges, rotate the work and complete the design without constant disruptive repositioning.
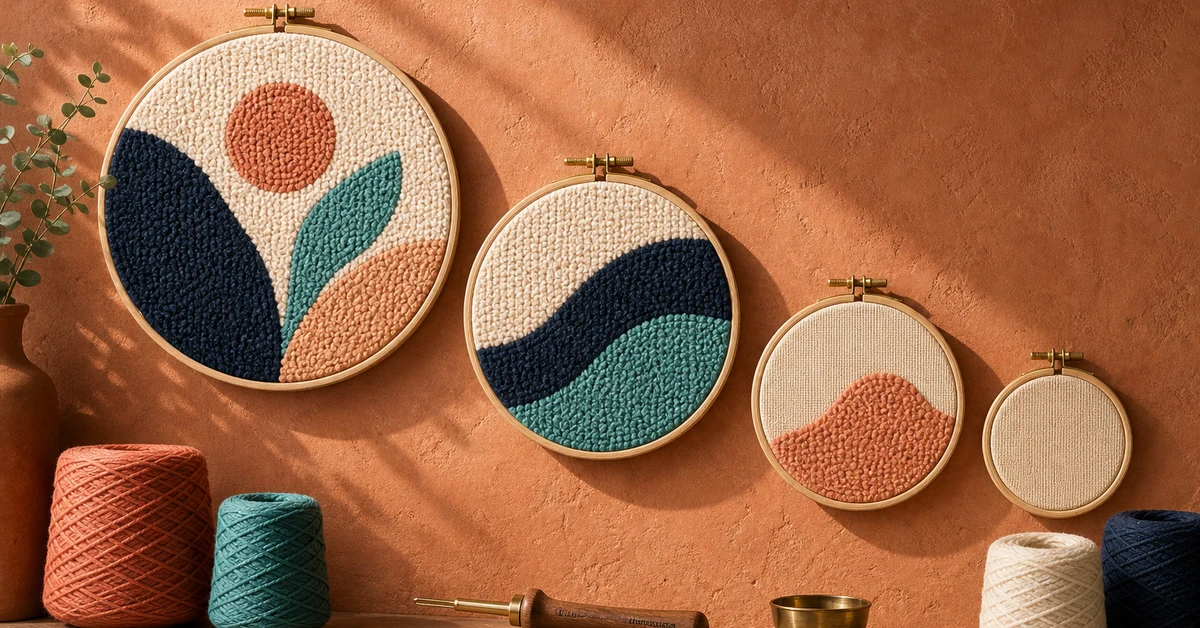
Separate finished size from working size
Start with the artwork boundary, then add the space needed to punch comfortably. The needle, user's hand and yarn path occupy room beyond the visible motif. A pattern that nearly touches the inner ring may force awkward tool angles and weak tension near the edge. Mark the intended design area, trim allowance and clamping zone as three different regions.
If the finished piece will stay in the hoop for display, the final framing relationship matters too. The art may need even margins and a clean background zone. If the hoop is only a working tool, excess fabric must still be sufficient for gripping, repositioning or later finishing. Document which role the hoop serves because display and process requirements can lead to different dimensions and finishes.
- Artwork zone: the visible punched shapes.
- Working clearance: space for the tool, hand and edge stitches.
- Clamping zone: fabric held between the rings.
- Finishing allowance: material needed for trimming, backing or display.
Draw the usable workspace geometry
Make a full-size paper or fabric template of the proposed hoop opening. Overlay the pattern and trace the true reachable area. Circular hoops lose useful corner space when a rectangular design is placed inside them. The smallest diameter that encloses the artwork may leave only narrow crescents for hand access.
Test several pattern positions instead of assuming perfect centering. Beginners may mount the fabric slightly off center. A tolerant kit should still provide workable clearance. For directional designs, decide whether the user will rotate the hoop or keep the artwork upright. Rotation can improve access but may twist yarn or confuse orientation unless the instructions anticipate it.
| Geometry question | Risk when ignored | Evidence to keep |
|---|---|---|
| Does the complete motif fit? | Pattern crosses the clamping zone | Full-size overlay |
| Is edge clearance usable? | Needle enters at a poor angle | Edge punch sample |
| Can the hand reach all areas? | Grip becomes tiring or unstable | User handling notes |
| Can the work rotate? | Yarn catches or pattern orientation is lost | Working sequence trial |
Compare tension across hoop diameters
Hoop size affects more than reach. Larger openings place greater demand on ring stiffness and fabric grip. The center can become soft even when the edge feels tight. Small hoops can create strong tension but may require repositioning for a larger design. Use the production fabric, ring material and fastening hardware for trials.
Mount equal fabric samples in adjacent hoop sizes and record setup time, tension at the center and edge, slippage after punching, and whether retightening is required. If an objective tension instrument is unavailable, use a controlled comparative method: the same operator, fabric orientation, tightening sequence and test pattern. Photograph distortion and mark any movement relative to the ring.
- Cut samples with equal grain orientation and allowance.
- Mount them using one documented tightening sequence.
- Punch a center field and an edge field.
- Measure or compare fabric movement after a fixed duration.
- Repeat after removing and remounting the material.
Check ring construction and fabric grip
Two hoops with the same diameter may behave differently. Ring depth, wall thickness, roundness, screw travel, joint quality and surface texture influence grip. A shallow flexible ring may deform under tightening. A rough surface can damage open-weave cloth, while an overly smooth ring may allow gradual slippage.
Inspect several production samples. Confirm that the inner and outer rings remain evenly nested and that the fastener can be adjusted without sharp edges or excessive force. If the hoop includes a lip, groove or non-slip feature, test it with the intended fabric thickness. A feature that improves grip on thin cloth may prevent proper seating with thicker material.
- Nominal inner opening and acceptable out-of-round limit.
- Ring depth, wall thickness and material.
- Fastener type, travel and tightening access.
- Surface finish and permitted cosmetic variation.
- Grip performance with the approved fabric.
Evaluate hand access and working rhythm
Ask target users to mount the fabric and punch a representative pattern section. Observe how they hold the hoop, whether fingers obstruct the back, and how often they change grip. A very small hoop may be easy to hold but leave little space for the supporting hand. A large hoop may provide a generous field but become tiring for users with smaller hands.
Include edge work, curves, dense fills and color changes. The yarn feed should remain free when the hoop is rotated or rested on a table. If the kit expects use with a stand, the stand connection and balance become part of the size decision. Do not approve a handheld test and assume the same dimensions work in another support system.
| Observed behavior | Possible cause | Development response |
|---|---|---|
| Frequent grip changes | Hoop is too large or edge access is poor | Try a smaller diameter or revise sequence |
| Fabric softens at center | Opening exceeds grip capability | Improve ring construction or reduce size |
| Needle catches the inner ring | Artwork is too close to the boundary | Add clearance or enlarge the hoop |
| Yarn snags during rotation | Feed path is not controlled | Add handling guidance or change orientation |
Decide whether the fabric must be repositioned
A larger design can be worked in a smaller hoop by moving the fabric, but this is not automatically beginner-friendly. Previously punched loops may be crushed or pulled when clamped. Repositioning can also distort the pattern and make alignment difficult. Test the exact sequence before offering a small hoop as a universal solution.
If repositioning is required, map safe clamp zones and show them in the instructions. Use a backing or protection method when necessary, and confirm that the fabric can be retensioned without shifting the transferred pattern. Count the number of moves. A product that requires repeated remounting may need a larger frame, a simplified design or a clearer skill-level position.
Fit the hoop into the retail package
Tool dimensions affect carton size, freight, shelf presentation and component protection. Measure the external hoop diameter, fastener projection and any display hardware rather than using the inner opening alone. Check whether the fastener presses into yarn, fabric or printed instructions during transport.
A slightly smaller hoop can reduce package volume, but only if it still passes the workspace test. Do not let the carton define the tool before the pattern has been validated. If a larger approved hoop changes the commercial target, compare a different pack orientation, detachable fastening hardware or a flat frame architecture with actual prototypes.
- External dimensions in the intended closed position.
- Fastener protection and component separation.
- Carton orientation and retail display needs.
- Movement after drop and vibration handling.
- Customer ability to remove the hoop without damage.
Freeze a hoop-and-pattern approval record
This is where the punch needle hoop size guide becomes a product specification. Keep the full-size pattern overlay, winning working sample, fabric allowance, tension notes, user trial and packaging fit record together. State whether the hoop is a working tool, final display frame or both.
Define substitution triggers. A change in ring material, depth, groove, screw, surface or supplier can alter grip even when diameter is unchanged. A revised pattern or thicker yarn can change reach and clearance. Require relevant retesting instead of approving replacements from a dimension sheet alone.
Challenge the choice with boundary conditions
Test the densest filled area at the hoop center and the most detailed edge area near the ring. Repeat setup with a user who mounts the fabric imperfectly. Try the allowed fabric tolerance and inspect whether thinner or thicker lots still grip. Store a mounted sample long enough to reveal relaxation or ring marking.
Also open the packed kit in the customer's sequence. The hoop should not arrive warped, separated in a confusing way or hidden beneath components that must be removed first. Instructions should name the hoop role and mounting method before the first punching step. A stable choice works from unboxing through finishing, not only in a development photo.
Where Onehourcrafts fits
The Onehourcrafts punch needle DIY kit page describes customizable hoops, fabric, punch needles, yarn, patterns and packaging. Buyers can submit a working-zone drawing and approved tension sample so hoop size is reviewed as part of the complete material system.
Connect this punch needle hoop size guide with the pattern design guide, component compatibility guide, skill-level framework and sampling timeline guide. Send the full-size artwork, fabric, desired display result, target user and package limits through the contact page. Final dimensions should be approved with production-equivalent components.
Frequently asked questions
Should the hoop be larger than the finished artwork?
Usually yes. The user needs clearance for the punch needle, hand and secure clamping. The exact margin should be tested with the production pattern and fabric rather than selected from a generic rule.
Is a larger hoop always easier for beginners?
No. A larger hoop offers more working area but may lose center tension or become tiring to hold. Compare reach, grip and comfort with target users.
Can a project be moved inside a smaller hoop?
It can, but repositioning may crush loops, shift the pattern or add difficult steps. Validate the sequence and show safe clamp zones if the kit requires it.
What hoop dimensions belong in the specification?
Record inner opening, external diameter, ring depth, wall thickness, fastener projection, material, surface and relevant tolerances, plus grip performance with the approved fabric.
What changes should trigger a new hoop test?
Retest after changes to diameter, construction, fastener, material, fabric, pattern scale, yarn thickness, finishing method or package orientation.





