

A crochet pattern verification checklist should prove that an independent maker can reproduce the approved project from the released instructions, components and yarn allowance. Verification needs more than proofreading sentences. Recalculate stitch logic, trace every shaping event, stitch the complete pattern without designer coaching, reconcile material use and close every revision before files reach production.
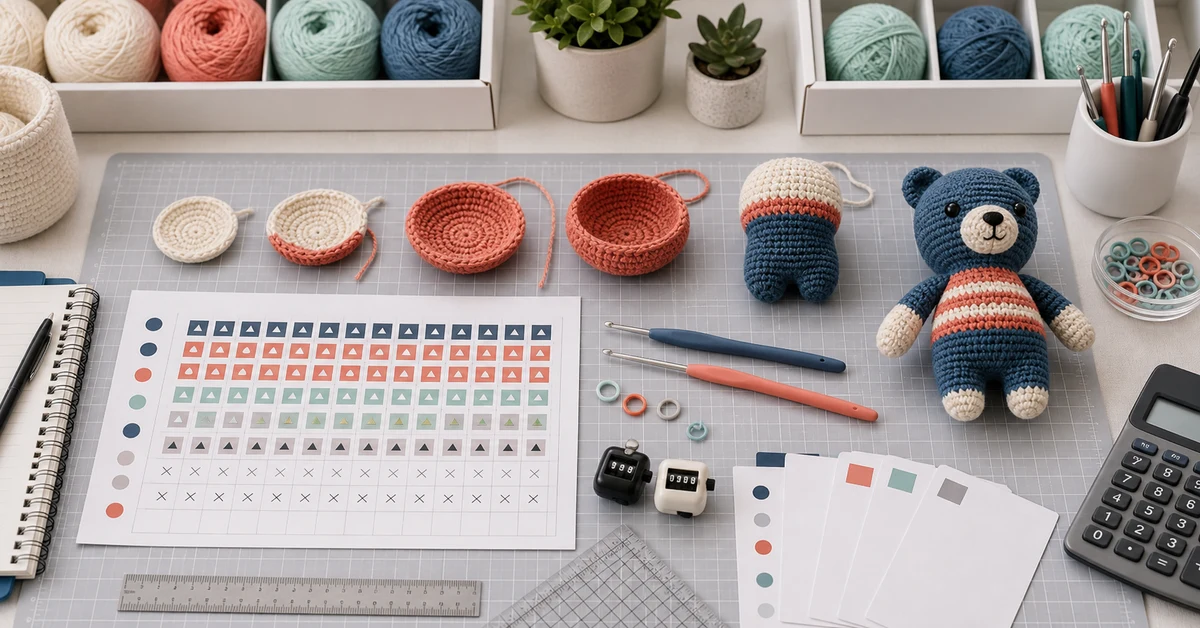
Freeze the inputs before testing
Pattern checking becomes unreliable when the design, yarn and hook continue changing during the test. Establish a review version and identify the exact materials used. The verifier should know what is controlled and what may still be challenged.
- Pattern file name, language and revision.
- Approved yarn construction, color sequence and quantity.
- Hook size and any permitted alternate size.
- Finished dimensions and intended fabric character.
- Reference sample version and approval photographs.
- Target user, terminology standard and measurement units.
If a component changes during verification, log the change and restart the affected checks. A pattern tested with one yarn cannot automatically validate a bulk kit using a different diameter, twist or surface.
Build a pattern logic ledger
Translate the pattern into a compact row or round ledger. The ledger records starting count, operations, repeats, expected ending count and any marker movement. It exposes arithmetic errors that may hide inside fluent prose.
| Step | Start count | Operation logic | Expected end | Dependency |
|---|---|---|---|---|
| Foundation | Defined by setup | Chain or ring construction | First working count | Turning or joining method |
| Increase section | Previous end | Repeat multiplied by change | Calculated new count | Marker placement |
| Even section | Previous end | No net count change | Same count | Specified number of rows |
| Decrease section | Previous end | Repeat multiplied by reduction | Calculated lower count | Spacing and symmetry |
| Assembly point | Completed pieces | Alignment references | Finished structure | Orientation and seam method |
Calculate repeats independently instead of trusting the written total. Check that the repeat fits the available stitches and that any unworked stitches are intentional. For shaped pieces, compare left and right operations or paired components so an unnoticed offset does not become part of production.
Audit terminology and action order
Use one terminology system consistently. A mixed use of regional stitch names, undefined abbreviations or changing phrases increases error risk. Confirm that every abbreviation appears in the key and that special techniques are explained before first use.
- List every action word, abbreviation and symbol.
- Check each term against the selected language convention.
- Confirm that actions appear in the order the maker performs them.
- Separate instructions from optional tips and troubleshooting notes.
- Verify references to color, side, orientation and component name.
- Remove directions that depend on an image not included in the pack.
Read the pattern aloud as an action sequence. Long sentences often contain several operations, a repeat and an exception. Break them into steps where the user must count, change direction or make a decision.
Test every count transition
The most expensive errors usually occur where counts change. Review increases, decreases, skipped stitches, joined rounds, turning chains and attachments. The ending count must follow from the written operations, not from the designer's intended shape.
| Risk point | Question | Evidence | Typical error |
|---|---|---|---|
| Repeat | Does the repeat use the stated number of stitches? | Expanded arithmetic | Repeat cannot fit the row |
| Turning edge | Does the chain count as a stitch? | Terminology rule and sample | One stitch added or lost per row |
| Joined round | Where does the next round begin? | Marker and seam view | Unintended spiral or duplicate stitch |
| Shaping | Are increases or decreases distributed correctly? | Count map and silhouette | Asymmetry or flat spot |
| Attachment | Do references exist on both parts? | Row and stitch landmarks | Misaligned component |
For patterns where dimensions matter, connect count checking with the crochet kit gauge swatch guide. Correct arithmetic can still produce the wrong size if the gauge definition is absent or unrealistic.
Run an independent stitch-through
The designer should not be the only tester. Give the frozen pattern, kit components and normal customer support materials to a maker who did not participate in development. Ask them to mark every point where they hesitate, infer missing information or choose between plausible meanings.
- Record start and finish time by major section.
- Mark any step read more than once.
- Photograph checkpoints before errors are corrected.
- Record actual stitch counts and finished dimensions.
- Weigh or measure yarn use by color.
- Note where a diagram or close-up would prevent explanation.
Do not answer questions during the first pass unless progress is impossible. The question itself is evidence. If the verifier receives coaching, separate the pre-coaching result from the corrected result.
Compare the result with the approved sample
Use standard front, side, top and detail views. Compare dimensions, silhouette, color position, fabric feel, seam placement and finishing. A project can match the stitch count while looking different because loop height, stuffing, joining tension or blocking is unspecified.
Classify differences before editing:
- Pattern error: the written action cannot produce the intended result.
- Instruction gap: the action is possible but a decision is not explained.
- Component mismatch: supplied yarn, hook or accessory changes performance.
- User variation: the result remains within a tested acceptable range.
- Sample inconsistency: the reference does not follow the released method.
This prevents every visual difference from becoming a wording change. Pair the review with the stitch tension guide when the discrepancy sits at the edge of normal hand variation.
Reconcile yarn and component requirements
Verification should confirm that the bill of materials supports the pattern as written. Record yarn consumption from the independent stitch-through, including tails, color changes, swatching and reasonable correction. Check whether accessory counts match every instructed use.
- Yarn quantity by color and total project quantity.
- Hook and needle dimensions named in the instructions.
- Number and type of markers used simultaneously.
- Stuffing, closures, fasteners or decorative components.
- Tools assumed but not included in the kit.
Use the tested data in the crochet kit yarn quantity calculation. A correct pattern with insufficient material still creates a failed customer experience.
Proof the visual instruction system
Check that photos, diagrams and video show the same revision as the text. Hand position should not hide the critical loop. Color labels must match the organizer and bill of materials. Captions should describe the decision shown rather than repeat a generic heading.
Use a cross-reference table:
| Pattern step | Visual reference | Required view | Revision check |
|---|---|---|---|
| Setup | Diagram or close-up | Loop path and orientation | Matches current stitch count |
| Special stitch | Photo sequence or video | Entry, yarn-over and completion | Uses approved yarn and hook |
| Shaping | Checkpoint image | Position of changes | Matches current row numbering |
| Assembly | Multi-angle view | Alignment and seam path | Uses approved component version |
The workflow in crochet kit video instructions helps keep filmed steps tied to the released pattern instead of becoming an untracked alternative version.
Close revisions with a second verification pass
Log each issue with location, severity, owner, proposed correction and retest result. After edits, verify the affected step and any downstream counts or references. A change to row numbering can alter photos, charts, assembly notes and video timestamps even if stitch logic is unchanged.
- Correct the source file, not only a printed copy.
- Update the revision and change summary.
- Recalculate dependent counts and measurements.
- Repeat the affected stitch section.
- Check all visual and material cross-references.
- Release one controlled production file set.
Where Onehourcrafts fits
Onehourcrafts can help retail teams connect custom pattern development with yarn, tool, sample and packing controls. A useful inquiry includes the project concept, target skill level, dimensions, terminology market, desired components and any existing pattern draft. Buyers can request independent pattern testing, material-use evidence and controlled revision records before production. The crochet pattern verification checklist should identify the exact pattern revision used for the approved stitch-through.
For multi-language programs, freeze the technical source first. Translation review should preserve counts, references and action order, then receive its own layout proof so line breaks and page changes do not separate warnings or captions from the steps they explain.
The final difficulty should also match the promised craft kit skill level. Verification reveals not only errors but also hidden decisions that make a supposedly beginner pattern behave like an advanced one.
Frequently asked questions
Is pattern proofreading the same as pattern testing?
No. Proofreading checks language, consistency and formatting. Pattern testing requires an independent maker to follow the instructions, confirm stitch logic, compare the result and record material use.
How many people should test a crochet pattern?
Use at least one independent technical verifier and target-level users when practical. More complex construction, multiple sizes or higher production risk may justify broader testing.
Should the designer answer questions during testing?
Capture the unassisted result first. Clarification may be necessary to continue, but record what was missing and retest the corrected instruction without relying on verbal coaching.
When must a pattern be retested?
Retest when stitch logic, yarn, hook, dimensions, construction order, terminology, visuals or important components change. Review downstream references after any row or round renumbering.
What is the final approval evidence?
Keep the released pattern, logic ledger, independent stitch notes, completed sample measurements, yarn-use record, issue log and approval images together under one revision.
Release instructions that reproduce the product
A dependable crochet pattern verification checklist connects arithmetic, language, components and the finished object. Independent stitching and controlled revision closure turn the pattern from a designer's memory aid into a retail instruction system that customers and production teams can use consistently.





