

A cross stitch thread organizer design should let a customer identify, remove, use and return every floss shade without relying on guesswork. The organizer is not only a packing accessory. It is a visual control that connects the thread inventory to the symbol key, reduces similar-color errors and keeps the remaining material usable through the project.
Map the mistakes the organizer must prevent
Begin with an error map rather than a favorite card shape. Review the artwork and identify shades that are visually close, colors used in small isolated areas, blended stitches, backstitch threads and any symbol that a beginner could confuse. Note when a shade first appears and whether it returns later. The design should make the highest-risk decisions the easiest to perform correctly.
Consider the full customer sequence. A user opens the kit, matches a physical thread to a chart reference, removes a workable length, separates strands, stitches, and stores the remainder. Errors can enter at each point. Loose bundles may look clear during factory packing but become mixed after the first session. A beautiful organizer may fail if thread catches during removal or if printed identifiers are hidden by loops.
- Adjacent shades that differ only slightly in value or hue.
- Symbols with similar shapes or small printed details.
- Colors used for only a few stitches.
- Threads required again after a long gap in the pattern.
- Special strands used for outlines, highlights or blending.
Choose the organizer architecture
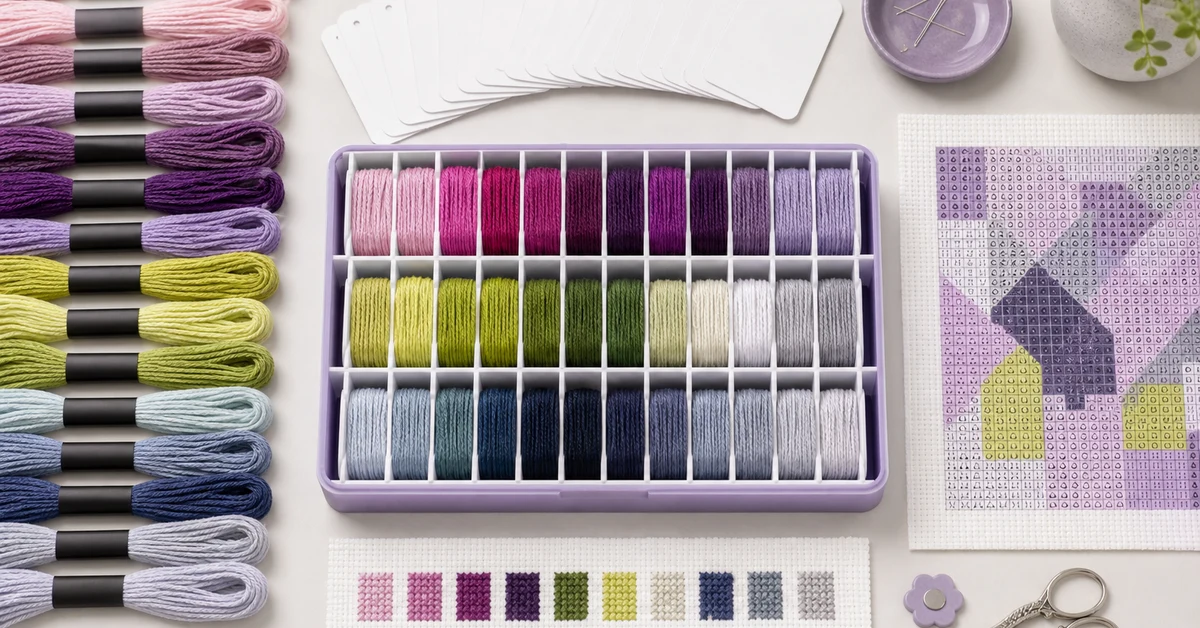
Common formats include punched cards, slotted cards, bobbins, compartment trays and pre-sorted bundles attached to a labeled strip. Each architecture changes the way thread is loaded and removed. A punched card is compact, but crowded holes can tangle long loops. A bobbin controls loose floss well, but adds winding work and may create strong folds. A tray protects separation but increases package volume.
Score formats against the actual kit instead of selecting one rule for every product. A small pattern with eight distinct shades can use a simple card. A detailed design with many near-neighbor colors may need more spacing, grouped sections or a tray. If the kit is positioned for travel, thread retention after repeated opening matters more than a display that only looks orderly at first unboxing.
| Format | Strength | Watch point |
|---|---|---|
| Punched card | Compact and easy to scan | Loops can overlap or pull through |
| Slotted card | Fast loading and removal | Slots may release thread in transit |
| Bobbins | Controls loose remaining floss | Requires winding and more handling |
| Compartment tray | Strong physical separation | Uses more package space |
| Labeled bundles | Simple for low color counts | Harder to return partial strands neatly |
Build a visual identification hierarchy
Use more than one signal to identify a shade. Position, a printed code, the chart symbol and a color group can reinforce one another. Do not rely on printed color swatches alone because ink, screen and lighting differences can make close shades unreliable. The physical floss must remain the primary material reference.
Arrange the organizer in a deliberate order. A light-to-dark sequence may help compare neighboring values, while chart order may reduce searching during the pattern. Another option groups colors by motif or stitching stage. Choose the logic that matches the instructions, then use it consistently across the organizer, chart legend and component list.
- Assign every shade one stable identifier.
- Pair that identifier with the exact chart symbol.
- Place risky similar shades apart or add a separator.
- Mark special-use threads with a distinct role cue.
- Verify that all references agree after artwork revisions.
Control spacing, holes and thread retention
Prototype the organizer with the actual number and length of thread bundles. Hole diameter, edge finish, spacing and card stiffness affect performance. A hole that is too small can abrade or compress the floss. A large hole may allow the loop to release. Closely spaced holes can turn separate shades into one tangled mass when the card moves inside the package.
Inspect cut edges and printed surfaces. Paper dust, rough fiber edges, burrs or wet ink can transfer to pale thread. Test the card after normal bending and humidity exposure. If the organizer uses folded board, make sure the fold does not crush loaded floss or hide identifiers. Thread should release without forcing the user to pull the entire bundle through a narrow opening.
- Hole or slot dimensions and accepted tolerance.
- Minimum spacing between loaded bundles.
- Board thickness, stiffness and edge quality.
- Maximum loaded thread length per position.
- Retention after shaking, shipping and repeated use.
Design for strand removal and return
Cross stitch floss is often divided into strands, so the organizer should support partial use. Ask beginners to remove a practical length, separate the required strands and store the rest. Observe whether remaining floss stays identified or becomes a loose, anonymous piece. If the organizer only works before the first cut, it is a presentation insert rather than a complete working system.
Decide how the instructions will handle partial lengths. Users may return them to the original hole, park them in a temporary area or discard lengths below a stated minimum. A small parking zone can help, but it must not resemble a new color position. If several blended colors are used, provide a clear method for keeping prepared combinations separate from original shades.
| User action | Failure signal | Design response |
|---|---|---|
| Remove one length | Neighboring loops pull out | Increase spacing or improve retention |
| Separate strands | Remaining bundle tangles | Adjust loop length and handling guidance |
| Return a partial length | Shade identity is lost | Add a defined parking position |
| Close the package | Thread escapes or knots | Add protection or change pack orientation |
Connect the organizer to packing control
The same design should help the factory verify contents. Create a master loading map that shows every organizer position, shade identity and required quantity. Packing staff should not have to interpret the consumer chart while kitting. Use controlled samples for similar colors and define lighting or comparison conditions when visual distinction is difficult.
Total floss weight cannot prove that the correct shades are present. Count positions, verify shade placement and use weight only as a secondary check. If several lengths share one hole, specify the count or folded bundle construction. A missing small accent may barely change total mass but can stop the customer near the end of the project.
- Master organizer diagram with position numbers.
- Approved physical floss references.
- Required lengths, folds or bundles per position.
- In-process check before the organizer is enclosed.
- Final comparison with the chart legend revision.
Run a blind setup test
Give a complete sample kit to testers who have not seen the development files. Ask them to identify the first required color, remove the correct thread and begin the pattern using only the customer materials. Record time, questions, wrong selections and any place they turn back to compare shades. Do not explain the intended organizer logic during the test.
Continue long enough to include a color change and a returned partial strand. The first selection may be easy because the organizer is pristine; the second session shows whether the system survives real use. Test in ordinary home lighting as well as the development studio. Close shades that look distinct under bright inspection lamps may become confusing near a warm household light.
This is where the cross stitch thread organizer design should be approved as part of the instructions, not as separate packaging artwork. Freeze the successful loading sequence, identifiers and handling method together. If the pattern legend changes, the organizer needs a linked revision review.
Stress the system before production
Shake the packed kit, drop the retail box within the agreed handling test and reopen it. Confirm that bundles remain in their positions and printed identifiers are readable. Repeat removal from the most crowded positions. Store samples for a practical period to check whether tight bends, coatings or board contact leave marks on pale floss.
Challenge the design with likely substitutions. A slightly thicker floss bundle may overcrowd a hole, while a longer cut length may tangle. A board stock change can alter slot grip. Do not accept these as equivalent based on appearance alone. Recheck loading, retention and customer handling when material or dimensions change.
Where Onehourcrafts fits
The Onehourcrafts cross stitch DIY kit page describes customizable fabric, threads, needles, patterns and packaging. Buyers can specify the organizer architecture, loading map and blind-test evidence alongside the other components rather than leaving floss presentation undefined.
Pair this cross stitch thread organizer design process with the fabric count guide, cross stitch kit quality checklist, instruction development guide and missing-parts controls. Send the color list, chart legend, loaded prototype, target skill level and packaging concept through the contact page. Final identification and labeling requirements should be confirmed for the intended market.
Frequently asked questions
Should threads be arranged by color or chart order?
Choose the order that reduces customer searching and errors for the specific pattern. Whichever logic is selected must match the organizer, chart legend, instructions and factory loading map.
Are printed color swatches enough to identify floss?
No. Printing and lighting can change perceived color. Use stable codes and symbols, and retain approved physical floss as the material reference for production checks.
How should very similar shades be handled?
Place them apart, add clear identifiers and test selection in ordinary lighting. A divider or grouped label can help, but users should not need to distinguish them from color appearance alone.
What makes an organizer beginner-friendly?
It makes the first color obvious, releases one length without disturbing others, preserves shade identity after cutting and gives partial strands a clear return or parking method.
When does the organizer need reapproval?
Reapprove it after changes to the floss list, shade sequence, chart symbols, cut lengths, organizer dimensions, board material, printing, packaging orientation or instructions.





