

A craft kit storage stability test should show whether a packed product remains usable and presentable through its expected warehouse, retail and customer-storage period. Map the sensitivity of every component, keep a protected baseline sample, expose complete kits to realistic heat, humidity, light and carton pressure conditions, and inspect at planned intervals for reversible and permanent change.
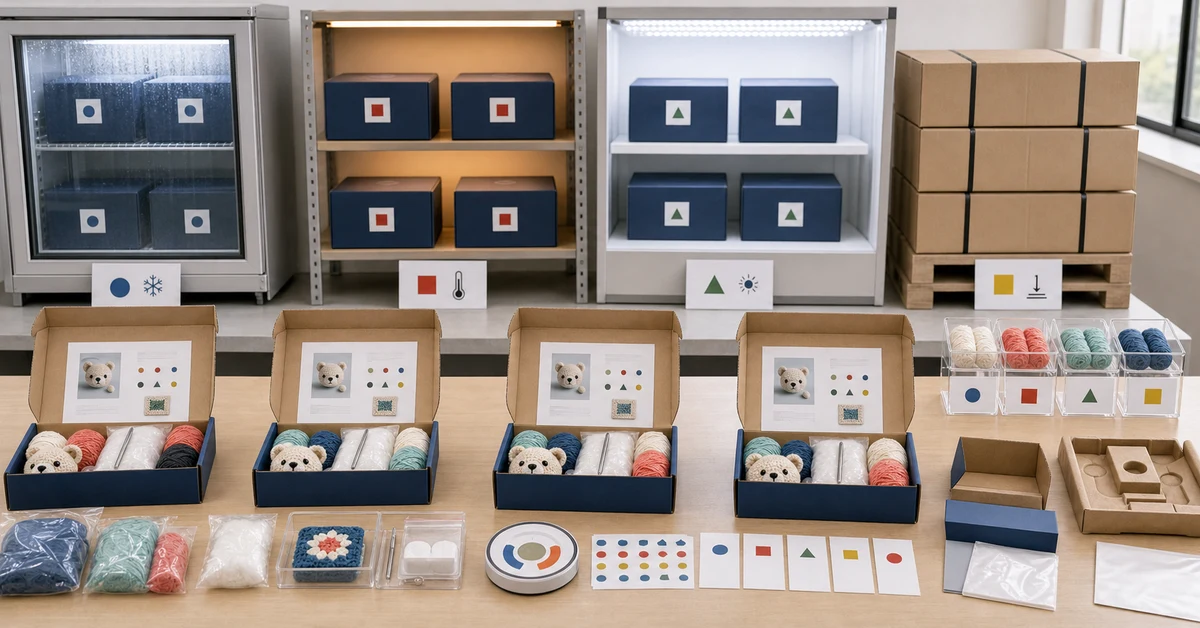
Start with a component sensitivity map
A craft kit combines materials that age differently. Yarn can absorb moisture or change appearance. Paper can curl or transfer ink. Metal tools can discolor. Adhesive items may lose tack or migrate. Plastic packaging can deform or trap odor. List the components and the change that would matter to the customer.
| Component | Possible sensitivity | Customer consequence | Inspection evidence |
|---|---|---|---|
| Yarn or floss | Moisture, light, compression, odor | Shade shift, tangling or poor handling | Color, mass, feel and stitch trial |
| Fabric or felt | Humidity, fold memory, staining | Distorted working area | Dimensions, flatness and surface view |
| Paper instructions | Humidity, heat, abrasion | Curl, blocking or unreadable print | Flatness, legibility and page separation |
| Metal tools | Moisture and contact materials | Discoloration or rough handling | Surface and functional check |
| Adhesive or coating | Heat and time | Leakage, weak bond or stiffness | Pack appearance and use trial |
| Outer packaging | Compression, humidity and light | Warping or poor shelf presentation | Dimensions, print and opening test |
Prioritize combinations as well as individual materials. A printed insert may transfer onto pale yarn only when pressed together. A metal needle may be stable alone but react inside a damp paper envelope.
Define the claimed storage journey
Write the expected route before designing conditions. Include production storage, international or domestic transport, distribution warehouse, retail shelf and time in a customer's home. The goal is not to expose kits to arbitrary extremes; it is to test plausible conditions and known short excursions with a defensible rationale.
- Expected time from production to first sale.
- Likely warehouse temperature and humidity range.
- Transport modes and potential high-temperature periods.
- Retail light exposure and shelf orientation.
- Carton stacking and unit compression.
- Any storage statement printed on the product.
Where formal shelf-life or regulated material claims apply, use qualified technical and compliance support. A product-team study can identify risk and support packaging decisions, but it should not create unsupported universal expiry claims.
Create a baseline and retained sample set
Inspect complete kits before exposure and keep protected controls from the same production batch. The baseline should document component identity, lot, quantity, color, dimensions, mass where useful, package condition and function. Photograph standard views under controlled light.
- Select finished kits from the same released pack batch.
- Confirm completeness and record component lots.
- Measure baseline package and sensitive component attributes.
- Seal control samples under defined protective conditions.
- Assign exposure condition and inspection interval IDs.
- Keep enough units for planned destructive opening points.
Link every sample to the craft kit batch traceability checklist. If exposed and control kits come from unknown lots, a normal production difference may be mistaken for storage change.
Build a realistic condition matrix
Use a control condition plus targeted environments that represent the sensitivity map. Separate heat, humidity, light and compression where possible, then add a combined condition when interaction is a credible risk. Record actual conditions rather than relying only on chamber or room labels.
| Condition | Purpose | Sample state | Main observations |
|---|---|---|---|
| Protected control | Shows normal time-related change | Complete sealed kit | Baseline drift |
| Warm storage | Challenges adhesives, plastic and print | Retail pack orientation | Deformation, odor, transfer and bond |
| High humidity | Challenges paper, textiles and metal | Closed pack and outer carton | Curl, moisture uptake and surface change |
| Light exposure | Challenges color and print appearance | Primary display face exposed | Shade difference and fading pattern |
| Stack pressure | Challenges shape and presentation | Units in shipping configuration | Crush, compression memory and opening |
| Combined journey | Approximates interacting stresses | Packed sequence of conditions | Complete customer-use result |
Do not treat accelerated exposure time as an automatic conversion to years of shelf life. Material-aging relationships require validated models and appropriate expertise. Use the matrix for comparison, failure discovery and packaging improvement unless a formal validation method supports a stronger claim.
Inspect unopened packs before opening samples
At each interval, inspect the complete pack first. Record carton dimensions, panel bowing, seal condition, print appearance, window clarity, odor on opening and whether internal components have shifted. The sequence matters because opening destroys evidence about the packed state.
- Photograph all sides in the same orientation.
- Measure crush, bulge or warp at defined points.
- Check seals, closures and hanging features.
- Observe color transfer through windows or transparent bags.
- Record rattling, component migration or collapsed dividers.
- Time and observe the first opening experience.
Compare these observations with the retail packaging format and craft kit unboxing test. A package may protect materials yet become frustrating or visually unacceptable after storage.
Evaluate textile components after conditioning
Allow opened materials to equilibrate under a defined review condition before final measurement, while also recording their immediate state. Some compression and moisture effects recover; others remain. Compare yarn and fabric with the protected control from the same lot.
- Inspect shade and staining under controlled light.
- Check tangles, flattened yarn and fiber shedding.
- Measure fabric dimensions, skew and fold recovery.
- Use a short stitching or handling trial.
- Check whether labels, bands or bags have transferred marks.
- Record recovery after a defined rest period.
For color-sensitive materials, use the physical comparison approach in the floss color matching guide. Screen photographs alone are not reliable evidence of a small shade shift.
Check paper, tools and auxiliary materials
Instructions must remain readable, separable and usable on a work surface. Check ink transfer, page blocking, curl, cracking at folds and whether QR or printed references remain clear. Test metal and plastic tools for surface change, dimensional distortion and normal function.
| Item | Functional check | Presentation check | Reject example |
|---|---|---|---|
| Instruction sheet | Opens, lies sufficiently flat and remains readable | No severe curl or transfer | Pages stick or critical print is obscured |
| Hook or needle | Feeds material without new roughness | No unacceptable surface change | Corrosion, burr or deformation |
| Organizer or card | Holds components and labels remain aligned | No warp or delamination | Colors mix or identification detaches |
| Adhesive item | Applies and bonds as intended | No leakage or staining | Dry, migrated or permanently tacky material |
Where the kit includes a chemical auxiliary, follow its supplier storage guidance and any applicable product requirements. Test the packed interaction rather than assuming the individual material specification covers contact with every neighboring component.
Separate reversible set from permanent damage
Record immediate condition, short recovery and final recovery. A yarn ball may regain volume after unpacking, while a printed carton crease will not. Define which temporary changes are acceptable and how long recovery can reasonably take before the customer begins the project.
- Immediate state: condition at the moment the pack is opened.
- Short recovery: change after simple unpacking and rest.
- Permitted action: flattening, reshaping or airing explicitly allowed by the instructions.
- Permanent state: remaining change after the defined recovery period.
- Functional result: whether the customer can complete the project normally.
A test should not excuse severe deformation by using recovery steps that the customer would never know to perform. If an action is necessary, it belongs in the product instructions and should be tested with target users.
Use failures to change packaging or material decisions
Classify failures by cause and consequence. If humidity curls the chart, a moisture barrier, paper change or different fold may help. If carton pressure flattens yarn and bends tools, revise internal support or orientation. If light shifts one floss shade, change the display barrier or material selection.
- Confirm the failure against the control and repeated sample.
- Identify which stress and component interaction produced it.
- Contain any related stock if the issue affects released goods.
- Change one material or packaging variable.
- Repeat the affected condition and customer-use check.
- Update specification, packing record and storage guidance.
The return reduction checklist can connect post-launch complaints with storage findings and help determine whether a failure clusters by batch, shipment or selling channel.
Set a review schedule based on risk
Schedule inspections at points that can reveal the change curve rather than opening all samples at the end. Sensitive adhesives or print interactions may need early checks, while color and carton effects may emerge more gradually. Keep unopened units for later intervals.
- Initial baseline before exposure.
- Early interval for rapid migration, odor or deformation.
- Midpoint for trend comparison.
- Planned storage endpoint.
- Post-recovery review after opening.
- Additional interval after material or packaging changes.
Where Onehourcrafts fits
Onehourcrafts can work with retail teams to identify storage-sensitive kit components and prepare comparison samples during custom development. A useful inquiry includes the target market, expected order and sales cycle, packaging format, known warehouse conditions, material preferences and any included adhesive or special finish. Buyers can request retained samples and pack-condition reviews before repeat orders. The craft kit storage stability test should stay linked to the packaging revision and retained sample set.
Storage planning is most effective before packaging is frozen. Material layout, barriers, dividers and carton strength can then be adjusted without redesigning a finished retail presentation.
Frequently asked questions
How long should a craft kit be stored during testing?
Choose intervals from the expected product journey, component sensitivity and the purpose of the study. Formal shelf-life claims may require validated methods beyond a comparative product-development test.
Can accelerated heat testing prove several years of shelf life?
Not automatically. Time-temperature relationships depend on materials and failure mechanisms. Use qualified methods before converting accelerated exposure into a shelf-life claim.
Should kits be tested inside shipping cartons?
Yes when carton stacking, transport or distribution storage is relevant. Also inspect individual retail packs because outer cartons and unit packaging create different stresses.
What is the purpose of a control sample?
It shows normal lot variation and time-related change under protected conditions. Without a control, teams may attribute a pre-existing component difference to the exposure condition.
When should storage stability testing be repeated?
Repeat affected studies when materials, suppliers, packaging layout, print, adhesives, storage guidance, sales cycle or distribution conditions change.
Approve the packed kit across time
A practical craft kit storage stability test links component sensitivity, realistic conditions, retained controls and customer-use checks. The result is not only a pass or fail: it shows which material or packaging decision protects product quality through the period before the customer starts making.





