

An amigurumi color change guide should specify exactly where the old yarn ends, where the new yarn becomes visible and how the transition is secured. Product teams should map each change to stitch coordinates, compare jog-control methods on the actual shape, inspect the character from all intended views and define yarn-tail handling that remains repeatable in production.
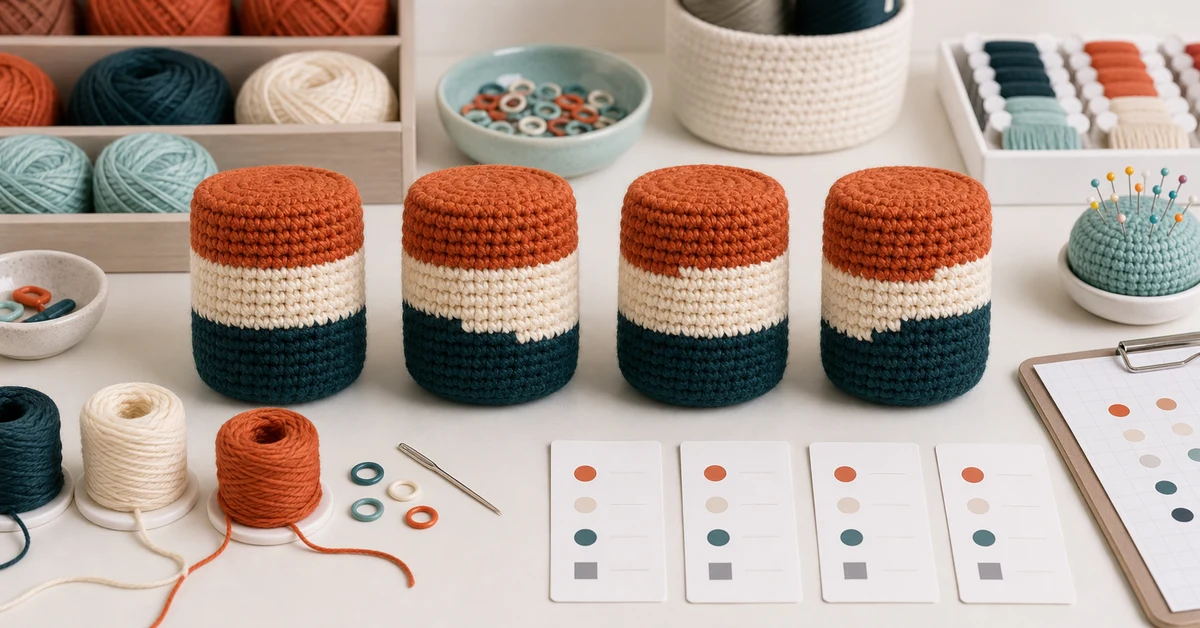
Translate artwork into stitch coordinates
Color artwork uses smooth boundaries, while crochet creates a stepped grid. Mark the start and end stitch for every transition by round or row. Identify whether the boundary is a full stripe, a partial motif, a spiral change or a separate applied feature.
| Transition type | Primary risk | Required reference | Approval view |
|---|---|---|---|
| Full horizontal stripe | Visible round jog | Change stitch and round seam | Front, back and side |
| Vertical patch | Wandering edge | Start and end stitch per round | Front and profile |
| Small motif | Lost or uneven shape | Charted stitch coordinates | Close-up at real size |
| Gradient or alternating color | Sequence error | Color order and repeat | Whole completed section |
| Applied color feature | Placement or seam visibility | Attachment landmarks | Standard character views |
Use the approved body orientation. A transition that is acceptable at the back may be distracting beside the face. Define which view is primary and where the construction seam is intended to sit.
Choose the change point deliberately
In a common stitch change, the new color is introduced during the final pull-through of the stitch before it should appear. But spiral construction, joined rounds and special stitches can shift the visible boundary. Test the exact pattern section instead of applying one generic instruction to every shape.
- Mark the last stitch worked completely in the old color.
- Mark the stitch where the new color enters the final pull-through.
- Identify the first stitch worked completely in the new color.
- Record whether the round is joined, spiraled or turned.
- Photograph the transition before tails are concealed.
- Photograph it again after stuffing and shaping.
This sequence gives sample makers and inspectors the same definition of the boundary. “Change to blue here” is insufficient if here can mean before or after completing the stitch.
Build a jog-control comparison ladder
Horizontal stripes in spiral crochet naturally show a step where rounds meet. Prepare small body samples using several credible methods. Keep yarn, hook, stitch count, body diameter and stuffing consistent.
- Standard change with no jog adjustment.
- Change combined with an approved transition stitch.
- Joined-round construction where suitable.
- Relocated seam placed in a less visible area.
- Separate component or surface detail if the motif cannot be stabilized in-line.
Compare appearance, construction time, stitch density, local stretch and beginner difficulty. A nearly invisible jog may require a technique that is too fragile or too hard to explain. Select the method that meets the product's visual requirement while remaining stable for the intended maker.
Protect tension at the transition
Color changes often become tighter because the maker pulls both yarns to hide the join. That can create a narrow waist, a hard ridge or enlarged neighboring holes after stuffing. The transition should secure the yarn without changing the approved circumference.
| Symptom | Likely cause | Check | Possible correction |
|---|---|---|---|
| Indented stripe edge | Tails pulled too firmly | Measure circumference before stuffing | Define tail tension and anchoring |
| Open hole at change | Loose final pull-through | Stretch and stuffing view | Secure without over-tightening |
| Raised ridge inside body | Bulky knots or carried yarn | Inside construction sample | Change tail route or yarn handling |
| Stripe slopes | Coordinate or round-start drift | Marker and count map | Stabilize start point |
Use the crochet stitch tension guide to separate normal hand variation from a transition method that consistently distorts the fabric.
Define how yarn travels between color areas
Decide whether unused yarn is cut, carried locally, floated inside or supplied as a separate working length. The right choice depends on distance, color contrast, yarn bulk and whether the inside will remain accessible.
- Cut and secure: suitable for distant changes but creates more tails.
- Carry over short distance: efficient when the carried yarn does not show or tighten the fabric.
- Float inside: may work for repeated motifs if floats cannot snag or distort stuffing.
- Separate small length: useful for isolated color areas when quantity and identification are controlled.
Test pale yarn over dark stuffing and dark carried yarn behind pale stitches. The unused color may shadow through the fabric, especially when the body stretches during filling.
Control yarn tails and security
Specify minimum practical tail length, anchoring route and when tails are trimmed or buried. Avoid bulky knots that create a visible lump. For an enclosed body, secure tails before the opening becomes difficult to access.
- Show the starting and finishing tail paths.
- Define whether tails are woven, tied, trapped or carried.
- Check for slip after gentle fabric flexing.
- Confirm that tails do not emerge through stuffing pressure.
- Retain an open construction sample for training and inspection.
Where a color boundary meets a joined component, coordinate the yarn-tail plan with the amigurumi seam strength test. Too many tails concentrated at one attachment area can add bulk or interfere with the joining path.
Inspect motifs against the character coordinate system
A stripe may be level while still sitting too high or low relative to eyes, limbs or a muzzle. Measure the transition against stable body references: opening edge, centerline, specific round, limb attachment or facial coordinate.
Use a view set rather than one front photograph:
- Front view for expression and motif balance.
- Back view for jog and construction seam.
- Left and right profiles for boundary level.
- Top view for centered patches and radial transitions.
- Close-up for holes, tails and stitch distortion.
Connect this review with the facial feature placement guide and the size specification. Color placement is part of character identity, not an isolated yarn decision.
Test color changes across production makers
During pilot production, compare samples from multiple makers. Record transition location, jog width, circumference change, yarn-tail security and time required. If variation clusters around one step, observe the process and revise the control.
| Inspection item | Target | Boundary evidence | Action |
|---|---|---|---|
| Change coordinate | Specified stitch and round | Count map | Correct before next section |
| Jog appearance | Matches approved sample | Back and side views | Review transition method |
| Body shape | Within dimensional tolerance | Circumference and silhouette | Check tail and stitch tension |
| Tail security | No slip or visible end | Open sample and handling check | Rework before closure |
Convert the method into production and kit instructions
The production card should include the color IDs, coordinate map, transition stitch, inside tail view, finished view and rejection examples. Customer instructions need the same logic in simpler form. Place the explanation before the first change and show the critical pull-through clearly.
For kits with several similar colors, align names and order with the crochet kit color palette plan. Identification mistakes can look like transition errors even when the stitching technique is correct.
Where Onehourcrafts fits
Onehourcrafts can support retailers in developing custom amigurumi colorways, stripe layouts and motifs as part of a complete crochet specification. A useful inquiry includes front and back artwork, finished dimensions, yarn preferences, target skill level, primary viewing angle and any transition that must remain hidden. Buyers can request jog comparisons, open construction samples and pilot inspection views before bulk approval. The approved amigurumi color change guide should remain paired with front, side and rear reference views.
When several sizes share one character design, approve coordinates separately rather than scaling only by eye. The number of available stitches changes boundary shape, and a motif that reads well on the larger body may collapse or drift on the smaller version.
This early work is especially useful when a character depends on a precise mask, belly patch or branded color boundary. The stitch grid should be resolved during sampling rather than left to each maker's visual estimate.
Frequently asked questions
Why does an amigurumi stripe have a visible step?
Spiral crochet moves upward continuously, so a horizontal color boundary meets itself at different heights. The visible result depends on change point, seam position, stitch method, tension and body shape.
Should unused yarn be carried inside the toy?
Only when the distance, bulk, color show-through and snag risk are acceptable. Test the completed stuffed body because inside floats can tighten or become visible after expansion.
Can yarn tails simply be knotted?
A knot may add bulk, change shape or remain visible. Approve a tail-security method on the actual yarn and construction, and document how it is anchored and concealed.
When should a color transition be inspected?
Check it immediately after the change, before the inside becomes inaccessible, after stuffing and again in the completed character views. Early checks allow correction without dismantling later work.
Does every colorway need a new transition test?
Repeat testing when yarn construction, shade contrast, motif coordinates, body size or transition method changes. Stronger contrast can make a previously acceptable jog or carried yarn more visible.
Approve the transition as part of the character
A practical amigurumi color change guide connects stitch coordinates, jog control, fabric tension, yarn tails and finished identity. Keep the transition map, comparison samples and multi-angle approval views together so color boundaries remain consistent across sampling, production and customer instructions.





