

Crochet kit video instructions should show the exact actions a customer cannot reliably infer from printed diagrams, using the approved yarn, hook, pattern and finished-size checkpoints. A video is not a decorative product trailer. It is a controlled support asset that must preserve hand visibility, stitch orientation, pacing and product-version accuracy from the first setup through finishing.
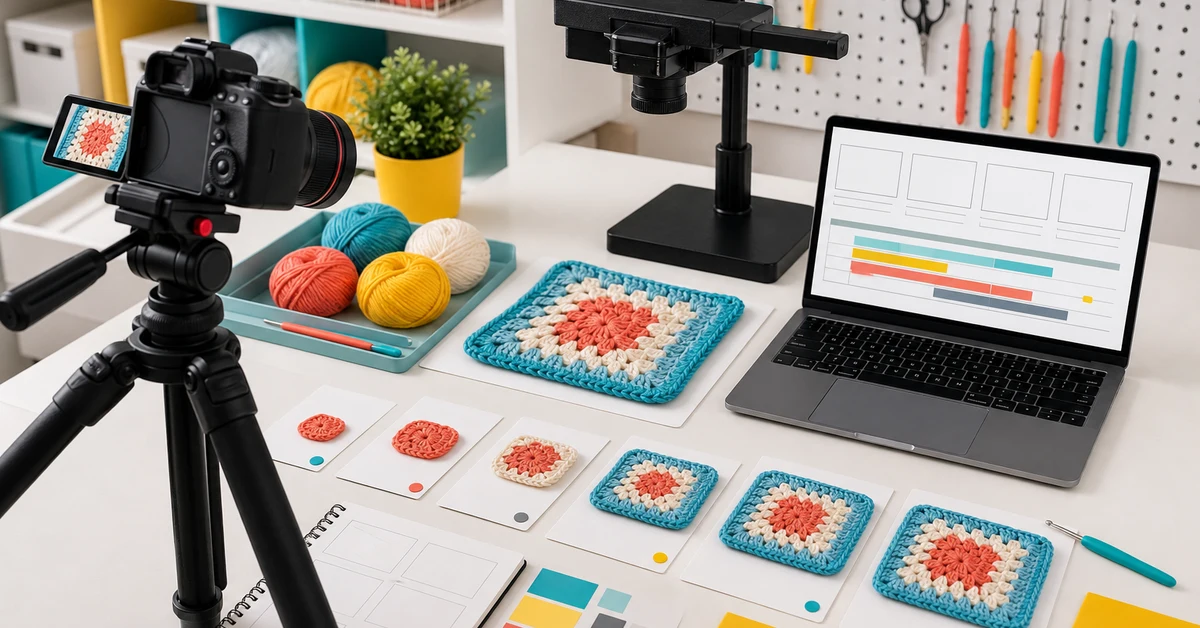
Start with the customer friction log
Review prototype tests, instruction comments and customer-service questions. Identify where target users hesitate, choose the wrong component, lose orientation or cannot compare their work with the intended result. These moments deserve video coverage. Do not film every printed sentence at equal length; prioritize actions where motion, hand position or changing loop structure carries the answer.
Separate product difficulty from unclear communication. If several testers cannot complete a step even after a clear demonstration, the pattern, tool or skill-level position may need revision. Video should not hide a design problem. Record the cause, the expected recovery path and whether a printed checkpoint must change alongside the media.
- First tool and yarn setup.
- Stitches that look similar before tightening.
- Changes in working direction or piece orientation.
- Assembly joins, stuffing and finishing.
- Error recovery that beginners can perform safely.
Turn tasks into a shot map
Create one row for each action the viewer must understand. State the starting condition, hand movement, camera angle, expected result and link to the printed step. A broad scene can introduce materials, while a close view should carry the critical movement. If one action requires several angles, decide whether to cut between them or repeat the motion clearly.
Keep the map focused on observable outcomes. “Explain the stitch” is too vague. “Show the hook entering both top loops, capturing yarn and completing the loop beside an approved sample” gives the camera and maker a testable brief. Include a visual checkpoint at the end of each sequence so viewers can compare shape, count or orientation.
| Shot-map field | Purpose | Approval evidence |
|---|---|---|
| Starting state | Prevents hidden preparation | Components and loop position visible |
| Required action | Defines the movement to capture | One clear task per shot |
| Camera angle | Protects hand and stitch visibility | Test frame from filming setup |
| End checkpoint | Lets the user self-correct | Count, shape or orientation reference |
| Print reference | Keeps media versions aligned | Instruction step identifier |
Choose angles that protect orientation
For many crochet actions, the viewer needs to understand both the hook path and the fabric's front, back or working edge. A top-down view can resemble the maker's perspective, but fingers may hide the insertion point. A low side angle shows loop structure but can reverse left-right interpretation. Test the angle with the actual project and target users before recording a full sequence.
Use consistent visual anchors. Keep the active stitch near the same part of the frame, use a contrasting work surface and control loose yarn so it does not cover the action. When the piece turns, show the turn rather than cutting to a changed orientation. If left-handed support is offered, plan it intentionally; simply mirroring text or video may alter symbol direction and on-screen references.
Control the physical filming sample
Prepare multiple stage samples so filming does not depend on completing the full project continuously. Each sample should use the approved yarn, hook, color sequence and dimensions. Label stage samples off camera and verify them against the current pattern. A convenient old prototype can introduce a stitch count or material that no longer matches the retail kit.
Inspect every visible component. Remove unofficial tools, unrelated props and packaging from the work area. Confirm that color appearance is close enough to the approved product under the chosen lighting. Keep spare yarn and duplicate components ready so a damaged or tangled sample does not force an unreviewed substitution.
- Freeze the pattern and component revision.
- Build stage samples for major transitions.
- Photograph and check each starting state.
- Prepare duplicate tools and yarn from the same specification.
- Record any filming-only adjustment that must not reach customers.
Make hand movement readable
Ask the demonstrator to work at a deliberate pace without changing the approved technique. Excessively slow motion can distort tension, while normal expert speed may hide the critical moment. Film clean repetitions and use editing to emphasize the movement instead of forcing an unnatural demonstration.
Watch finger placement, hook reflections and yarn contrast. The hand should not cover the entry point when the viewer needs it. Use a matte or controlled tool finish when glare obscures the hook throat. Dark yarn may need a lighter background and tighter lighting control. If the kit includes several colors, test the least visible one rather than filming only the easiest shade.
| Visibility problem | Likely cause | Production response |
|---|---|---|
| Hook entry disappears | Fingers cover the active stitch | Change grip or add a second angle |
| Loops merge visually | Low contrast or shallow focus | Adjust background, light and focus |
| Orientation feels reversed | Camera is opposite the user view | Add an orientation transition |
| Yarn blocks the action | Feed path crosses the working area | Control the yarn outside frame center |
Write narration after the visual proof
First confirm that the action can be understood visually. Then add concise narration or captions that name the step, point out the checkpoint and warn about a common mistake. Avoid describing every visible movement. The words should clarify what the camera cannot prove, such as stitch count, direction, tension limit or the reason for pausing.
Keep terminology identical to the printed instructions and component labels. If the booklet says stitch marker, the video should not switch to clip or pin without explanation. Build a controlled terminology list and a caption file that can be reviewed separately. Plan localization before embedding text into the image; burned-in English labels are harder to maintain across markets.
- Step name and printed-reference identifier.
- Short action statement using approved terminology.
- Visible checkpoint or count.
- One relevant warning or recovery note.
- Caption and translation source text.
Edit for decisions, not entertainment
Use cuts where the viewer's decision changes. Remove waiting, repeated winding and unrelated setup, but do not remove the transition that explains orientation or component order. A short chapter for one difficult task is often more useful than one long continuous film. Give each chapter a stable destination so printed instructions can link directly to it.
Review the video on a phone with ordinary sound and brightness settings. Important stitch details must remain visible on a small screen. Captions should not cover the hands or active fabric. Avoid rapid decorative transitions, background music that competes with narration and intro sequences that delay the answer.
Run a silent and guided usability test
Give target-level users the retail kit and video in the intended access method. First observe whether they can find the correct chapter and follow the action without coaching. A silent review reveals whether the visual sequence works; a normal audio review checks narration and captions. Record pauses, rewinds, wrong turns and points where users leave the video for another source.
This is where crochet kit video instructions become an approved product support system. Define acceptance criteria such as correct first setup, successful completion of critical steps, recoverable errors and agreement with the printed result. If users repeatedly rewind the same second, change the shot rather than blaming attention.
| Observed behavior | Interpretation | Next action |
|---|---|---|
| Viewer cannot find the step | Navigation or print link is weak | Improve chapter naming and access |
| Viewer copies the wrong loop | Camera did not prove insertion point | Reshoot closer or add angle |
| Viewer reaches a different shape | Checkpoint appears too late | Add an earlier comparison frame |
| Viewer needs spoken explanation only | Visual action is incomplete | Strengthen the shot before adding words |
Control links, hosting and revisions
Decide how customers will access the media and what happens if a URL changes. Test QR codes, short links and landing pages on multiple devices. A printed code should lead to the correct language and product version without requiring an unclear search. Keep privacy, cookie and platform requirements in mind for the intended markets.
Assign a media revision to the pattern and packaging revision. When yarn, hook, stitch count, color order or finishing changes, review every affected chapter. Archive the approved master, caption files, thumbnails and shot map. Do not overwrite the only copy with a new edit that has not passed product review.
Where Onehourcrafts fits
The Onehourcrafts crochet DIY kit page describes customizable yarn, hooks, patterns and packaging. Buyers can include crochet kit video instructions requirements in the product brief so filming uses the same approved components and checkpoints as the retail kit.
Build the shot map from the craft kit instruction guide, validate difficulty with the skill-level framework, plan supporting images with the product photography checklist and freeze components through the crochet sampling process. Send the project, target user, pattern revision, desired media format and order assumptions through the contact page. Hosting, localization and market-specific accessibility requirements still need separate confirmation.
Frequently asked questions
Does every printed instruction step need a video clip?
No. Prioritize actions where movement, orientation or changing loop structure is difficult to communicate in print. Keep routine repeated steps concise and easy to navigate.
Should the video use the final production components?
Yes. Yarn, hook, colors, stitch counts and stage samples should match the approved product. Otherwise the video can contradict the kit even when the technique is generally correct.
Is a top-down camera angle always best?
No. It often matches the maker's view, but fingers can hide the insertion point. Test top-down, angled and close side views with the actual step and target users.
When should a tutorial video be updated?
Review it after changes to the pattern, tools, yarn, color sequence, terminology, instructions, access links or product positioning. Update affected chapters under revision control.
How can video quality be tested before launch?
Observe target-level users finding and following critical chapters without coaching. Record errors, pauses, rewinds and result differences, then revise the shots that do not support correct action.





