

A punch needle fabric selection guide should match weave opening, yarn retention, dimensional stability and edge behavior to the actual punch tool, yarn and loop height. Fabric that looks suitable in a product photo can be too tight to punch, too open to hold loops or too unstable for beginner handling.
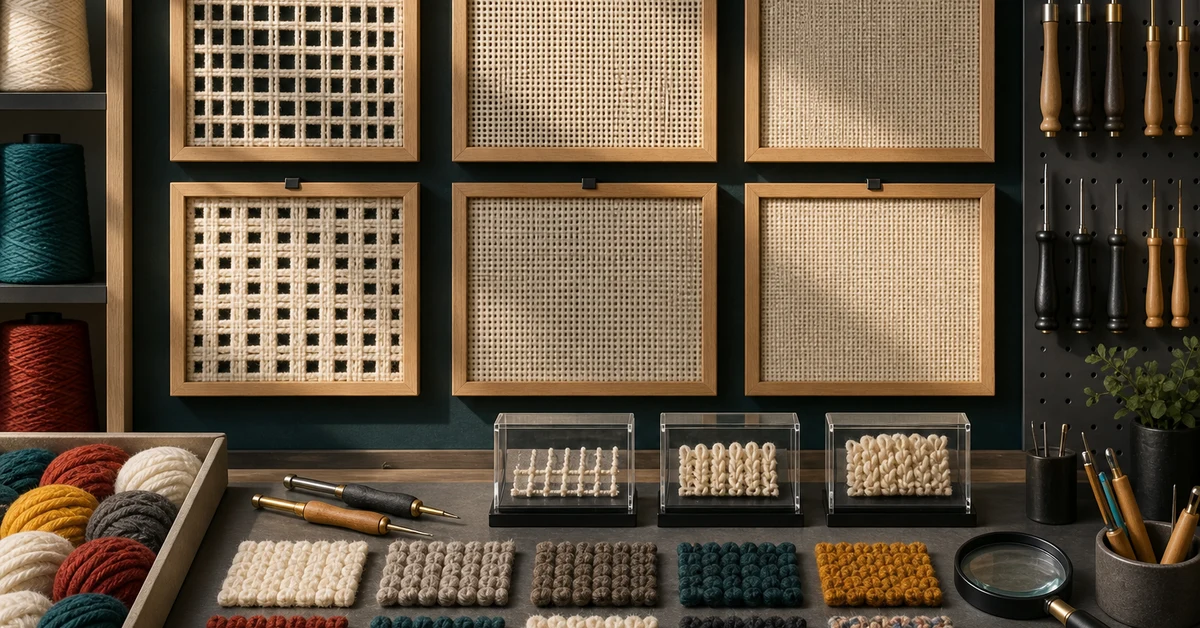
Define the backing's complete job
State whether the fabric is a temporary working backing, a visible finished surface or part of a cushion, wall piece or accessory. Record the required loop side, dimensions, finishing allowance, edge treatment and expected handling. Product use changes the acceptable strength and appearance.
Describe the target working experience. Beginners need visible openings, stable tension and recoverable mistakes. A fabric that supports expert detail may require too much insertion force for the intended kit.
- Tool and yarn compatibility.
- Loop retention before finishing.
- Tension stability in the hoop or frame.
- Pattern visibility and transfer quality.
- Edge, backing and final-use requirements.
Measure weave construction and opening
Record fiber content, construction, thread count or spacing, mass, thickness, stretch and visible opening dimensions. Monk's cloth and other backings vary by supplier and finish. A product name alone does not define performance.
Inspect several locations and directions. Uneven weave can change tool passage across one panel. Confirm grain orientation and whether washing or finishing alters the opening.
| Fabric field | Why it matters | Risk |
|---|---|---|
| Opening size | Controls tool passage and yarn grip | Jamming or loose loops |
| Thread stability | Maintains pattern geometry | Weave shifts during punching |
| Stretch | Affects hoop tension | Center softens or design distorts |
| Surface finish | Changes friction and marking | Tool drag or poor transfer |
| Edge behavior | Controls handling and finishing | Fraying reduces usable area |
Build a tool-yarn-fabric test grid
Punch equal tiles with the proposed tool and yarn across adjacent fabric candidates. Include straight lines, curves, dense fills and isolated details. Record insertion force, skipped loops, fabric movement, hole recovery and pile appearance.
Test the full range of production yarn colors or constructions when they differ materially. A smooth yarn may retain differently from a lofty or hairy one. Keep tool setting, loop height and operator rhythm controlled.
- Condition fabrics and yarn consistently.
- Mount equal samples with one method.
- Transfer the same test tile.
- Punch with production tool and yarn.
- Inspect both sides after resting.
Compare insertion force and fabric damage
The tool should pass through the openings without excessive force or cutting structural threads. Observe noise, resistance and hand effort. Magnify the fabric after repeated punching and corrections. Broken or permanently spread threads can weaken retention.
A very open fabric may feel easy but fail to close around the yarn. A tight fabric may hold loops while making the process tiring. Approve a balanced working window, not the lowest force alone.
| Signal | Fabric may be too tight | Fabric may be too open |
|---|---|---|
| Tool passage | High force or snagging | Very little resistance |
| Weave | Threads break or distort | Openings remain enlarged |
| Loops | Height varies from drag | Loops release during handling |
| User effort | Fatigue and slow rhythm | Low control and shifting stitches |
Test tension in the actual hoop or frame
Mount each candidate using the approved hoop and allowance. Record setup time, center and edge tension, slippage and retightening. Fabric stretch and surface grip interact with hoop construction. A sample clamped in a laboratory frame may not represent the retail tool.
Punch the center and near the ring. Confirm that the weave remains stable as the panel fills. If repositioning is required, test whether previously worked areas survive remounting.
Check pattern transfer and visibility
Apply the proposed printed, drawn or transferred pattern. Lines should remain visible during work without bleeding, smearing or permanently marking areas intended to show. Test dark and light yarn and ordinary home lighting.
Fabric color and texture can hide fine artwork or make corrections difficult. Simplify the pattern or change the transfer method when necessary. Validate any inks or markers for the product and market separately.
- Line contrast before and during punching.
- Dimensional accuracy after mounting.
- Resistance to smearing and handling.
- Removal or concealment after finishing.
- Compatibility with fabric finish.
Measure loop retention and correction
Flex and handle the test tiles before backing or adhesive is applied. Remove and redo a short area. The fabric should retain normal loops while allowing a realistic correction path. Record how openings recover after yarn removal.
This is where the punch needle fabric selection guide becomes a user-experience control. A fabric that holds perfectly but cannot tolerate one beginner correction may not fit the product position.
| Test | Pass signal | Risk |
|---|---|---|
| Gentle flex | Loops remain stable | Yarn releases from openings |
| Correction | Fabric can be repunched | Openings stay enlarged |
| Dense fill | Panel remains flat | Weave buckles or stiffens |
| Edge work | Tool access remains practical | Fabric slips or frays |
Plan cutting, allowance and edge control
Specify cut dimensions, grain orientation and minimum allowance around the artwork. Fraying during kitting and customer use can reduce the clamping zone. Test overlocking, tape, glue or other edge controls only when appropriate to the product.
Confirm that folded fabric fits the package without permanent creases that affect mounting. Include orientation marks if the grain or printed pattern direction matters.
Complete finishing and care trials
Apply the intended backing, trimming, display or assembly method. Adhesives and heat can change fabric dimensions, color or stiffness. Review the finished product, not only the working tile.
If care instructions are planned, test the complete construction. Do not extend generic fabric claims to the combined yarn, adhesive and backing system without evidence.
Freeze the fabric standard
Keep material specifications, approved physical samples, measured openings, tool-yarn grid, mounting notes, pattern transfer proof and finished tiles. Define accepted color, weave and dimensional variation plus incoming inspection.
Reapprove after supplier, fiber, construction, finish, tool, yarn, loop height, hoop, transfer or finishing changes. Similar appearance is not proof of compatibility.
Audit bulk rolls, conditioning and storage
Development swatches can come from the center of a stable roll, while production pieces include edges, joins and sections exposed to different tension during weaving and finishing. Sample across roll width and length. Record opening size, skew, color, stains, broken threads and local finish differences.
Condition fabric after transport and before cutting when humidity or tight rolling can change dimensions. Test whether creases relax under the approved preparation method. Do not let packing teams stretch or steam fabric informally to make it fit the target; any treatment that changes performance must become a controlled step.
Review storage and roll handling. Crushing, moisture, dust and contact with rough surfaces can damage open weaves. Define protection, stacking orientation and maximum practical storage period where needed. When cut pieces are folded for kits, control fold position so it does not cross the most detailed artwork or create a permanent weak line.
Use incoming inspection that reflects functional risk. Visual color comparison alone cannot detect an opening that is slightly too tight for the tool. Combine a bounded dimensional check with a quick punch-and-retention tile from representative lots.
When rolls are supplied in several widths, verify that the weave construction and finishing remain equivalent across them. Cutting yield should not drive approval of a wider material that stretches differently. Retain lot samples with direction marked, because rotating a fabric can hide warp-and-weft differences during later troubleshooting.
Compare the first and last cut pieces from a normal production run. Repeated spreading and cutting can shift grain alignment, while worn cutting tools can pull open threads at the edge. Define an action when cut dimensions or weave orientation move outside the approved window.
- Samples from roll edges, center and length positions.
- Conditioning time before measurement and cutting.
- Limits for skew, defects and opening variation.
- Storage and fold protection.
- Functional lot-release punch sample.
Where Onehourcrafts fits
The Onehourcrafts punch needle DIY kit page describes customizable fabric, yarn, tools, hoops and patterns. Buyers can bring a punch needle fabric selection guide grid and approved tiles into sampling.
Coordinate backing choice with the yarn selection guide, component compatibility guide, hoop size guide and pattern design guide. Send the tool, yarn, artwork, finishing and order assumptions through the contact page. Final care, labeling and market requirements need separate confirmation.
Frequently asked questions
Is monk's cloth always suitable for punch needle?
No. Construction and opening vary. Test the actual material with the selected tool, yarn, loop height and hoop.
How can buyers tell if fabric is too tight?
High insertion force, snagging, broken weave threads and user fatigue are strong signals. Compare controlled samples.
Why do loops fall out of fabric?
The openings may be too large, yarn too fine, loops too tall or tension unstable. Evaluate the complete system.
Should fabric edges be finished inside the kit?
It depends on fraying, allowance, package and project. Test whether unfinished edges remain usable through the customer workflow.
When should fabric selection be retested?
Retest after changes to fabric source or finish, tool, yarn, hoop, pattern transfer, loop setting, finishing or package folding.





