

Punch needle kit component compatibility means the needle, yarn, cloth, frame tension and pattern density work as one system for the intended user. Choosing each item separately can produce a kit that looks complete but will not hold loops, thread smoothly or cover the design. Buyers should validate the chain with production-representative samples.
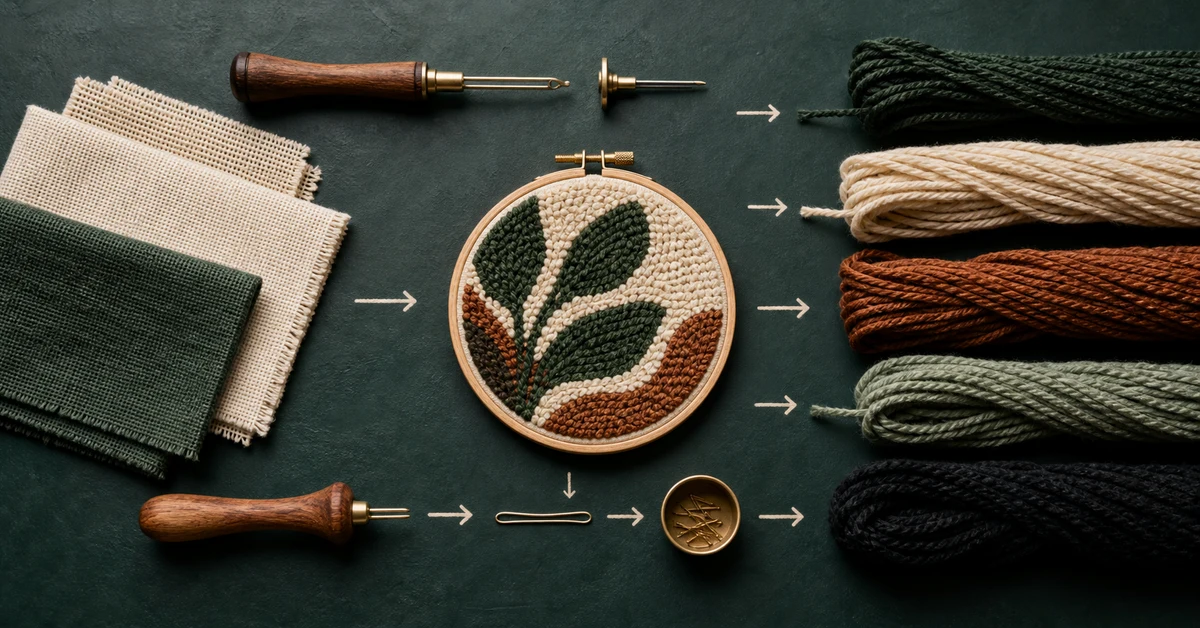
The compatibility chain
A punch needle opens a path through the cloth and carries yarn into a loop. The cloth must separate around the tool and then grip the yarn when the needle withdraws. The frame must keep the working area taut enough for consistent penetration. The yarn must pass through the tool without excessive drag, and the pattern must leave enough space for the chosen loop size.
That sequence explains why a catalog specification is not enough. A larger needle is not simply better for thicker yarn, and a strong fabric is not automatically suitable. Construction, spacing, surface finish and tension interact. Change one component and repeat the working test rather than assuming the rest of the system remains valid.
Start with the intended surface
Define the finished look before selecting tools. A dense, low-loop graphic has different requirements from a loose, plush texture. Record intended loop height, coverage, edge sharpness, direction changes and whether the back or loop side is displayed. Also define the project area and expected completion time, because slow coverage can turn a beginner kit into an endurance exercise.
Create a small reference panel containing straight lines, curves, tight corners, solid fill and a color change. This panel exposes more system behavior than a simple square. Approve it alongside a finished sample so future substitutions can be judged against visible outcomes rather than component descriptions.
- Straight rows reveal feed consistency and spacing.
- Curves reveal control during tool rotation.
- Tight corners reveal the practical detail limit.
- Solid fills reveal coverage, distortion and time demand.
Match needle channel to yarn behavior
Thread the exact yarn through the production needle and work several directions. The strand should feed without repeated snagging, compression or accidental unthreading. Inspect the tool opening and internal path for roughness. Yarn with the same nominal weight may behave differently because of twist, loft or surface hair.
Test any adjustable needle at the intended setting and check whether it stays fixed during use. If several settings are offered, the instructions must explain their result and the rest of the components must support them. More options can increase confusion; for a first project, one validated setting may deliver a better user experience.
| Observation | Possible mismatch | Next experiment |
|---|---|---|
| Yarn drags inside tool | Channel too tight or surface rough | Try a compatible tool or smoother yarn construction |
| Needle frequently unthreads | Excess drag, short tail or use error | Inspect path and improve setup instruction |
| Large holes remain visible | Tool too large for cloth or density | Compare smaller tool and revised spacing |
| Loops pull out easily | Cloth grip, technique or tension problem | Test cloth, frame and stitch direction separately |
Choose cloth by recovery and grip
Mount candidate cloth and punch the reference panel. Watch whether the structure opens for the needle, closes around the yarn and stays stable after the frame is removed. Check for tearing, permanent oversized holes and distortion. Fabric labels such as monk's cloth are broad categories; the actual weave and finish still need testing.
Cut size matters as well. The cloth needs enough margin for secure mounting and any finishing method. Marked or pre-printed patterns must remain legible while the fabric is stretched. If marks are expected to disappear, validate the documented removal process on the final fabric and ink combination before making claims.
Treat the hoop as a tension tool
A hoop or frame is not only packaging-friendly hardware. It must grip the chosen fabric, hold useful tension and remain comfortable during the project. Test closure range, edge finish, roundness and slippage. Retightening every few stitches creates frustration and can change loop consistency.
Run a short endurance trial rather than checking the hoop once. Mount the cloth, work for a realistic session, set it down and resume. Inspect whether tension is retained and whether the fabric becomes marked or damaged. If the finished work is displayed in the same hoop, assess both working performance and presentation quality.
Set pattern density from physical trials
Artwork should be converted with the tool diameter, yarn coverage and beginner control in mind. Tiny islands, narrow gaps and sharp corners may close up when punched. Place lines according to the tested spacing instead of shrinking a print illustration and expecting the maker to interpret it.
Compare the printed guide with the final loop surface. The guide may require simplified shapes or a clear order of operations. Where color boundaries are critical, include checkpoints that show when an area is sufficiently filled. A dense result is not always better; excess punching can distort cloth or make correction difficult.
- Punch the standard panel with the proposed system.
- Record threading, penetration, loop retention and coverage.
- Give the same setup to target-level users.
- Change only one component per comparison.
- Repeat the complete project after the system is locked.
Diagnose failure without guessing
When loops fail, avoid changing several parts at once. First confirm the needle is inserted to the intended depth and kept in the correct orientation. Then verify frame tension and that the tool remains close to the fabric between stitches. If technique is controlled, compare yarn feed, cloth recovery and tool size one variable at a time.
Use coded samples and a defect log. Record the symptom, location, operator, material lot and corrective experiment. This prevents a temporary technique adjustment from being mistaken for a material solution. It also provides evidence when discussing substitutions with a supplier.
Validate the whole packed experience
Complete a pre-production kit using the exact needle, threader, yarn, printed cloth, hoop and instructions intended for bulk. Check whether yarn becomes compressed or tangled in the pack, whether the tool arrives protected and whether the first setup is obvious. A technically compatible system can still fail if the customer cannot assemble it correctly.
The limitation of any lab result is user variation. Run observed trials with the stated skill level, define pass criteria and keep a sealed approved kit. This makes punch needle kit component compatibility a controlled product property rather than an assumption based on parts lists.
Freeze a system specification
Once the prototype passes, record the components as a connected specification rather than a list of generic items. Identify needle type and working setting, yarn reference and construction, fabric reference and cut size, hoop dimensions and closure, printed pattern version and target surface standard. Add the approved setup sequence because a technically sound kit can still fail when assembly is unclear.
Specify which changes trigger a full system retest. Replacing only the yarn color may need a focused feed and coverage check; changing yarn construction, fabric weave or tool size requires broader validation. A dependable punch needle kit component compatibility file includes:
- The signed reference panel and completed project.
- Tool, yarn, cloth and hoop production references.
- Recorded tension, spacing, loop height and coverage observations.
- Target-user results and known troubleshooting boundaries.
- Substitution rules tied to specific repeat tests.
This file also improves incoming inspection. Quality teams can compare a new lot with the system standard, reproduce the short reference panel and isolate a changed behavior before assembled kits reach packing.
Where Onehourcrafts fits
The Onehourcrafts punch needle DIY kit page describes pre-printed fabric, an embroidery hoop, yarn and essential accessories, with acrylic or wool yarn options and custom pattern, packaging and kit-content support. Buyers can use the compatibility chain as the brief for evaluating those configurable elements together.
Read the existing punch needle factory guide, compare instruction needs with the craft kit skill-level model, and review OEM sampling timing. Submit the intended surface, tool type, yarn, fabric, hoop, artwork and order assumptions through the contact page. Final specifications and applicable testing should be agreed for the target market.
Frequently asked questions
Can any punch needle yarn be used with any tool?
No. Nominal yarn weight does not capture twist, loft and friction. Thread and punch the exact production yarn through the proposed tool, then inspect feed, holes, loop formation and finished coverage.
Why do punch needle loops keep pulling out?
Possible causes include insufficient fabric tension, unsuitable cloth grip, incorrect needle depth or orientation, excess yarn drag and user technique. Control the setup and change one variable at a time to identify the cause.
Is monk's cloth always suitable for beginner kits?
No category name guarantees performance. Weave spacing, stability and finish vary. Test the actual cloth with the selected tool, yarn, frame and pattern before approving it.
How should pattern density be approved?
Use a physical reference panel and complete project. Confirm that curves, corners, fills and color boundaries remain clear without excessive punching, distortion or unrealistic time demands.
What must a sealed system sample contain?
It should contain the final tool, yarn lots or standards, cut and printed fabric, hoop, threader or accessories, instructions, organization and packaging. Retain it with version and approval records.





