

A stamped cross stitch kits supplier should prove that the printed guide, fabric grid, floss map and removal instructions remain one coordinated system. A colorful canvas can look accurate at arm's length while its symbols drift between holes, disappear under dark thread or leave residue after the project is finished.
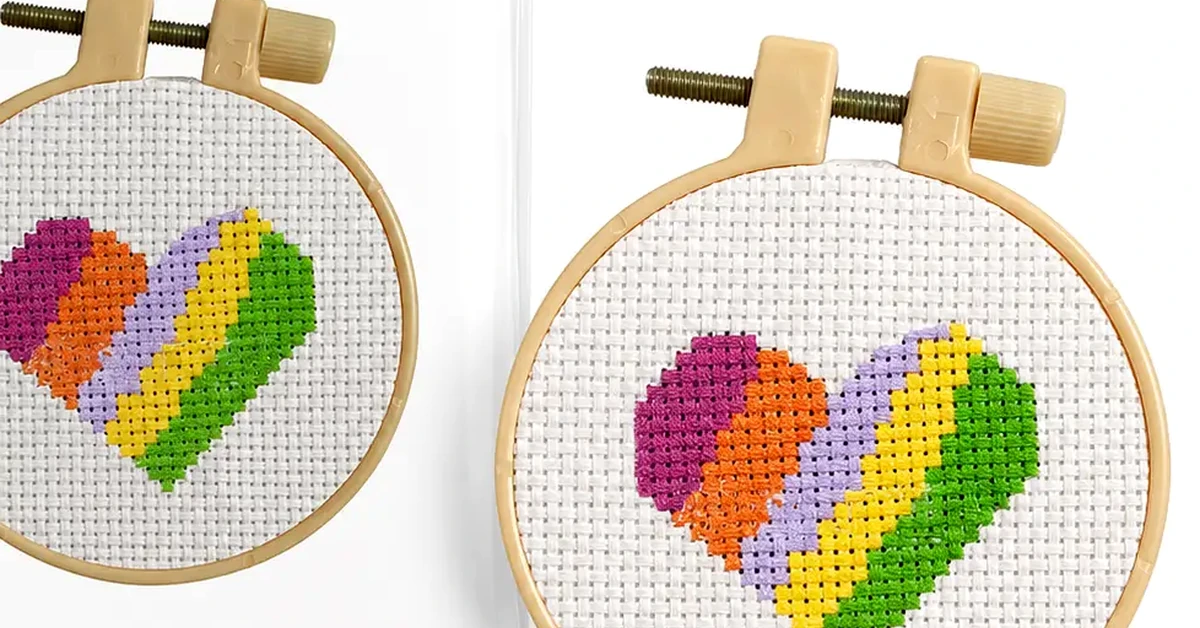
Put the print under a transparent grid
Begin with an overlay that marks the fabric-hole centers and the intended design coordinates. Align it to named registration points, not to the outer fabric edge, which may be cut or folded unevenly. Inspect the center, corners, color boundaries and isolated details. Record whether each printed cell directs the needle to one unambiguous hole.
The test should answer a practical question: can an unfamiliar user move from printed cell to fabric hole without guessing? High-resolution artwork alone cannot answer it.
Define the registration budget
Separate tolerances for global shift, local distortion and color-to-color alignment. A whole image shifted by one grid unit creates a different problem from a single color boundary that feathers across several holes. Establish measurable pass conditions on a production-equivalent fabric, print method and design density.
| Registration condition | Observation method | User effect |
|---|---|---|
| Whole design offset | Overlay at four reference points | Finished motif sits off center |
| Local print stretch | Compare grid spacing by zone | Symbols drift gradually |
| Boundary overlap | Inspect adjacent color cells | Color placement becomes ambiguous |
| Fine detail loss | Check isolated cells and outlines | Small features disappear |
Condition the fabric before judging it
Humidity, folding and tension can change the apparent relationship between print and grid. Condition samples consistently, unfold them without aggressive stretching and mount them using the intended method. Record fabric count, construction, finish and orientation. The cross stitch fabric count guide explains why count and finished size must be approved before artwork.
- Fabric lot and count verified against specification
- Warp and weft direction identified where relevant
- Cut size and design margins measured
- Fold lines checked for print transfer or abrasion
- Mounting tension held consistent across comparison samples
Read symbols at three distances
Inspect the full design at normal working distance, then examine boundaries and isolated symbols closely. Finally, step back to judge the finished composition. Symbols need enough contrast to guide stitching without being so dark that they show through pale floss. Printed cross stitch kits should also avoid near-identical colors whose marks become indistinguishable under warm household light.
Use the chart symbol design guide to compare printed-canvas choices with the separate chart or legend.
Reconcile four identities for every color
Each project color may have a printed mark, chart symbol, floss-organizer position and written name or code. Build a reconciliation table and sign off every row. If the design uses blended strands, state the combination and sequence clearly. Do not let the artwork team, thread packer and instruction editor maintain independent lists.
| Design zone | Printed mark | Organizer position | Approved floss |
|---|---|---|---|
| Example background | Controlled symbol | Numbered slot | Physical color reference |
| Example detail | Controlled symbol | Numbered slot | Physical color reference |
The floss color matching guide adds lot control and lighting checks to this reconciliation.
Stitch the most difficult square first
Do not begin only at the easiest solid block. Select a boundary with several colors, an isolated detail and a pale area where print coverage matters. Have a representative user stitch those zones using the supplied needle and strand count. Record skipped holes, corrections, thread damage and moments of uncertainty.
- Photograph the untouched printed zone under controlled light.
- Mark the intended stitch path on a separate test copy.
- Observe the user without correcting the first decision.
- Compare completed stitches with the master coordinate file.
- Log whether the error came from print, legend, thread or instruction.
Control what disappears during stitching
Some print is intended to be covered; some is intended to wash away. State the system explicitly. For cover-only printing, inspect whether unstitched edges remain visible after normal alignment variation. For removable printing, verify the permitted water temperature, time, agitation and drying method using the final fabric, inks and threads.
A removal claim must not depend on an undocumented treatment that the customer cannot reproduce. Keep untreated and treated controls from every development round.
Run a controlled wash-removal matrix
| Variable | Controlled levels | Post-test check |
|---|---|---|
| Water | Specified temperature range | Residual print and color migration |
| Time | Minimum and upper instruction limit | Removal consistency |
| Agitation | Documented gentle method | Fabric distortion and floss movement |
| Drying | Approved flat or other method | Dimensions, creases and finish |
Measure the fabric before and after treatment and photograph the same design zones. A visually clean sample may still shrink enough to distort a hoop-framed finish.
Challenge dark and light thread differently
Pale floss may allow heavy print to show through, while dark floss may transfer color during the removal step. Test contrast extremes and saturated shades rather than relying on a middle-tone sample. Inspect wet and fully dried work. If thread substitutions are allowed, repeat the relevant check because dye and construction can change.
Make the instructions match the print technology
State where to start, how to interpret a printed cell, strand count, stitch direction, treatment method and what must be completed before washing. Illustrations should use the same symbols and colors as the production design. Private label cross stitch kits need version control that ties artwork, legend, organizer and instructions to one SKU.
- One named start point appears on canvas and instructions
- Symbol legend matches every printed zone
- Wash guidance specifies water, time, handling and drying
- Warnings and material information fit the destination market
- Customer support can identify the exact design revision
Sample the print run, not the studio proof
Approve production samples from the beginning, middle and end of the print run and from different fabric positions where practical. Check registration, color density, cut margin, organizer sequence and pack identity. A cross stitch kit supplier should retain setup evidence and a reference showing how print alignment is checked after stops or material changes.
Use a stitched reference square as well as an unworked print. The unworked panel shows registration and symbol quality, while the stitched square reveals whether marks remain readable at the actual working distance and whether neighboring colors create confusion under thread. Photograph both under controlled lighting so later lots can be compared to the same visual baseline.
Quarantine panels when drift exceeds the approved registration budget. Rework may be possible before cutting, but mixed panels should not be corrected informally during packing. A documented disposition protects the relationship between printed coordinates, floss quantities and instruction photography.
Retain one washed and dried reference too, because the final appearance is the outcome customers keep after the temporary guide has served its purpose.
Keep product classification separate from technique
A stamped design does not determine whether a product is for adults or children. Intended use, imagery, instructions, components and marketing matter. The CPSC children's products guidance explains this broader assessment. Its Art and Craft Safety Guide discusses common tools and materials, including considerations when children use craft supplies.
Requirements vary by destination and product configuration. Confirm applicable testing, labeling and documentation with qualified specialists rather than copying a warning from another kit.
How Onehourcrafts would document the trial
When reviewing a stamped cross stitch kits supplier, Onehourcrafts can record fabric lot, print method, overlay results, difficult-zone stitch trials, floss reconciliation, wash matrix and final dimensions. Buyers can provide artwork, finished size, fabric count, audience, market, packaging and acceptance criteria so samples are compared against one controlled design file.
Frequently asked questions
What is stamped cross stitch?
The fabric carries a printed guide that directs stitch placement; the exact print and removal system depends on the kit design.
Should every printed mark sit on a fabric hole?
The approved registration method should make the intended stitch location unambiguous across the whole design.
Why use a transparent overlay?
It reveals global shift, local distortion and boundary errors more consistently than visual judgment alone.
Does the print always wash away?
No. Some systems are covered by stitching. The package and instructions must accurately state the approved method.
How should wash removal be tested?
Control water temperature, time, agitation and drying, then inspect residue, dimensions, floss and fabric.
Can one color approve the whole palette?
No. Test contrast extremes and shades with higher transfer risk using production-equivalent materials.
What causes print misregistration?
Fabric distortion, feeding, setup, artwork scaling, print process variation and restart controls can all contribute.
Should the chart repeat the printed design?
A chart or legend should provide a controlled reference that agrees with the canvas and thread organizer.
What belongs in the golden sample?
Retain printed fabric, stitched and washed controls, floss map, artwork, instructions, packaging and signed criteria.
What should buyers include in an inquiry?
Provide design files, fabric count, print behavior, size, palette, audience, market, quantity and required testing.
Approve the disappearing guide by what remains
The useful proof is not a vivid unstitched canvas. It is a registered design that guides correct placement, reconciles with every floss position and leaves the intended finished result after treatment. Select a stamped cross stitch kits supplier by overlay, stitch and wash evidence, then carry those controls into the production run.





