

An amigurumi seam strength test should prove that an attached part stays secure while the character keeps its approved shape. The useful test is not a single hard pull. Map every joint, build comparison seams with controlled variables, apply staged loads in realistic directions, and inspect both attachment security and visible distortion after recovery. This produces a repeatable joining specification instead of a vague instruction to sew firmly.
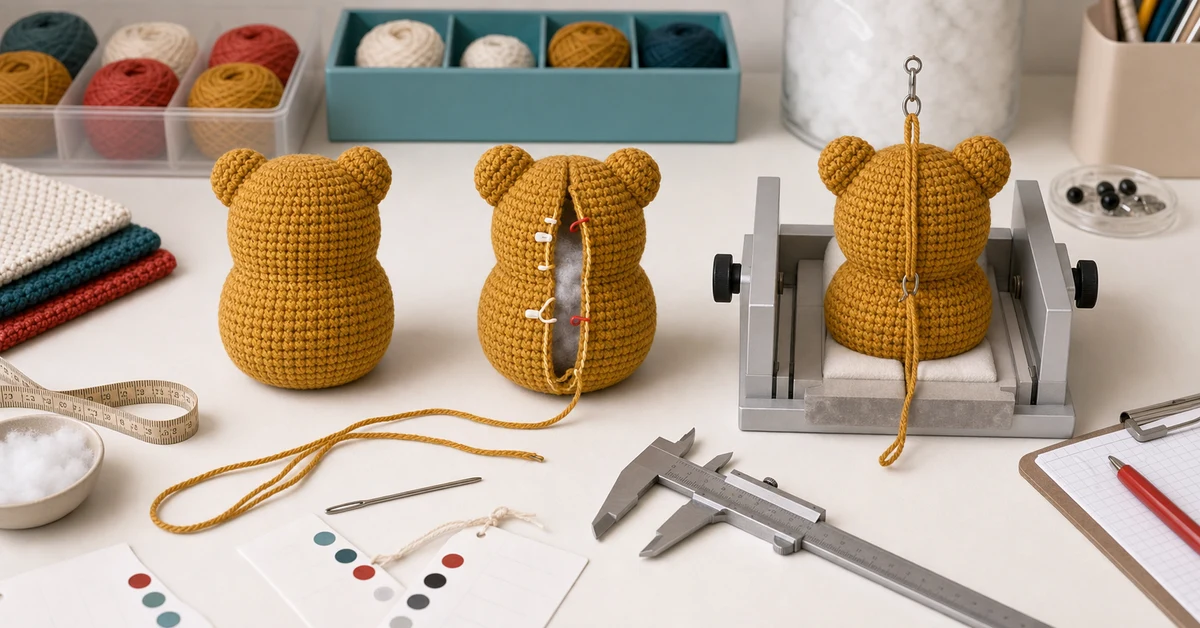
Start with a joint-risk map
Not all seams carry the same risk. A decorative ear has low mass but may be caught by handling. A long arm creates leverage at a small attachment area. A head joint supports more weight and strongly affects character identity. Make a diagram of the approved sample and classify each join by load, leverage, access during sewing and consequence of failure.
| Joint | Typical demand | Visible risk | Test direction |
|---|---|---|---|
| Head to body | Weight and repeated handling | Tilt, gap or neck collapse | Lift, rotate and side bend |
| Arm or leg | Leverage from the limb | Uneven angle or exposed stuffing | Axial and outward pull |
| Ear, horn or tail | Snagging and twisting | Loose edge or changed silhouette | Peel and controlled twist |
| Muzzle or patch | Surface rubbing | Raised edge or puckering | Edge lift and abrasion |
| Embroidered feature | Thread movement | Expression shift | Light rub and tail security |
The map determines where to spend testing effort. It also prevents one strong joint from creating false confidence about every other attachment. Record whether the product is a decorative item, a collectible or intended for another defined use. Applicable safety and compliance decisions require qualified review for the target market; this production test does not replace them.
Control the seam variables before loading
Use the approved crochet bodies, attachment parts, yarn and stuffing condition. Seams made on overfilled pieces behave differently from seams made on the intended density. Keep the maker, needle and preparation method recorded, then change one joining variable at a time.
- Joining yarn construction and diameter.
- Length and anchoring method of the starting and finishing tails.
- Stitch path, such as loop selection and direction around the joint.
- Number and spacing of attachment stitches.
- Edge preparation, pinning and alignment references.
- Tension applied while drawing the parts together.
Prepare at least three specimens for the preferred method and comparison specimens for any credible alternative. One sample can fail because of an isolated hidden defect. Repeated specimens reveal whether the method is stable enough for production.
Define the seam before it disappears inside the toy
A finished joint can look tidy while hiding an inconsistent path. Document the seam at three moments: positioned but unsewn, partially attached, and completed before tails are buried. Photograph the entry points and show which crochet loops are captured. Mark reference points on the sample pattern so production makers are not estimating position independently.
- Align the part using defined rows, stitches or centerlines.
- Anchor the yarn with the approved method and tail length.
- Sew the first quarter of the joint and verify angle.
- Complete the attachment using the specified stitch spacing.
- Check for gaps before securing and burying the final tail.
- Record the completed silhouette from standard views.
This complements an amigurumi placement specification. Position tells the maker where the part belongs; the seam definition tells them how it remains there.
Use staged loads, not a dramatic pass or fail
Apply force gradually in the directions identified on the risk map. Begin with normal handling: lift the product by the body, reposition the limb and place it on a surface. Progress to a controlled pull using a padded fixture that does not cut the yarn or crush the part. Hold each level for a consistent duration, release it and allow a defined recovery time before inspection.
| Stage | Purpose | Observation | Decision |
|---|---|---|---|
| Handling cycle | Expose immediate looseness | Angle, gap and stitch movement | Continue only if unchanged |
| Low sustained load | Reveal settling or tail slip | Temporary extension and recovery | Record recoverable movement |
| Target proof load | Confirm approved margin | Attachment, body fabric and shape | Pass against written criteria |
| Directional repeat | Test leverage and asymmetry | Rotation or localized opening | Compare specimens |
The exact load and duration depend on product type, dimensions, materials, claimed use and market requirements. Do not invent a universal number from an unrelated toy or internet example. A qualified test plan should define the appropriate conditions where regulated safety evaluation applies.
Inspect appearance and structure after recovery
Strength is not only whether the part remains attached. A seam can technically hold while the head tilts, the body stretches, the filling migrates or attachment stitches cut into the crochet fabric. Inspect immediately after each stage and again after a rest period.
- Gap: measure any opening between the parts and check for visible filling.
- Angle: compare the joint orientation with the approved front, side and top views.
- Stitch migration: look for enlarged crochet openings or pulled attachment loops.
- Tail security: check whether either buried end has moved toward the surface.
- Surface damage: note abrasion, fuzzing, yarn breakage or color transfer.
- Recovery: record whether compression and distortion return to the approved form.
Use the approved amigurumi size specification as the visual baseline. If a joint passes the load but moves the character outside its defined silhouette, it has not met the full product requirement.
Find the failure mode before changing the method
When a specimen fails, identify where the system yielded. The joining yarn may break. A knot or anchor may slip. The seam may remain intact while the body stitches enlarge. The part itself may deform because stuffing is inconsistent. Each cause needs a different correction.
- If the joining yarn breaks, compare yarn strength, abrasion and stitch path.
- If the anchor slips, review tail length, anchoring sequence and burial route.
- If body fabric opens, distribute the load across more suitable loops or a wider area.
- If the part changes shape, verify the stuffing density target.
- If placement shifts between makers, add alignment references and an in-process check.
A stronger joining yarn is not automatically the safest correction. If it is much harder than the body fabric, load may transfer into the crocheted shell and cause a different failure. The goal is a balanced joint that protects both seam and surrounding structure.
Turn the result into a production seam card
The production record should be short enough to use at the workbench and detailed enough to remove guesswork. Include component name, alignment references, joining yarn, needle, seam path, stitch spacing, start and finish anchors, tail treatment and acceptable finished views. Add one close-up of the approved partial seam and one of the finished joint.
Inspection criteria can follow a simple sequence:
- Correct part, color and orientation.
- Alignment within the approved row or stitch reference.
- No visible gap, loose yarn or exposed filling.
- Symmetry against the paired feature when applicable.
- Joint withstands the defined handling or sampling check.
- Character returns to the approved silhouette.
Link the card to the sample version. A seam instruction without version control can remain in production after the body pattern, yarn or filling specification changes.
Audit consistency across makers and time
During a pilot run, sample joints from different makers and different points in the day. Compare appearance first, then test a defined subset. If one maker consistently produces a different angle or gap, observe the method before changing the specification. The issue may be access, pinning sequence, unclear landmarks or the order in which stuffing and attachment occur.
Retain an approved sample and a small number of tested specimens with their records. These support root-cause work if later compression, handling or customer feedback reveals a joint problem. The related packaging compression test should also confirm that the carton does not create sustained leverage on vulnerable features.
Where Onehourcrafts fits
Onehourcrafts can support buyers in translating an approved crochet character into component, stuffing, placement and joining controls. A productive inquiry includes design views, dimensions, intended positioning, target market, material preferences and any feature that will receive frequent handling. Buyers can request seam comparisons, pilot evidence and close-up construction records before approving bulk production. The amigurumi seam strength test record should travel with the approved construction sample.
For custom programs, define the joint-risk map during sampling rather than after a loose feature appears in final inspection. That timing leaves room to change attachment area, part geometry, filling or assembly order without disrupting packed goods.
Frequently asked questions
Is a pull test enough to approve an amigurumi seam?
No. A joint should be evaluated for security, gap formation, yarn or fabric damage, angle and shape recovery. A part that remains attached but permanently distorts the character can still fail the product requirement.
How many seam samples should be tested?
Use repeated specimens for the preferred method and include different makers during pilot production. The exact sample plan should reflect product risk, production volume and any applicable quality or compliance requirements.
Should the joining yarn match the body yarn?
It may, but matching color is only one factor. Compare diameter, abrasion, strength, stretch and how the yarn interacts with the body stitches. Any substitution should be approved in the completed joint.
When should seam testing happen?
Test during development after body geometry and stuffing are stable, repeat at pilot production, and review again when yarn, seam method, part size, filling or intended use changes.
Can inspection replace destructive testing?
Visual inspection is essential for every sampled product but cannot reveal all hidden weaknesses. Use non-destructive checks for routine control and a defined test subset for evidence appropriate to the product and market.
Approve the joint as a complete system
A useful amigurumi seam strength test connects load, construction and character appearance. Keep the risk map, specimen variables, staged results, recovery photos and production seam card together. That record makes the attachment repeatable and helps teams correct the real failure mode instead of simply adding tighter stitches.





