

A cross stitch backstitch design guide should turn decorative outlines into line segments that a maker can locate, stitch and verify on the fabric grid. Define which lines carry essential detail, place anchor points at readable positions, limit ambiguous long spans, separate colors clearly and test the overlay on a completed cross-stitch sample before releasing the chart.
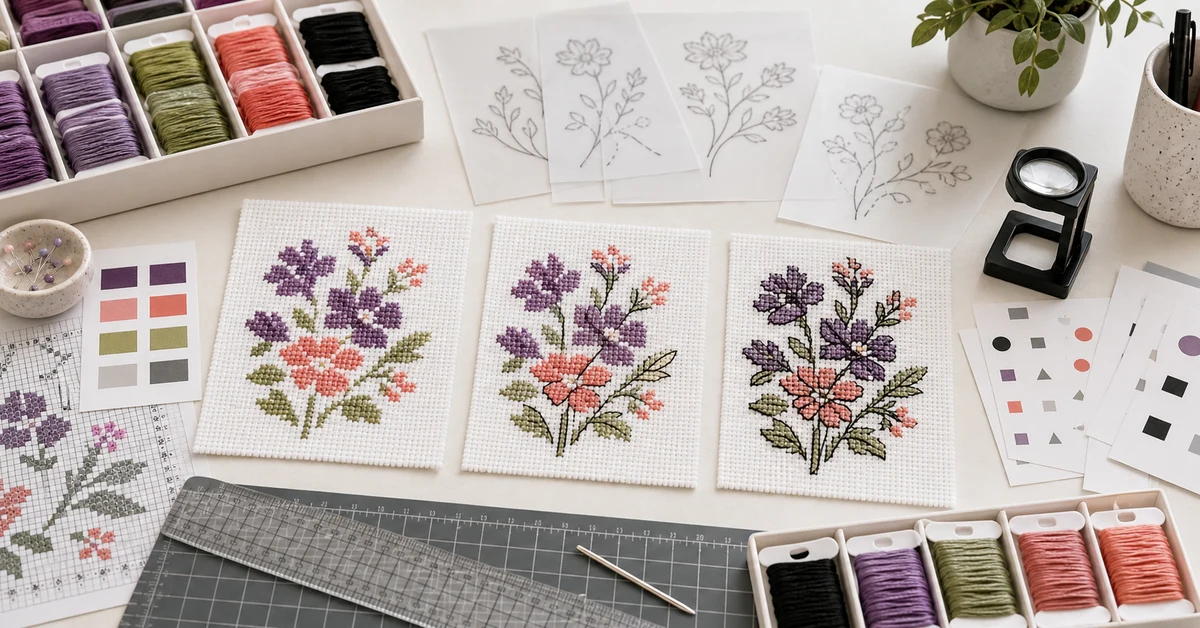
Give every line a job
Backstitch can define edges, add facial features, separate overlapping shapes or create fine stems and lettering. If every boundary receives the same dark outline, the design may look heavy and the stitching workload rises without improving readability.
| Line role | Design purpose | Priority | Typical treatment |
|---|---|---|---|
| Primary contour | Defines the main object silhouette | High | Continuous, clearly anchored path |
| Internal separator | Distinguishes touching color areas | Medium to high | Selective line where contrast is weak |
| Identity detail | Adds face, vein, lettering or small feature | High | Short precise segments |
| Decorative accent | Adds texture or motion | Optional | Light, limited and removable if crowded |
| Correction line | Compensates for unclear pixel edge | Case-specific | Tested against stitched color blocks |
Create a line hierarchy before drawing the final overlay. The most important detail should remain visible when the design is viewed at its intended finished size, not only when the chart is enlarged on screen.
Design on the actual fabric grid
A smooth vector curve does not automatically become a stitchable path. Map every segment to fabric holes or approved fractional positions. Confirm whether the kit expects full-grid backstitch only or includes half-grid and quarter-grid anchors.
- Use the selected fabric count and finished dimensions.
- Show the cross-stitch layer beneath the line overlay.
- Mark each direction change at a clear anchor.
- Avoid endpoints that appear to float without a visible hole reference.
- Check whether the needle can pass through crowded anchor points.
- Keep the path consistent with the chart's grid conventions.
The cross stitch fabric count guide is relevant because a path that reads cleanly on a coarse grid may become too fine or too crowded when the fabric count changes.
Set anchor points where makers can find them
Long lines across several cells look elegant in artwork but can be difficult to tension, snag easily and hide the exact route. Break lines at meaningful corners, color boundaries or grid intersections. Keep segments long enough to look smooth but short enough to locate and control.
- Mark the start and end point of the complete line.
- Add anchors at every intentional corner or direction change.
- Add an intermediate anchor where a long span would be hard to place.
- Check whether the resulting segments create unwanted angular bumps.
- Stitch the line and adjust anchor positions from the physical result.
For diagonal lines, compare alternative anchor spacing. Too many short segments can look jagged; too few can float above the surface or lose tension.
Control thread color and strand count
The outline must separate the intended shapes without dominating them. Test dark neutral, deep local color and any accent alternative beside the completed stitches. Strand count changes line weight and may affect how easily crowded holes accept the needle.
| Decision | What to compare | Failure risk | Approval evidence |
|---|---|---|---|
| Outline color | Contrast with all touching shades | Line disappears or looks harsh | Completed motif under controlled light |
| Strand count | Weight, coverage and needle passage | Bulky corners or weak line | Same path stitched in alternatives |
| Multiple line colors | Identification and chart clarity | Colors swapped by user | Organizer and chart cross-check |
| Special accent thread | Friction, sheen and handling | Snagging or inconsistent tension | Full process trial |
Pair this review with the floss color matching guide. A substitute that passes as a fill shade may not preserve the contrast needed for a fine outline.
Sequence backstitch after the correct base work
Most outlines are applied after the relevant cross-stitch areas are complete, but complex projects may benefit from section-based sequencing. Define when the line is added so it does not disappear beneath later stitches or block access to shared holes.
- Identify which cross-stitch colors must be complete first.
- Group nearby backstitch paths to reduce unnecessary travel.
- Define how thread starts and ends without bulky knots.
- Limit long carries on the reverse side.
- Protect finished lines during hoop repositioning.
Test the sequence on the actual hoop or frame arrangement. A line near the edge may be easy on an unmounted sample but awkward when the fabric is tensioned as instructed.
Design the chart overlay for unambiguous reading
The backstitch layer must remain visible over colored cross-stitch symbols. Use line colors and weights that survive printing at the final size. If several backstitch colors exist, identify them without depending only on subtle hue differences.
- Print the chart at intended production scale.
- Check it under ordinary indoor light.
- Follow each path without consulting the finished photo.
- Confirm that start, end and crossing points remain distinct.
- Verify every line color against the key and organizer.
- Photocopy or rescan the chart if customers may use lower-quality reproductions.
Use the principles in the chart symbol design guide to keep symbols and line overlays from competing for the same visual space.
Test crossings, corners and crowded holes
Critical points deserve physical trials. Stitch line crossings in the intended order and observe whether one strand lifts another. At corners, check whether tension rounds the angle or pulls the fabric. Where backstitch shares a hole with several cross stitches, confirm that the supplied needle and thread bundle can pass without damage.
| Critical point | Test | Acceptable result | Correction path |
|---|---|---|---|
| Sharp corner | Stitch from both directions | Defined angle without puckering | Move or split anchor |
| Line crossing | Compare stitching order | Clean intersection | Define top line or shared anchor |
| Crowded hole | Complete base and outline | Needle passes without fabric damage | Adjust strand count or anchor |
| Long diagonal | Handle and lightly flex sample | Line stays controlled | Add a tested intermediate anchor |
The supplied needle must support these details. Reference the cross stitch needle size guide when a finer outline route creates difficult shared holes.
Run a before-and-after legibility test
Stitch the critical motif without backstitch, then add line groups in priority order. Photograph after each group under the same conditions. This reveals which lines contribute meaningful definition and which add time without visible benefit.
- Can viewers identify the motif before any outline?
- Which line group creates the largest readability improvement?
- Do small details remain visible at normal viewing distance?
- Does the final outline overpower delicate color transitions?
- Can a target-level maker follow the path without coaching?
Remove or simplify lines that do not survive the test. A lighter chart and shorter stitching time can improve the kit if the decorative result remains intact.
Package a controlled backstitch specification
Keep the source overlay, printed chart, thread specification, strand count, stitch sequence, critical-point samples and completed approval piece together. Include a chart version and verify that the finished product photo uses the same line path.
The broader cross stitch kit quality checklist can then confirm that fabric, floss, needle, chart and packaging all support the approved outline method.
Where Onehourcrafts fits
Onehourcrafts can support retail buyers in converting cross-stitch artwork into production-ready charts, thread sets and test samples. A useful inquiry includes original artwork, target dimensions, fabric count, intended skill level and the details that must remain recognizable. Buyers can request printed-scale chart tests and stitched backstitch comparisons before the full kit is approved. The cross stitch backstitch design guide should reference the same chart revision included in the pack.
For translated kits, line paths usually remain unchanged but captions, legends and sequencing notes still require a technical cross-check. A correct graphic can become difficult to follow when localized text points to the wrong line color or uses inconsistent anchor terminology.
Resolving the line system during sampling reduces late artwork edits and helps ensure that the chart, organizer and finished product image describe one reproducible result.
Frequently asked questions
Does every cross-stitch design need backstitch?
No. Use it where outlines or small details materially improve recognition. Designs with strong color boundaries may need little or no backstitch.
How long can one backstitch segment be?
There is no universal length. Choose anchors based on fabric count, line direction, tension control, handling and chart readability. Test long diagonals physically.
Should backstitch use one or two strands?
Approve strand count from the desired line weight, thread construction, needle access and crowded-hole behavior. Different line roles may justify different weights if the chart identifies them clearly.
Can backstitch cross over completed stitches?
Yes, when the design requires it, but the path, anchors and tension should be tested. Long floating spans may snag or shift and can be hard for beginners to place.
When should the backstitch chart be retested?
Retest after changes to fabric count, finished size, chart scale, line path, thread color, strand count, needle or underlying color placement.
Approve the outline as a line system
A useful cross stitch backstitch design guide connects artistic intent with grid anchors, thread behavior and printed chart clarity. The final evidence should show that each line adds value, can be located by the user and remains stable in the stitched result.





